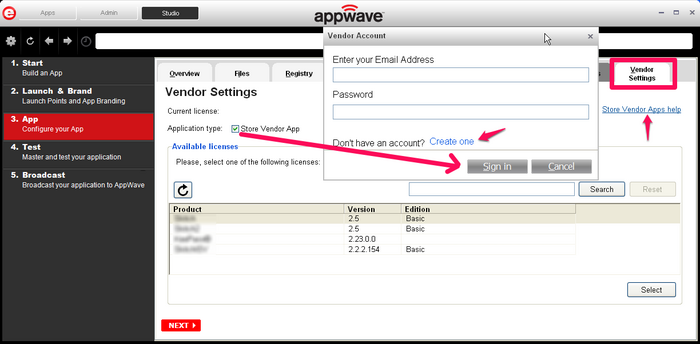
Configure your App:Vendor Settings
Go Up to Configure you App
- Click the Vendor Settings tab or click the Vendor Settings icon.
- Select the Store Vendor App option as the Application type. If you are not already signed in, the Vendor Account dialog opens. Enter your EDN account email address and password and click Sign in.
- Note: You can also create a vendor account at this point by clicking Create One, but you cannot complete the mastering process until your application is approved. The approval may take up to 72 hours.
- Once you are signed in, all the licenses available to the Vendor are loaded. The license information includes the Product, Version, and Edition. Highlight the license you want to use and click Select. The selected license is shown in the Current License field.
