Change Records
Go Up to Working with Objects in the Repository
Increasing your ability to collaborate in an Agile environment, Change Records, Tasks and Change Management Center give you the ability to track and manage the changes made by Repository check-ins. Every check-in is stored in the repository as a change record. Users can associate tasks from third-party tools, such as Atlassian JIRA, to specific projects available within the Repository Project Center. Similar support also exists in Team Server, where you can add, change, and delete the same tasks.
Contents
To Open Change Management Center
- Log in to the repository.
- On the main Application Menu, click Repository > Change Management Center.
- ID: The ID given to the change record.
- Name: The change record name that you have chosen. It is possible to leave this field blank if you do not type a name upon check-out or check-in.
- Status:
- Completed: All changes have been checked-in.
- In Progress: Currently checked out.
- User Name: The user who has checked out/in the changes.
- Description: The text added in the description field.
To Create a Task and Associate it to a Project
Creating a task using Change Management Center
- In the Change Management Center main window, click Create, and then create the new task.
- In the Project field, select the project to which you want to associate the task, and then click OK. When you return to the Change Management Center main window, verify that the task includes the selected project.
To Add a Change Record to a Repository Model
Check out a diagram from the repository
- Log in to the repository.
- On the main Application Menu, click Repository > Change Management Center.
- Check Out a Model.
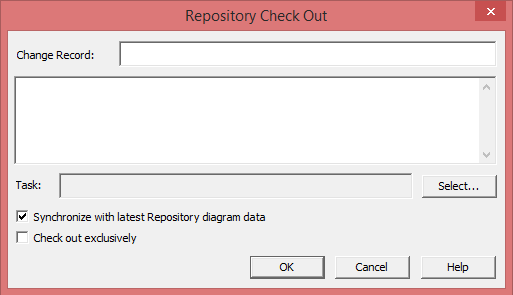
- You can leave the fields blank, or add a name and description.
- If you would like to link your changes to a task choose a task from the list by highlighting it, or create a new task by clicking
 .
. - Click OK.
- Your diagram is now checked out and the padlock icons change from locked to open.
 . You can now make your modifications to the model.
 - For this example we have added a new entity to the model.
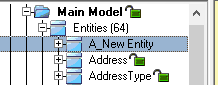
- Your diagram is now checked out and the padlock icons change from locked to open.


Check in the changes to the Repository
- Click Repository > Diagrams > Check In Diagrams.
- Adding a name to the change record will identify what you have done. You may also add a description.
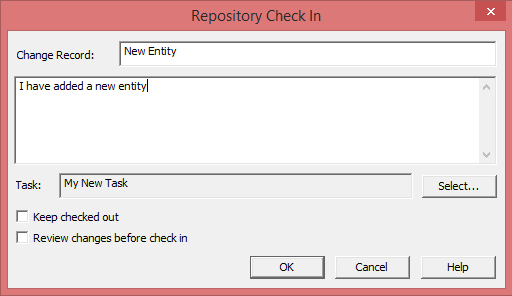
- The task that i created at checkout, is automatically selected, you can also assign a new task by clicking the button.
- You can also choose to review the changes or keep the diagram checked out.
- The task that i created at checkout, is automatically selected, you can also assign a new task by clicking the
- Click OK

Reviewing the Changes in Change Management Center
To review the changes made to your diagrams at any time in the future:
- Open Repository > Change Management Center.
- In the Tasks tab: You can view the tasks have been worked on.
- From here you can check the status of the tasks and sub-tasks.
- In the Change Records tab: You can view the details of each change record.
- Double-click a change record to open, or select the change record and click Details button to open the dialog.
- In Properties you can see the owner information and task details.
- In Modified Objects view, you can expand the items to show the changes.
