Tutorials: Creating a Data Lineage and Transformation Visualization
Go Up to Introduction
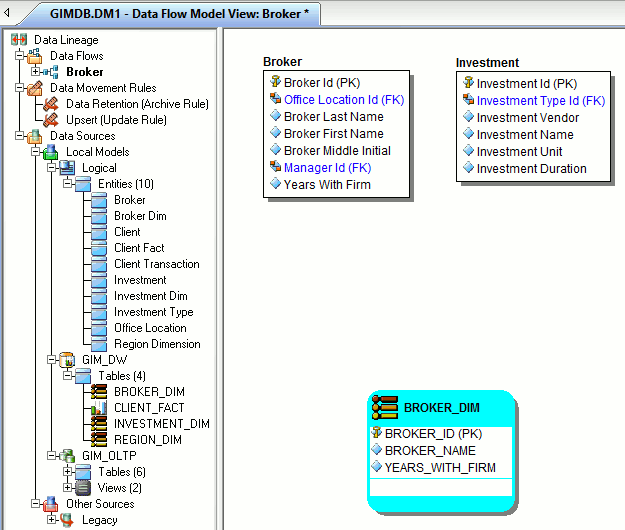
- To create the data source or transformation input tables, expand Data Sources > Local Models > Logical > Entities and then drag and drop the Broker and Investment tables onto the Data Lineage window.
- To create the data target or transformation output tables, navigate to Data Sources > Local Models > GIM_DW > Tables and then drag and drop the BROKER_DIM table onto the Data Lineage window.
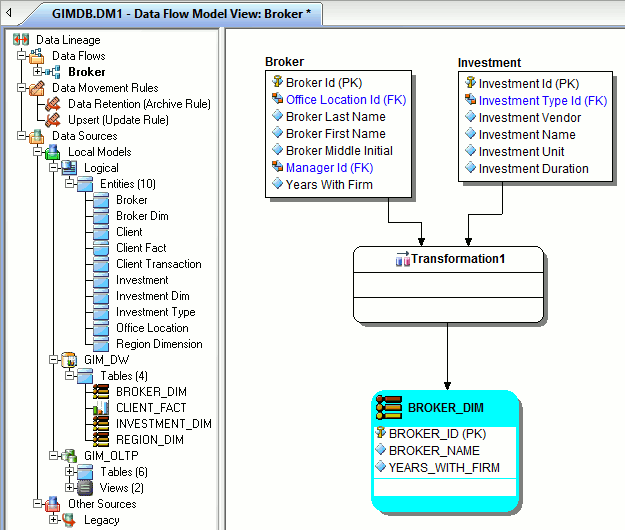
- To obtain the Transformation Insertion tool, right-click an empty space in the Data Lineage window and then click Insert Transformation.
- To insert the transformation, click in the Data Lineage window between the source and target data sources and then right-click to drop the Transformation Insertion tool.
- Reposition and resize the transformation object to suit your needs.
- Right-click an empty space of the Data Lineage window and then click Insert Data Stream.
- Click an input and then click the transformation object. Repeat as many times as necessary to link all the inputs to the transformation object.
- Click the transformation object and then click an output.
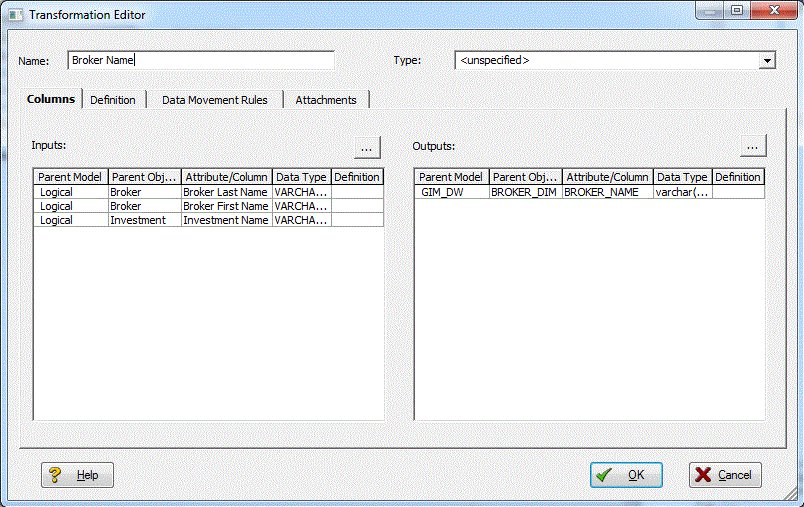
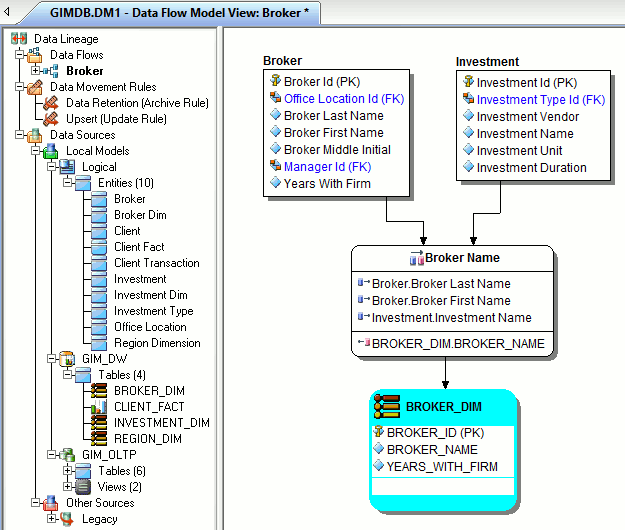
- To define which columns should be used in the transformation and any transformation rules, double-click the new transformation to open the Transformation Editor.
- Complete the Transformation Editor as required and then click OK to exit the editor.
- You are done! Now you can more easily share your ideas with your colleagues!
![]() Tip: Once the Data Flow is created, you can double-click it to change its name, or double click a transformation or component to change its properties.
Tip: Once the Data Flow is created, you can double-click it to change its name, or double click a transformation or component to change its properties.
The following describes options in the Transformation Editor that require additional explanation, for more options that are not required for this tutorial, please read the User Guide:
Columns tab
- Inputs: Click the ellipsis (...) button to choose the inputs to be transformed in this task.
- Outputs: Click the ellipsis (...) button to choose the outputs resulting from the transformation.
![]() Note: You can delete or edit an input or output column by double-clicking the transformation in the Data Lineage window, clicking the ellipsis in the Transformation Editor and then deselecting the column you want to remove.
Note: You can delete or edit an input or output column by double-clicking the transformation in the Data Lineage window, clicking the ellipsis in the Transformation Editor and then deselecting the column you want to remove.
Definition tab
- Business: Describe the transformation for your audience.
- Code: Enter the code that will perform the transformation, such as a SELECT statement, or a VBBasic or Java Script function or procedure.
Data Movement Rules tab
These are the rules from the Data Movement Rules node of the Data Lineage Explorer.
Attachments tab
Bind an external piece of information or attachment to the transformation. You can also remove an attachment from an object, override the default value of an attachment, or change the position of a bound attachment. To override the value of the attachment you have moved to the Selected Attachments grid, double-click the Value field of the target attachment. ER/Studio Data Architect opens the Value Override Editor or a list, depending on the attachment datatype. Attachments are created in the Attachments folder of the Data Dictionary and must be applied to the default before they will display on this tab.


