FireMonkey テキスト レイアウト機能の使用
ここでは、FireMonkey で提供されているテキスト レイアウト機能の使い方を例を使って示します。
この例には、TImage オブジェクト上にテキストを描画する方法と、PositionAtPoint、RegionForRange、ConvertToPath の各メソッドの使い方を示すコードが含まれています。
空のマルチデバイス アプリケーションの作成
- 新しい空のマルチデバイス アプリケーションを作成します。
- [ツール パレット]から以下のコンポーネントをフォームに追加します。
- 1 つの TImage
- 1 つの TRadioButton
- 3 つの TButtons
- [オブジェクト インスペクタ]で、TForm の OnCreate イベント、TImage の OnPaint イベント、各 TButton の OnClick イベントについて、それぞれイベント ハンドラを作成します。
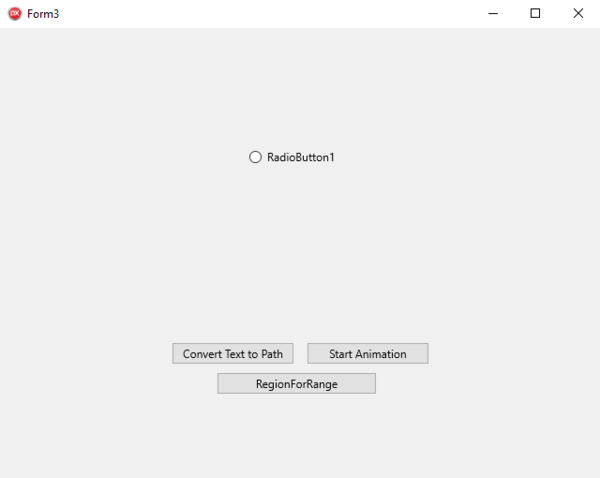
- 設計した結果は次のようになります。
メモ: 次のサンプルをレプリケートするには、TImage で背景色を追加することを覚えておいてください。
テキスト レイアウトを使用するコードの追加
- 次の宣言を追加します。
Delphi の場合:
MyLayout: TTextLayout;
PathAnimation1: TPathAnimation;
C++ の場合:
//header file
TPathAnimation *PathAnimation1;
TTextLayout *MyLayout;
Delphi の場合:
procedure TForm3.FormCreate(Sender: TObject);
begin
  RadioButton1.Position.X := Image1.Position.X - 5;
  RadioButton1.Position.Y := Image1.Position.Y - 5;
  RadioButton1.Text := '';
end;
C++ の場合:
void __fastcall TForm3::FromCreate(TObject *Sender)
{
	RadioButton1->Position->X = Image1->Position->X - 5;
	RadioButton1->Position->Y = Image1->Position->Y - 5;
	RadioButton1->Text = "";
}
Delphi の場合:
procedure TForm3.Image1Paint(Sender: TObject; Canvas: TCanvas;
  const ARect: TRectF);

begin
  MyLayout := TTextLayoutManager.DefaultTextLayout.Create;
  MyLayout.BeginUpdate;
  MyLayout.TopLeft := TPointF.Create(0, 0);
  MyLayout.Font.Size := 78;
  MyLayout.Font.Family := 'Tahoma';
  MyLayout.Font.Style := [TFontStyle.fsBold];
  MyLayout.Text := 'TEXT';
  MyLayout.Color := TAlphaColorRec.Brown;
  MyLayout.RenderLayout(Canvas);
end;
C++ の場合:
void __fastcall TForm3::Image1Paint(TObject *Sender, TCanvas *Canvas, const TRectF &ARect)

{
	Fmx::Graphics::TFont *font;
	MyLayout = TTextLayoutManager::TextLayoutForClass
		(TTextLayoutManager::DefaultTextLayout);
	MyLayout->BeginUpdate();
	MyLayout->TopLeft = TPointF(0, 0);
	MyLayout->Font->Size = 78;
	MyLayout->Font->Family = "Tahoma";
	MyLayout->Font->Style = TFontStyles(1);
	MyLayout->Text = "TEXT";
	MyLayout->Color = TAlphaColorRec::Brown;

}
-
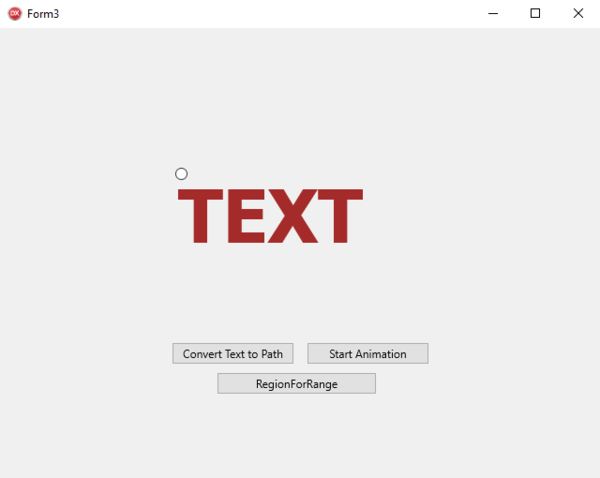
- 実行した結果は次のようになります。
Delphi の場合:
procedure TForm3.Button1Click(Sender: TObject);
var
  PathD: TPathData;
begin
  PathAnimation1 := TPathAnimation.Create(Self);
  PathAnimation1.Parent := RadioButton1;
  PathD := TPathData.Create();
  MyLayout.ConvertToPath(PathD);
  PathAnimation1.Path := PathD;
  PathAnimation1.Loop := True;
  PathAnimation1.Duration := 50;
end;

procedure TForm3.Button2Click(Sender: TObject);
begin
  PathAnimation1.Start;
end;
C++ の場合:
void __fastcall TForm3::Button1Click(TObject *Sender)
{
	TPathData *PathD;
	PathAnimation1 = new TPathAnimation(this);
	PathAnimation1->Parent = RadioButton1;
	PathD = new TPathData();
	MyLayout->ConvertToPath(PathD);
	PathAnimation1->Path = PathD;
	PathAnimation1->Loop = true;
	PathAnimation1->Duration = 50;
}

void __fastcall TForm3::Button2Click(TObject *Sender)
{
	PathAnimation1->Start();
}
-
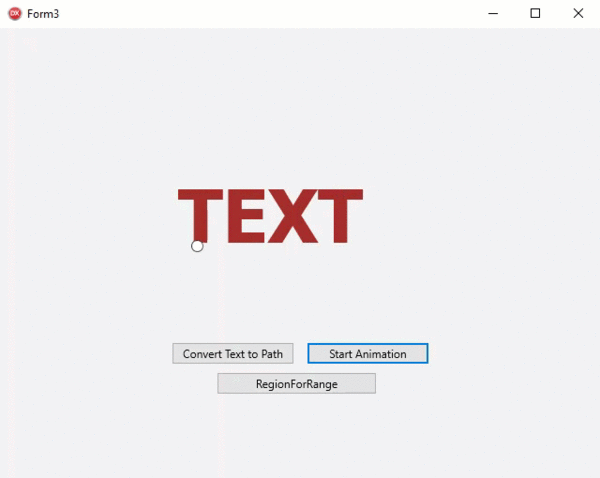
- 実行した結果は次のようになります。

Delphi の場合:
procedure TForm3.Button3Click(Sender: TObject);
var
  MyRects: TRegion;
begin

  MyRects := MyLayout.RegionForRange(TTextRange.Create(1, 1));
  if Image1.Bitmap.Canvas.BeginScene then
  begin
    try
      Image1.Bitmap.Canvas.DrawRect(MyRects[0], 0, 0, AllCorners, 100);
    finally
      Image1.Bitmap.Canvas.EndScene;
    end;
  end;
end;
C++ の場合:
void __fastcall TForm3::Button3Click(TObject *Sender)
{
	TRegion MyRects;
	MyRects = MyLayout->RegionForRange(TTextRange(1, 1));
	if (Image1->Bitmap->Canvas->BeginScene())
	{
	   try {
			Image1->Bitmap->Canvas->DrawRect(MyRects[0], 0, 0, AllCorners, 100);
	   } __finally  {
			Image1->Bitmap->Canvas->EndScene();
	   }
	}
}
-
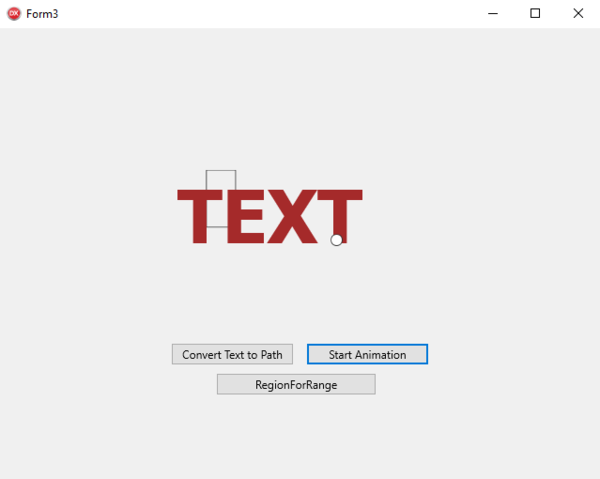
- 実行した結果は次のようになります。

使用する API
- TextLayout.TTextLayoutManager
- TextLayout.TTextLayout
- TextLayout.TTextLayout.AddAttribute
- TextLayout.TTextRange
- TextLayout.TTextAttribute
- TextLayout.TTextLayout.RenderLayout
- TextLayout.TTextLayout.PositionAtPoint
- TextLayout.TTextLayout.RegionForRange
- TextLayout.TTextLayout.ConvertToPath