Mobile Tutorial: Set Up Your Development Environment on Windows PC (iOS)
Go Up to Mobile Tutorials: Mobile Application Development (iOS and Android)
Before starting this tutorial, you should read and perform the following tutorial session:
Contents
A FireMonkey application destined for the iOS target platform can be tested initially on the iOS Simulator available on the Mac. The second half of the testing process uses the iOS Device target platform and requires a test iOS device connected to the Mac.
- Note: On iOS devices, you can run both Delphi and C++ applications. However, the iOS Simulator is not supported by BCCIOSARM, so only iOS devices are supported for C++.
To deploy an iOS Application to your iOS device or iOS Simulator for debugging and testing purposes, RAD Studio uses the Platform Assistant, which you must install and run on the Mac. Your hardware and software development environment should have the configuration demonstrated in the following figure. RAD Studio runs on a Windows PC computer. Your PC computer should be connected to a Mac running the Platform Assistant and having installed the appropriate versions of Xcode and iOS SDK (for iOS development). To run iOS apps on an iOS device, the iOS device must be connected via USB cable to the Mac.
This section describes the steps to set up your development environment after you configure your environment on your Mac.
Setting Up Your RAD Studio Environment
You need to execute the following configuration steps to prepare the iOS development with RAD Studio.
Create a Connection Profile for the Mac
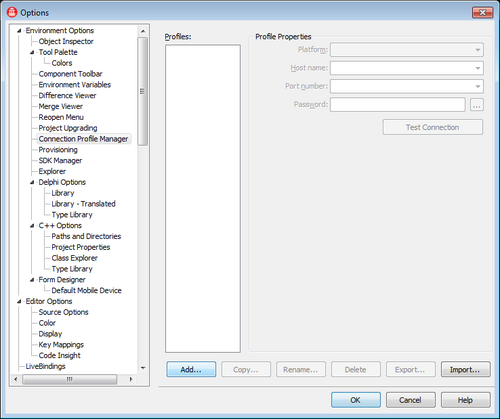
- In the RAD Studio IDE, open Tools > Options > Environment Options > Connection Profile Manager.
- Click Add:
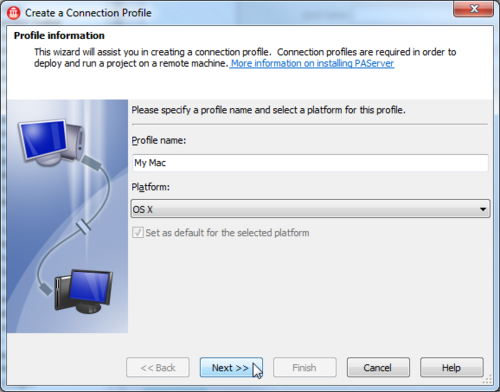
- Now you see the Create a Connection Profile wizard. Define a name for the connection profile, such as "My Mac".
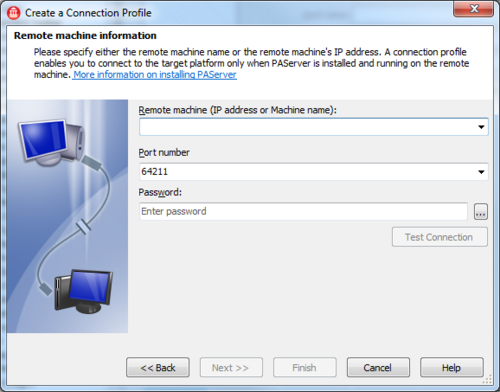
Make sure you select OS X as the platform, and then click Next: - On the Remote machine information page, set the name or IP address of the host Mac, a port number to use (the default port 64211 typically works), and an optional password (if you want to use a password).
- Click Test Connection, and make sure that the connection profile succeeds with no error (you should receive the message "Connection to <hostname> on port <portnumber> succeeded").
- If the Test Connection succeeds, click the Finish button, otherwise check the settings and try again.
Add an SDK to the Development System for the iOS Device Connected to the Mac
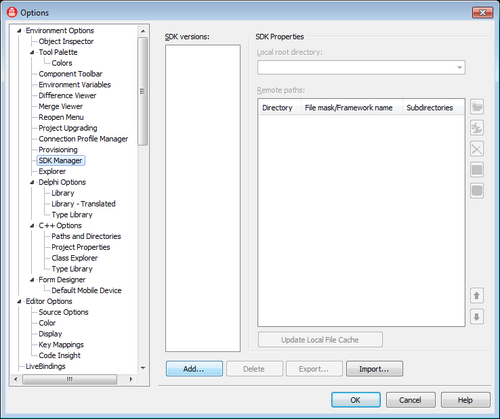
- Open Tools > Options > Environment Options > SDK Manager:
- Click Add.
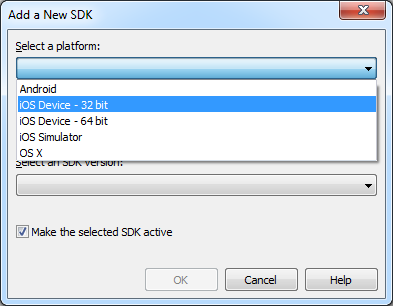
- On the Add a New SDK dialog box, select iOS Device - 32 bit or iOS Device - 64 bit as a platform.
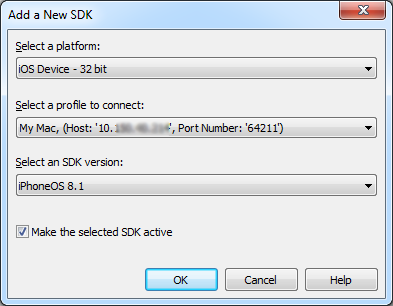
- After you select a platform, the IDE fills a Profile (such as "My Mac") and SDK version combo box with the list of SDK versions available on the machine where the Platform Assistant server is running:
- Click OK to add the selected SDK version.
- After the operation completes, click Close to close the dialog.
- Note: The SDK Manager page may not close when you click OK because of issues with your Android SDK paths. This happens if you have not built any project for the Android target platform yet. You can click Cancel to close the SDK Manager page; clicking Cancel does not revert your changes for iOS.
See Also
- Mobile Tutorial: Creating an Application for Mobile Platforms (iOS and Android)
- Mobile Tutorial: Set Up Your Development Environment on the Mac (iOS)
- Working with a Mac and a PC
- Running Your iOS Application on an iOS Device
- Running Your iOS Application on the iOS Simulator
- FireMonkey Platform Prerequisites
- Creating an iOS App
- Mac OS X Application Development
- Creating a FireMonkey Application
- Apple developer.apple.com pages

