Mobile Tutorial: Creating an Application for Mobile Platforms (iOS and Android)
Go Up to Mobile Tutorials: Mobile Application Development (iOS and Android)
Contents
- 1 Before You Start
- 2 Step 1: Create a New FireMonkey Application for Android or iOS
- 3 Step 2: Select a Style
- 4 Step 3: Place Components on the Multi-Device Form
- 5 Step 4: Adding Views to Your Project
- 6 Step 5: Write an Event Handler for a Button Click by the User
- 7 Step 6: Test Your Mobile Application
- 8 See Also
This topic describes how to create a "Hello World" multi-device application (C++ or Delphi) for either the iOS or Android target platform.
Before You Start
To develop mobile (iOS and Android) applications using RAD Studio, you need to complete some important configuration steps. This tutorial assumes that you have completed all the necessary setup steps.
For details, see:
- Mobile Tutorial: Set Up Your Development Environment on the Mac (iOS)
- Mobile Tutorial: Set Up Your Development Environment on Windows PC (iOS)
- Mobile Tutorial: Set Up Your Development Environment on Windows PC (Android)
Step 1: Create a New FireMonkey Application for Android or iOS
- Select either:
- File > New > Multi-Device Application - Delphi
- File > New > Multi-Device Application - C++Builder
- The Multi-Device Application wizard appears:
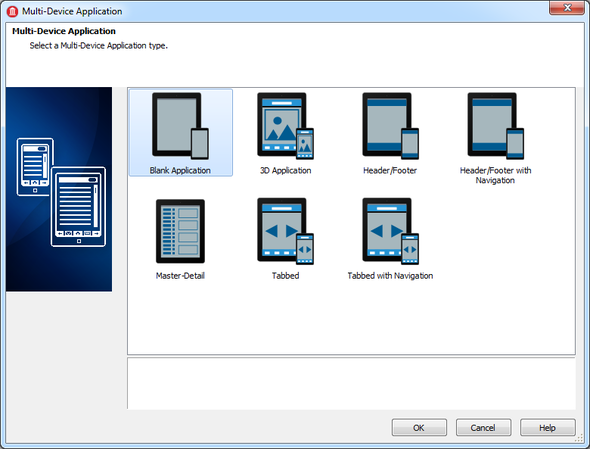
- Select Blank Application. The Form Designer shows a new form:
- Select the target platform from the Project Manager.
- Android: See Configuring Your System to Detect Your Android Device to use an Android device.
- iOS: If you want to create an iOS app, open the Target Platform node in the Project Manager and double-click iOS Simulator (only for Delphi) or a connected iOS device (for either Delphi or C++):
- Note: When you select a platform, the components not available for this particular platform appear grayed.


Step 2: Select a Style
- Select either iOS or Android from the Style drop-down menu in order to define the Master view to show all the properties related with this style.
- Note: See Style Selector for more information.
Step 3: Place Components on the Multi-Device Form
We recommend that you read this tutorial before you start placing components: Mobile Tutorial: Using Layout to Adjust Different Form Sizes or Orientations (iOS and Android).
The first step in creating a multi-device application is designing the user interface. There are many reusable components available in the IDE for creating user interfaces.
- Move the mouse pointer over the Tool Palette, and expand the Standard category by clicking the plus (+) icon next to the category name.
- Select the TEdit component and either double-click TEdit or drop it onto the Form Designer.
- Repeat these steps, but now add a TLabel and a TButton component to the form.
- Select the edit box and set the KillFocusByReturn property in the Object Inspector to
True. - Select the button and change the Text property in the Object Inspector to "Say Hello".
- Now you should see three components on the Form Designer. Here is an iOS app:
- After you place these components on the Form Designer, the IDE automatically sets names for the components.
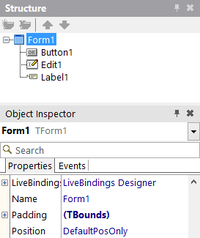
- To see or to change the name of a component, click the component on the Form Designer, and then find its Name property in the Object Inspector and the Structure View:
- For a TButton component, the component name is set by default to Button1 (or Button2, Button3, depending on how many TButtons you have created in this application).
- The form on which these components are located also has a name. Select the background of the Form Designer, and select the Name property in the Object Inspector. The name of the form Form1 (or Form2, Form3,...) is displayed. You can also locate the name of the form in the Structure View:
- Note: Form names set by default as Form1, Form2, Form3,... are for the Master views. Device views are named FormName_ViewName such as Form1_iPhone (iPhone 3.5” form) and Form1_NmXhdpiPh (Android 4” Phone form).
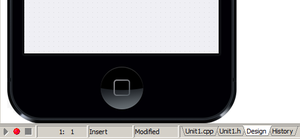
- You can easily switch to source code by selecting the Code (for Delphi) or <unit name>.cpp/<unit name>.h (for C++) tab at the bottom of the Form Designer. You can also press the F12 key to switch between the Form Designer and the Code Editor:


Delphi C++ 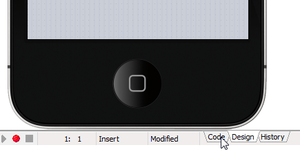


- The Code Editor displays the source code that the IDE has generated. You should find three components defined (Edit1, Label1, and Button1):
Delphi C++ 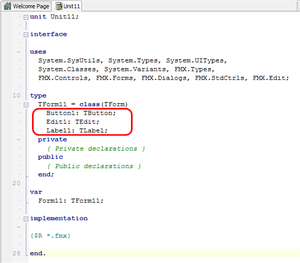
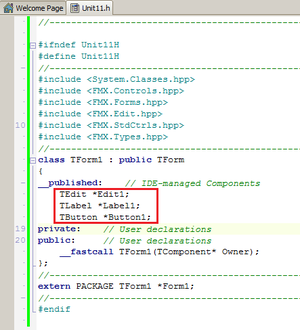


- Note: When you save or run your project, the uses and include clauses are updated (to add FMX.StdCtrls for TLabel and FMX.Edit for TEdit).
Step 4: Adding Views to Your Project
If you want to customize you application for a particular type of device, you can do it using Views.
- Go to the Views selector.
- Select the available views you want to add just by clicking on them.
- Go to the view to do the changes you want to include.
To add a customized view, see Adding a Customized View to the View Selector.
Step 5: Write an Event Handler for a Button Click by the User
The next step is defining an event handler for the TButton component. You can define event handlers for your application in the same way you define event handlers for desktop platforms. For the TButton component, the most typical event is a button click.
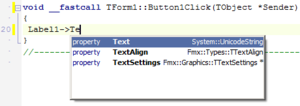
Double-click the button on the Form Designer, and RAD Studio creates skeleton code that you can use to implement an event handler for the button click event:
Delphi C++ 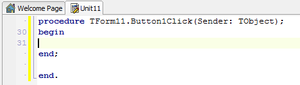
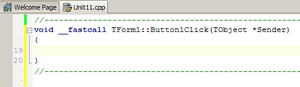


Now you can implement responses within the Button1Click method.
The following code snippets (Delphi and C++) implement a response that displays a small dialog box, which reads "Hello + <name entered into the edit box>":
Delphi code:
Label1.Text := 'Hello ' + Edit1.Text + ' !';
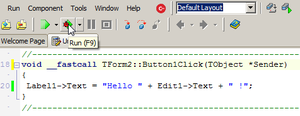
C++ code:
Label1->Text = "Hello " + Edit1->Text + " !";
In Delphi, the quotation marks that surround string literals must be straight single quotation marks (that is, 'string'). You can use the plus (+) sign to concatenate strings. If you need a single quote inside a string, you can use two consecutive single quotes inside a string, which yields a single quote.
While you are typing code, some tooltip hints appear, indicating the kind of parameter you need to specify. The tooltip hints also display the kinds of members that are supported in a given class:
Delphi C++ 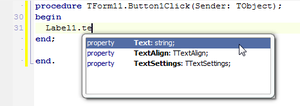


Step 6: Test Your Mobile Application
The implementation of this application is finished, so now you can run the application.
You can click the Run button (![]() ) in the IDE, press F9, or select Run > Run from the RAD Studio main menu:
) in the IDE, press F9, or select Run > Run from the RAD Studio main menu:
Delphi C++ 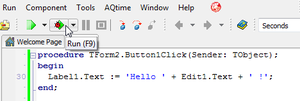


Test Your Android Application on the Android Device
If you complete the steps described in Mobile Tutorial: Set Up Your Development Environment on Windows PC (Android) before creating your new project, you can now run your Android app on an Android device connected to your PC by USB cable.

Test Your iOS Application
Testing on the Mac (iOS Simulator)
By default, FireMonkey Delphi iOS applications run on the iOS Simulator target platform. You can confirm the target platform in the Project Manager:

When you run your application, it is deployed to the Mac and then to the iOS Simulator on the Mac. For our app, a form with an edit box and a button is displayed. Enter text into the edit box, and click the Say Hello button:

- Note: On the iOS simulators, you can test only your Delphi applications.
Testing on a Connected iOS Device
If you complete the steps described in Mobile Tutorial: Set Up Your Development Environment on the Mac (iOS) and Mobile Tutorial: Set Up Your Development Environment on Windows PC (iOS) before creating your new project, you can now run your iOS app on an iOS device connected to your Mac by USB cable.
To run your iOS app on a connected iOS device, first select the iOS Device - 32 bit or iOS Device - 64 bit target platform so that the Platform Assistant deploys the application to the connected iOS Device:

After you select the appropriate iOS Device target platform, run your iOS app by clicking the Run button in the IDE, pressing F9 or selecting Run > Run.
On your Mac, you might see a dialog asking your permission to code sign your iOS app. Select either "Always Allow" or "Allow" to sign your app.

Then go to your iOS device and wait for your FireMonkey iOS app to appear. Watch for the FireMonkey launch image (the icon is available in $(BDS)\bin\Artwork\iOS, and you can set the launch image in Application Options):
