Binding Created Objects
Go Up to Tutorial: Using LiveBinding in VCL Applications
Once you have completed the previous step, you can move on to the next section, which describes how to bind various properties of the edit controls to the properties of the image control. For this purpose you will be using the LiveBindings Designer.
If the LiveBindings Designer is not already shown, then go to the View menu and choose the LiveBindings Designer command.

Enabling the Bindable Members
First you have to enable the Top, Left, Width, and Height bindable members in the designer for the image control. To do this:
- Click the three-dots logo in the lower-right corner of the block that represents the image control, in the designer.
- From the Bindable Members dialog box, check the
Top,Left,Width, andHeightmembers, and click OK.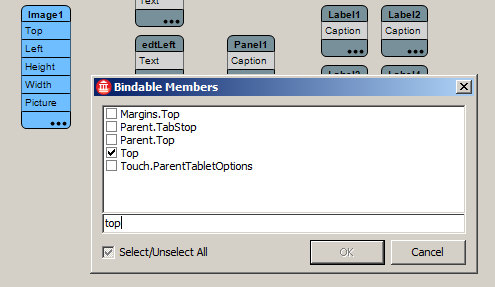

Creating LiveBindings
Now you can just create bindings between the edits and the dimension-related properties of the image.
- Draw a line between the
Textproperty of the edtHeight block to theHeightproperty of the Image1 control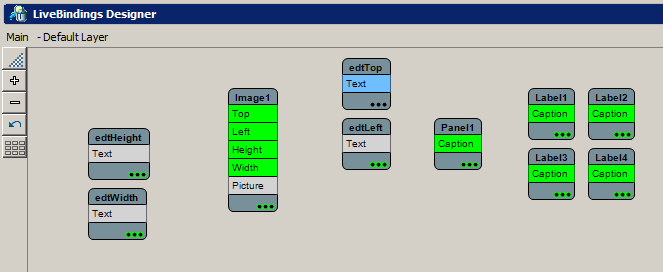
- Draw lines between the
Textproperty of the other edit boxes to their corresponding properties of the Image1 control.


After completing the creation of the binding expressions, you can see that a new component has been added to the form: BindingsList1. Double-click this component to bring up the following dialog box.

The binding expression editor allows for visual editing of all expressions available in your Application. Double-click any binding expression listed in the binding list component to bring up another dialog box that is used to edit the parameters of the selected binding expression. In this way, you can easily edit and modify your binding expressions, the same as you would do in the Object Inspector.
Now you are ready to run your Application.