Welcome Page
Go Up to View Menu
View > Welcome Page
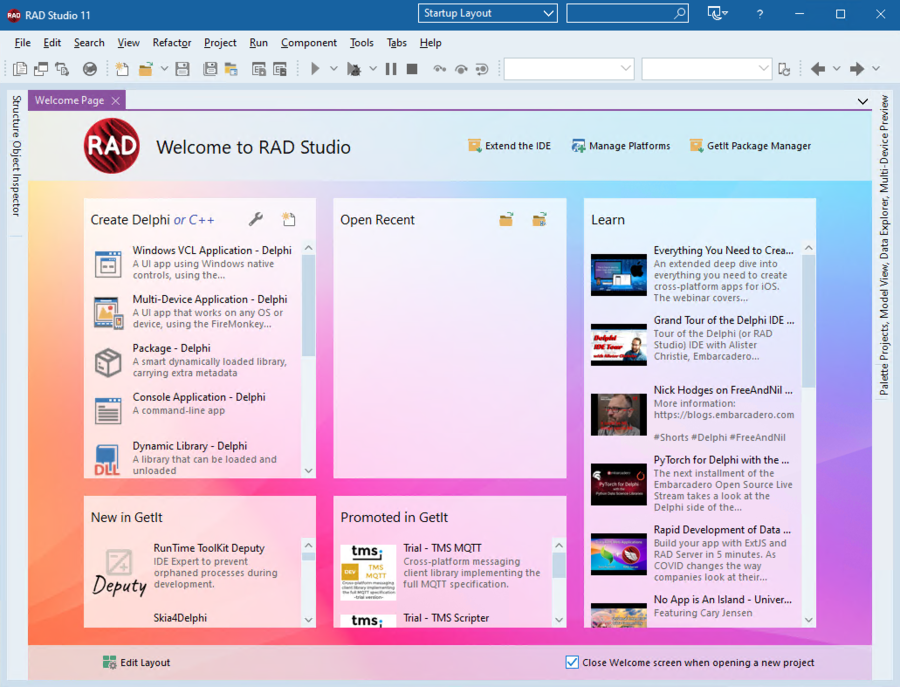
RAD Studio displays the Welcome Page when you open the IDE. This displays useful content for when you first start the IDE, such as shortcuts to quickly reopen recent projects, create new projects, or see useful information from our Youtube channel or GetIt.
The Welcome Page can be fully customized. It has multiple frames that can be added, removed, or their position and size rearranged as you wish to organize its sections with the information you consider most useful.
Contents
Top Buttons
Extend the IDE
Add platforms, additional options, or Packages to your IDE by selecting one of the option in this section.
Manage Platforms
Click to access RAD Studio Platforms and Additional Options installed. You can either uninstall any of them or apply new ones.
GetIt Package Manager
Click to display the GetIt Package Manager.
Patch Available
This button is not always visible, but is displayed when a patch or update is available for RAD Studio. We recommend installing all patches. To do so, click the button.
Inbuilt Functionality
The following frames are provided by Embarcadero and displayed by default:
Create
This frame allows you to quickly create a new project. It displays the same contents as the File > New menu. You can toggle language between Delphi and C++.
Open Recent
For easy access, this section lists all projects and recent files that you were working on recently. Click the heart icon to mark any recently opened item as a favorite, which will display at the top of the list.
You have the option to open your project from Version Control.
Learn
This section displays recent videos from our Youtube channel, helping your learn new things about RAD Studio, Delphi, C++, and more.
New in GetIt
This displays the latest packages added to the GetIt package manager. Double-click one to open it in the GetIt Package Manager and install it.
Promoted in GetIt
This section displays specific packages available in the package manager that may be of interest.
Editing
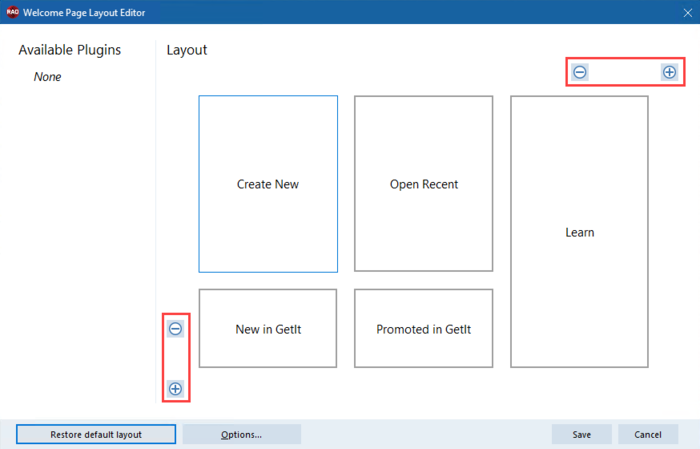
Edit Layout
Click the Edit Layout button on the bottom left of the Welcome Page. If there are frames that are not visible on the Welcome Page, they will be available in the column on the left: double-click to add one to the Welcome Page. Once added, frames can be selected and then moved, resized, or removed, at which point they will reappear in the left-side list.
Frames are placed in a grid. You can make the grid larger or smaller by clicking the + and - buttons in the column and row headers. More rows and columns allows a more complex or fine-grained layout.
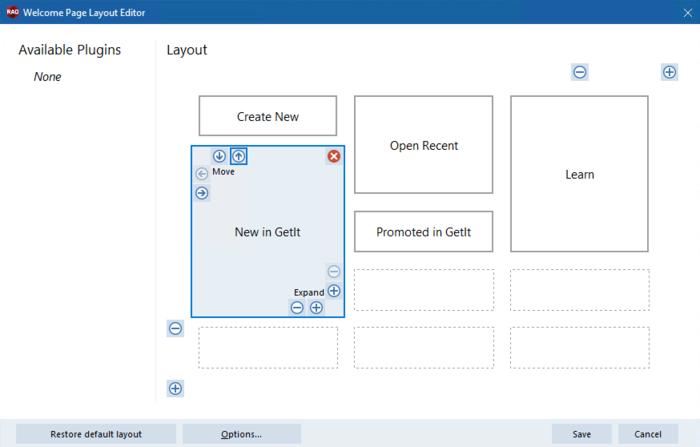
To edit a specific frame, click it in the editor's main section to select it. When selected, it will draw highlighted and will contain buttons allowing you to edit it. You can:
- Remove the frame by clicking the red X button
- Move the frame up and down, or left and right (keeping the same size)
- Expand or shrink the frame vertically (from the bottom) or horizontally (from the right)
This allows you to place a frame anywhere you wish, and with any shape and size you wish. Empty areas of the grid will simply be blank when the Welcome Page displays.
Click on Restore default layout to remove your changes.
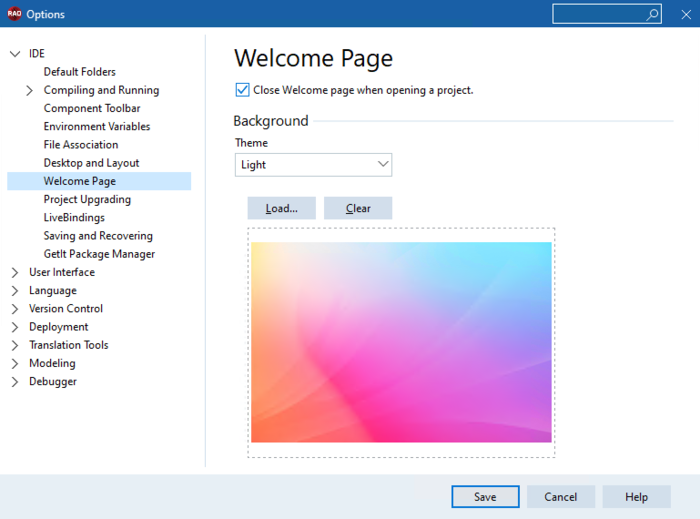
Click on Options... to edit the Welcome Page background theme. For detailed information, go to the Welcome Page
You can also set your tab color with a ToolAPI plugin called INTACustomEditorView280 interface.

Files opened while debugging have a checkbox indicating that they will be closed when the debugging session ends. The "X" close button is optional. To configure it, go to the Tabs section.
Other
By default, the Welcome Page is closed when you open a project. To keep it open, uncheck the Close Welcome screen when opening a project checkbox.
To reopen the Welcome Page, choose View > Welcome Page.