DataSnap Server Wizard
Go Up to DataSnap Server Application
Go Up to File Menu
File > New > Other > Delphi Projects > DataSnap Server > DataSnap Server
File > New > Other > C++Builder Projects > DataSnap Server > DataSnap Server
Contents
DataSnap Server Wizard provides an easy way to implement a server application using the DataSnap technology. Regardless of the options you select, it creates a ServerContainerUnit that contains a TDSServer component. All the additional components are connected to the TDSServer, having the Server property set to the name of the TDSServer component. If the selected protocol is TCP/IP, the server unit also contains a TDSTCPServerTransport. If HTTP is selected as the communication protocol, the server unit contains a TDSHTTPService component. If HTTPS is selected, then the server unit will contain a TDSHTTPService component configured for HTTPS operations.
The DataSnap Server Wizard has five, six, or seven steps (depending on your selections within its pages), which are illustrated in this topic.
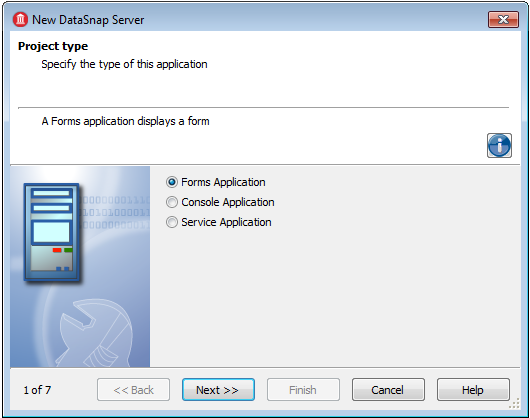
Project type page
In the first step you are prompted to select the type of the DataSnap server. The DataSnap server can be:
- A Forms Application (you specify either FireMonkey or VCL on the next page)
- A Console Application
- A Service Application
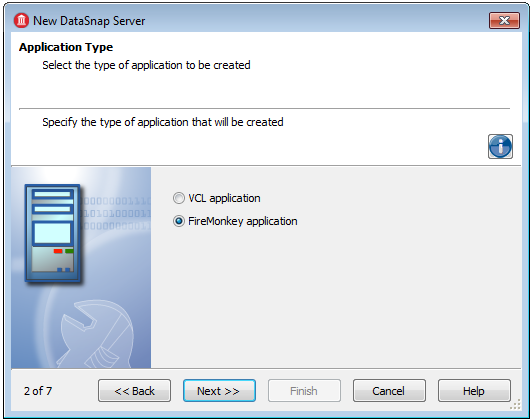
Application Type page
In the second step of the DataSnap Server Wizard, choose the type of application you want to create.
The available application types are:
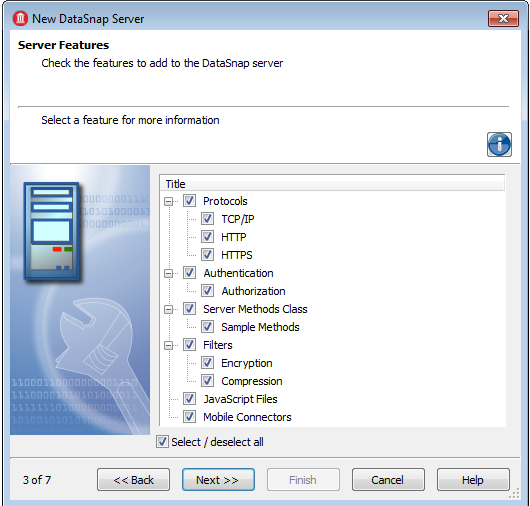
Server Features page
The third step of the DataSnap Server Wizard enables you to select the features you want to add to the DataSnap server.
Every feature in the checklist is self-descriptive: select a feature, and a hint appears in the upper side of the wizard.
The available communication protocols are:
- TCP/IP
- HTTP
- HTTPS
You can select protocols in each combination you want, but make sure TCP/IP is always selected. Selecting a communication protocol from this list enables the selection of communication ports for the protocols that are selected, in the next step of the DataSnap Server Wizard.
Note: If you select HTTPS as the communication protocol, the DataSnap Server Wizard displays an additional page, asking for information regarding certificate files.
If you select the Authentication option, a TDSAuthenticationManager component is placed on the server form. The TDSHTTPService component uses TDSAuthenticationManager as the AuthenticationManager to allow the implementation of HTTP user authentication for the DataSnap server. The implementation consists in implementing the Authenticate event. When Authentication is selected, the client must provide the DataSnap user name and password as SQL connection properties.
Selecting the Server Methods Class option adds a TDSServerClass component to the server form that allows defining a class on the server, which exposes server methods to client applications.
If you select the Sample Methods option, then the ServerMethodsUnit will contain the implementation of two simple methods called EchoString and ReverseString, which return the Value given as parameter in normal respective reversed states.
The Filters category specifies the filters that the DataSnap Server employs. You can chose to include an Encryption filter, a Compression filter, or both:
- The Encryption filter adds a PC1 and RSA filters for the selected communication protocols. Note that the RSA filter requires the OpenSSL libraries to be present on the server.
- The Compression filter adds a ZLib compression filter for the selected communications protocols.
The JavaScript files set up the project with the JavaScript framework and proxy generator.
If you select Mobile Connectors, your project supports proxy dispatching for applications on mobile devices such as Android, Windows 7 Phone, and iPhone. For more information, see DataSnap Connectors for Mobile Devices.
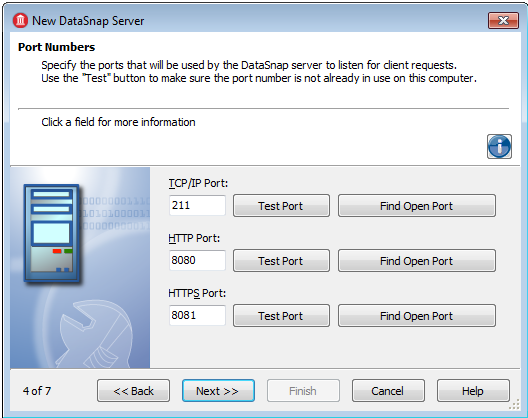
Port Numbers page
The fourth step asks for the TCP/IP communication port. The wizard allows you to check the availability of the specified port using the Test Port button. Use the Find Open Port button to automatically select an opened port auto-detected by the DataSnap Server Wizard.
Tip: Note that if you select the HTTPS feature in the previous step, you have to specify the HTTPS communications port also. The same buttons as for the TCP/IP communication port are available: Test Port and Find Open Port.
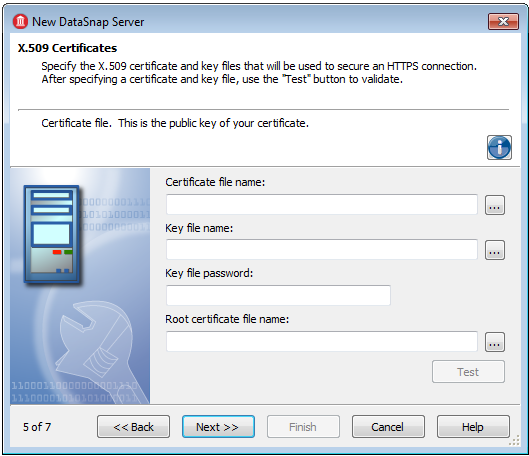
X.509 Certificates page
This step appears only if you select the HTTPS communication protocol in the second step. Here you are requested to enter the following information in order to use the X.509 certificates:
- File name that holds the X.509 certificate (*.pem).
- File name that holds the key.
- File name that contains the password for the key file.
- File that holds the root certificate.
To validate the selection, press the Test button.
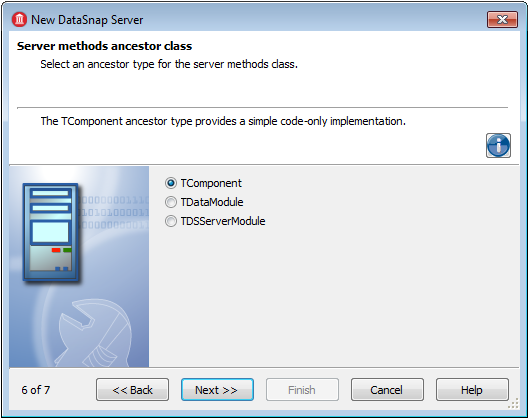
Server methods ancestor class page
Step 6 of the DataSnap Server Wizard asks for the ancestor type of the server methods class:
- Choose TComponent if you want to entirely implement the server class.
- Choose TDataModule if you want to use nonvisual components in your server class.
- Choose TDSServerModule to expose datasets from the server to client applications.
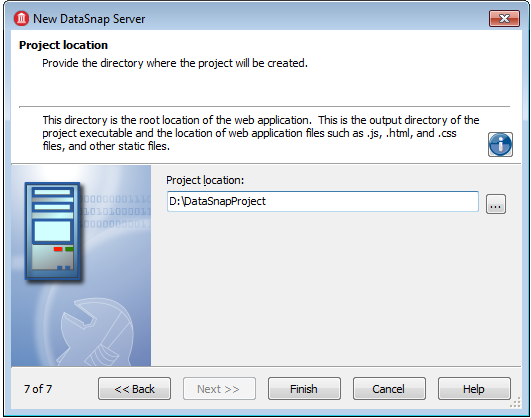
Project Location page (for iOS Mobile Devices only)
This step only appears if the Mobile Connectors feature is selected in the second step of this wizard. You are prompted to enter the root directory of the web application. This is the output directory of the project executable and the location of web application files such as .js, .html, and .css files, and other static files.
Note: Server components are linked among themselves and the destruction order is important when the server is active. It is a good idea to turn off any DataSnap server instances before closing the form; a code example is suggested below:
procedure TForm1.FormClose(Sender: TObject; var Action: TCloseAction);
begin
  DSServer1.Stop;
end;
See Also
- Creating Multi-Tiered Applications Index
- DataSnap WebBroker Application Wizard
- DataSnap Connectors for Mobile Devices
- Datasnap.DSConnect.TDSProviderConnection
- Datasnap.DSServer
- Datasnap.DSNames
- Datasnap.DSCommonServer
- Mobile Tutorial: Connecting to an Enterprise Database from a Mobile Client (iOS and Android)
