Preparing a Windows Application for appx Package Distribution
Go Up to 64-bit Windows Application Development
Your Windows app is deployed when you run it on a Windows target device. After your Windows application is ready for final deployment, you can proceed to build and sign your application. See Packaging Your UWP App for Windows Store and Packaging Your UWP App for Ad Hoc Distribution.
Configuring the Options for Deploying Your Windows App
Before you build the application for distribution, you have to configure several options for your Windows app. The properties that you configure are bundled with your application in the AppXManifest.xml file.
After you build and sign your application, you cannot modify these properties, as they provide key information about your application. Therefore, before you deploy your application, please make sure they contain the correct values, or you might have to rebuild your application.
Before each release of your Windows application, you should check if all settings are configured properly.
To configure your Windows app:
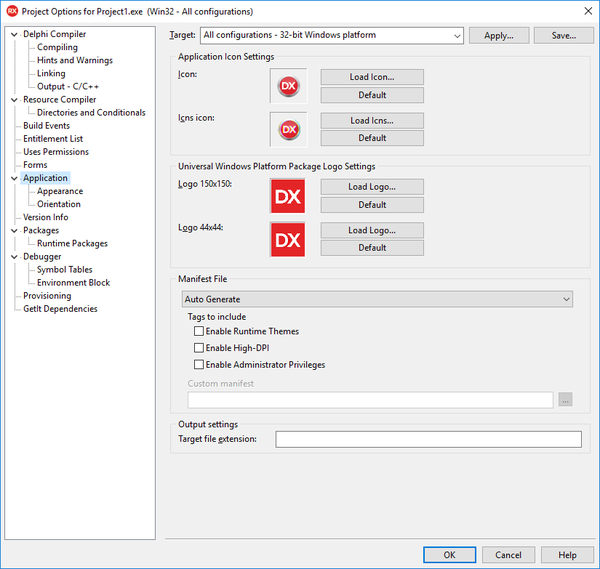
- On the Project > Options > Application page, provide the icons and images required to represent your application.
- Provide logos for Universal Windows Platform Package:
- • 150×150px: logo used for Start menu medium icon.
- • 44×44px: logo used as a tile logo and/or used for taskbar icon.
- Tip: If you do not have a custom logo, click Default next to the icon to use the default.
- On the Project > Options > Version Info page, increase the version code of your application. Application stores such as Windows Store may require that newer versions of your application always have a higher version code than previous versions.
- On the Project > Options > Provisioning page, in the Target field, select the required Windows build configuration. Then, select one of the following Distribution types:
- Click Ad hoc to create a distribution provisioning profile to use it for testing or direct distribution without submitting to the Windows Store.
- Click Store to create a distribution provisioning profile to submit your application to the Windows Store.
Customizing Your AppxManifest File
RAD Studio allows you to customize the content of the AppxManifest file if you need to include custom data in this file that you cannot define visually in your project options.
When you build an application for the Windows target platform for the first time, RAD Studio adds a file to your project folder: AppxManifest.template.xml. Whenever you build your application for Windows, RAD Studio reads this file, replaces some placeholders in the file with actual values from your project options, and writes the resulting content into an output file: Windows\<build configuration>\ AppxManifest.xml. This output file is the AppxManifest.xml file that is included in the Windows package that RAD Studio generates when you deploy your application for the Windows target platform.
To customize the output AppxManifest.xml file of a single project, edit the content of AppxManifest.template.xml.
You can customize the AppxManifest.xml file manually by adding to it all necessary information. You can also upload new details about the project such as logos of new sizes (for splash screen, wide tiles, etc.), description, preferred display mode, and so on.
