Setting Up the Messaging Service
Go Up to Push Notifications
Contents
You can send Remote Notifications to your Android or iOS devices from one of the cloud service providers available (Kinvey or Parse) or from the backend service EMS.
To allow your applications to receive Remote Notifications, you need:
- For Android apps, a new project on Google Developer Console.
- For iOS apps, a new App-ID on Apple Developer Program.
Use the following steps to set up the messaging service for Android and iOS apps.
Registering with Google
- Go to Google Developer Console
- Select Create Project and define a name for your project:
- On the project page, you need both Project ID and Project Number later in this procedure:
- Select APIs & auth from the left-hand side, and enable Google Cloud Messaging API for Android:
- Select Credentials from Public API access section, press the CREATE NEW KEY button, and select SERVER KEY.
For testing purposes, you can set the SERVER KEY to0.0.0.0/0. - Record the API key, which is needed to configure the push notification provider.


Registering with Apple
- Note: You need to be a team agent or admin to perform the following tasks on Apple Developer Program.
Creating iOS App ID on Apple Developer Program
-
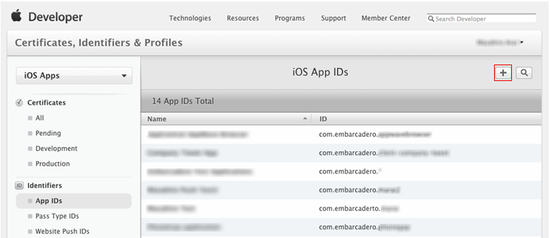
Go to iOS Developer Program > Certificates, Identifiers & Profile > Identifiers > APP ID page.
-
Press the
+button at top right to define a new App ID. Fill App Name, App ID Prefix, App ID Suffix. Also, select Push Notifications in the App Services section: -
Click Continue, and then press Submit to confirm your App ID:


Creating a Certificate for your App
-
On Certificates, Identifiers & Profile Apple page select your app and click Edit:
-
Select Create Certificate in the Development SSL Certificate section:
- In the About Creating a Certificate Signing Request (CSR) page, select Continue.
-
On the Mac, select Keychain Access > Certificate Assistant > Request a Certificate from a Certificate Authority…
- On the Certificate Assistant page:
- Enter your e-mail address and your name.
- Select the Save to disk option.
- Press Continue:
- Specify a file name and save. Now you have a CSR saved as a file.
-
On the Apple Developer Program web page, specify a CSR:
- Press Generate, and you will get a Certificate. Download the certificate, and install it on your system.
-
Now you have a certificate installed on your system:


Creating a Provisioning Profile
-
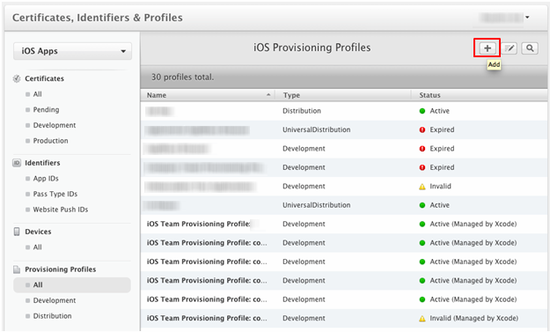
On the iOS Provisioning Profiles page, select
+at the top right:
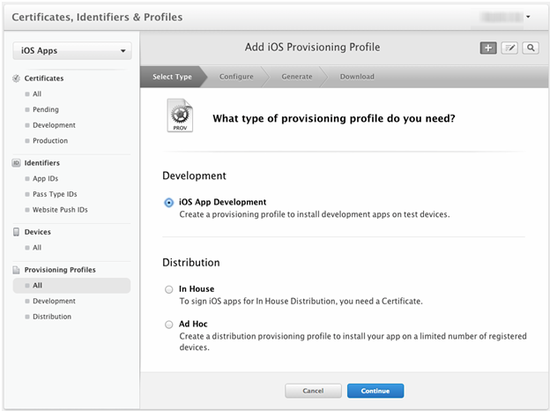
- On the Add iOS Provisioning Profile page:
- Select iOS App Development as type of the profile. Press Continue:
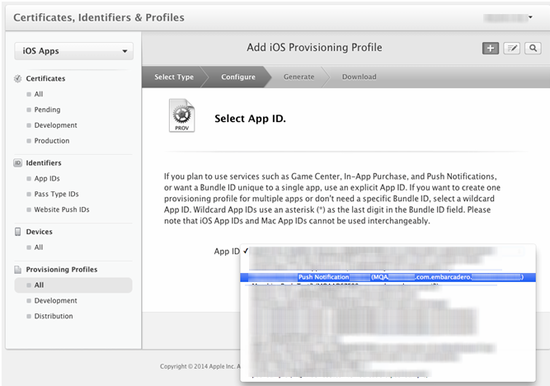
- Select the App ID that you created in the previous step:
- Select iOS App Development as type of the profile. Press Continue:
- Select the list of people who can use this profile, and click Continue.
- Select the list of devices for this profile, and click Continue.
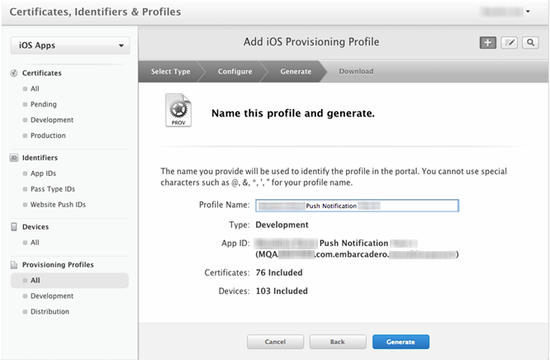
-
Specify a name for the profile, and click Generate:
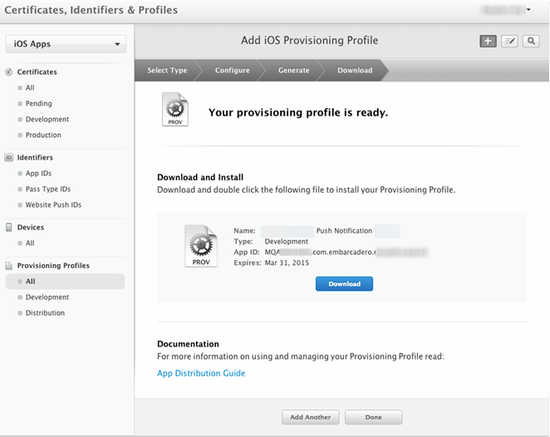
- Download your profile:
-
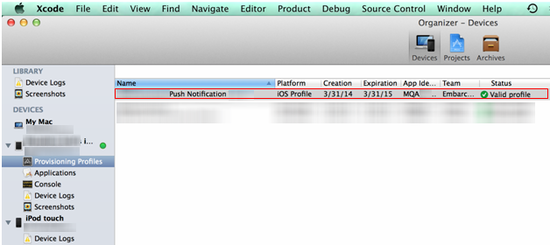
Double-click the profile, and you should now see it as a new profile in Xcode on your Mac:


Exporting the .p12 Certificate
- In Keychain Access on the Mac, select the certificate, right-click it and choose Export.

- Define a name and click Save.
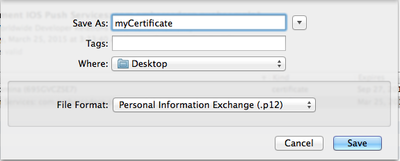
- Note: You can only choose a password if you use Kinvey or EMS as the service provider.

