Submitting Your Android App to Google Play
Go Up to Android Mobile Application Development
This topic describes the steps necessary to upload an application to Google Play, the Google store for Android applications.
Prerequisites
Before you can upload your application to Google Play, you must:
- Have a Google Play developer account. If you do not have one, create one; it requires a one-time payment of $25 to Google.
- Prepare your application for deployment.
- Warning: Never lose the keystore file that you configre at Project > Options > Provisioning or forget its password. Any later updates of your application must be signed with the same keystore file and keystOre alias, otherwise Google Play does not let you upload any update, and forces you to create a different application instead, with a different package ID, which means that your users cannot upgrade automatically.
- Build a signed application package that you can upload to Google Play.
Submitting Your Application
To submit your Android application to Google Play:
- Log into the Google Play Developer Console.
- Select Add new application.
- On the dialog box that appears, select the default language of your application, the title of your application and select Upload APK.
- You are taken to the APK page of your new application. Select Upload your first APK file to Production on the center of the screen (you can alternatively set up beta or alpha testing if you wish), and select the signed application package that you deployed.
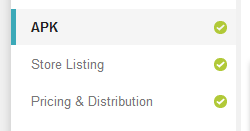
- When your package file finishes uploading, the Production tab shows information extracted from your package file, and the gray check mark on the right-hand side of the APK tab becomes green:
- Complete the mandatory information in the remaining tabs that show a gray check mark until they all show a green check mark instead. Labels of mandatory fields are marked with an asterisk.
- Note: You must click Save after you fill the fields of a tab so that the check mark of that tab turns green.
- After you have provided all the necessary information about your application on the Google Play Developer Console, on the page of your application, on the top-right corner, select Ready to publish > Publish this app.


Your application is now published.
- Note: It may take several hours until it is actually available through Google Play.