DataSnap Client Module Wizard
Go Up to File Menu
File > New > Other > Delphi Projects > DataSnap Server > DataSnap Client Module
File > New > Other > C++Builder > DataSnap Server > DataSnap Client Module
Tip: The DataSnap client wizard is available only after you have created a DataSnap Server.
DataSnap Client Module Wizard
DataSnap Client Module provides an easy connection to a DataSnap server, from within the IDE. Start by creating a new VCL Forms Application, then choose DataSnap Client Module from the DataSnap server palette in the File > New menu.
Note: If the DataSnap server this client connects to has filters applied (namely Encryption, Compression, or both), this client automatically applies and employs such filters.
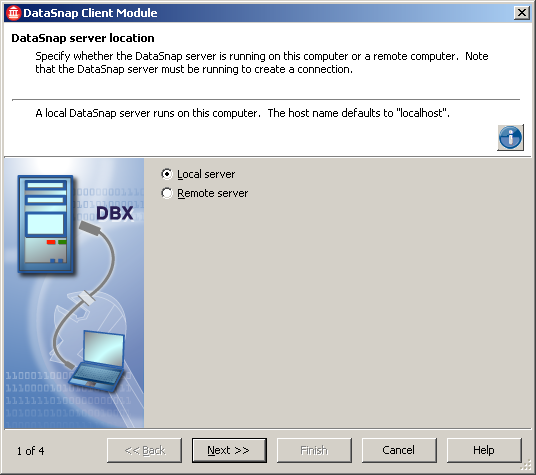
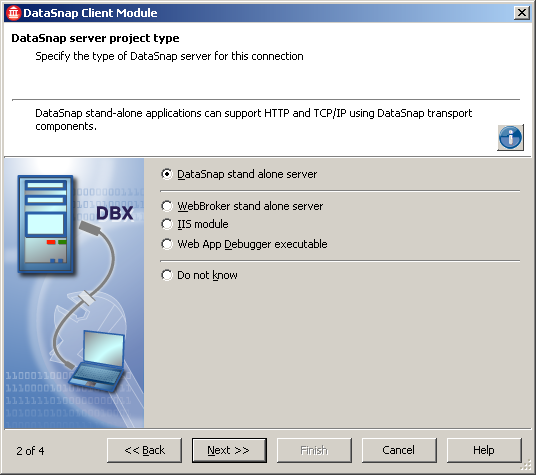
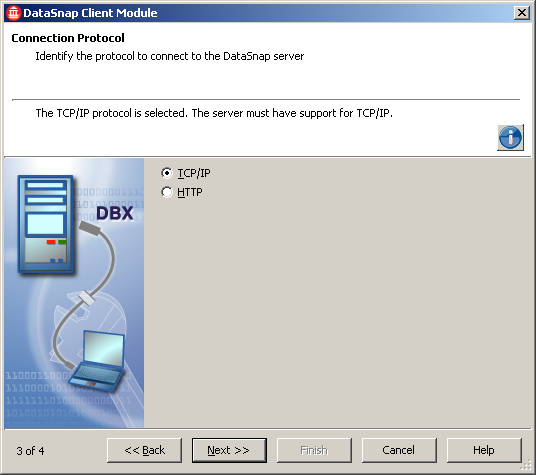
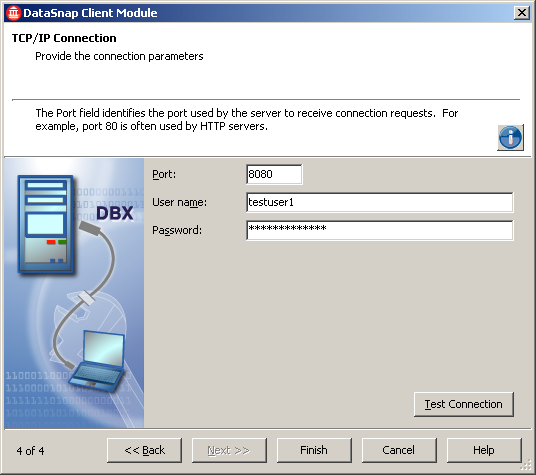
DataSnap Client Module Wizard has four steps, which are displayed in the following images.
In the first step of DataSnap Client Module Wizard you select the location of the DataSnap server. A DataSnap server can be local (running on localhost) or remote (running on another machine with a valid IP address).
In the second step of the wizard you are prompted to select the type of DataSnap server for the current connection. You can choose one of the options by clicking its corresponding radio button. To gain further information about a specific option, click the option and the wizard will display a hint. Note that if the hint is turned off, you must click the blue exclamation mark button to show it.
In the third step of DataSnap Client Module Wizard you are prompted to select the connection protocol. Note that the server must have support for the selected connection protocol.
In the fourth step of the wizard you select the communication port, user name, and password. This step also offers a Test Connection button that ensures that the connection was properly configured.


