macOS Notarization
Follow the steps below to notarize a macOS 64-bit app:
- Create an application-specific password to use with Notarization at the Apple ID site.
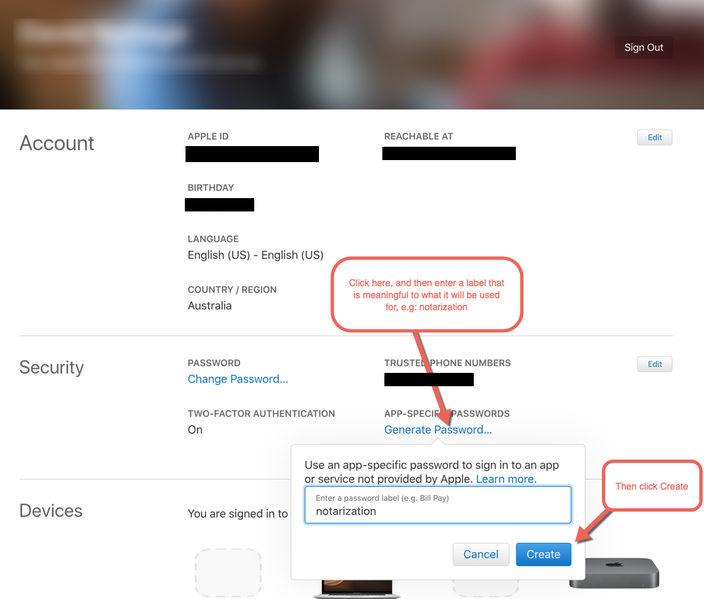
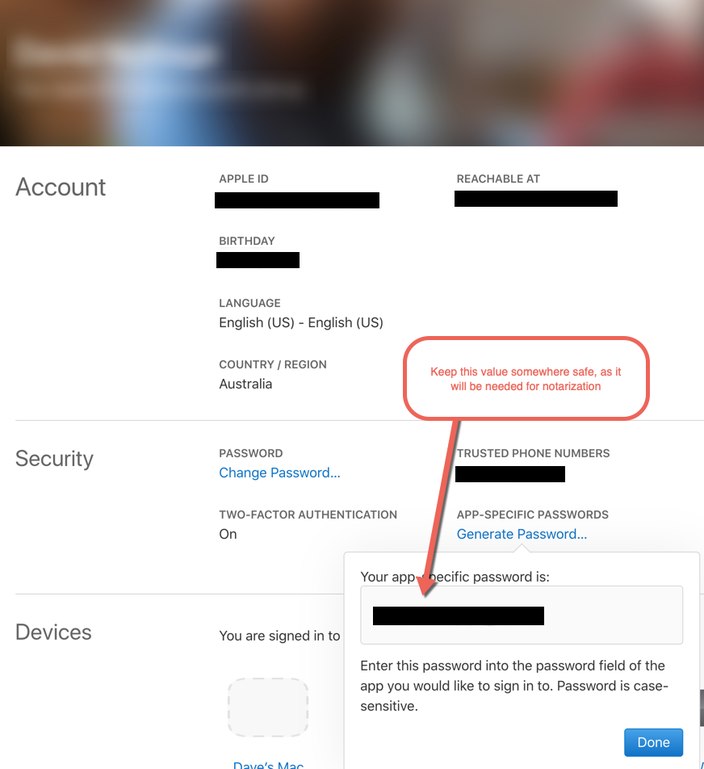
- Assuming the password is 'myPassword', and the Apple ID is 'myAppleID'.
- Create Developer ID certificate using Xcode or Apple Developer site.
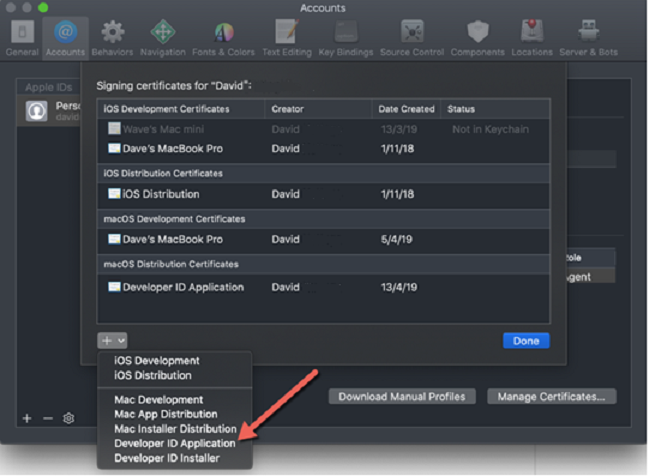
- Assuming the certificate is myDeveloperIDCertificate.
- Create an application in the IDE.
- Create an application (assuming this application name is myApp).
- Create a connection profile to the Mac machine (assuming this connection profile is called myMac).
- Set target platform to macOS 64-bit.
- Set target platform configuration to Developer ID.
- Set connection profile to myMac.
- Go to Project > Options > Deployment > Provisioning and do the following:
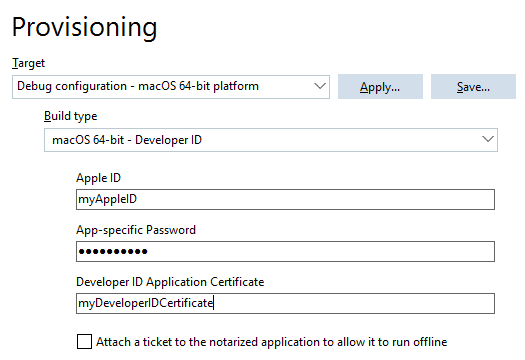
- Set Build type to macOS 64-bit - Developer ID.
- Enter your Apple ID.
- Enter the App-specific password.
- Enter the complete name of your Developer ID Application Certificate.
- Select Attach a ticket to the notarized application to allow it to run offline, if needed.
- Click Run or Run Without Debugging, or go to Project > Build and Project > Deploy.
Attention:
- To prevent the app from crashing after being notarized, macOS notarization requires that Allow unsigned executable memory entitlement is enabled.
- When an Apple Service error appears indicating that supplied UUID was not found during the "Checking Notarization Status" phase, increase the NotarizationInfoDelay value.
To increase the NotrizationInfoDelay value, navigate to <bds>\bin\codegear.deployment.targets, search for NotarizationInfoDelay="20", and change the NotarizationInfoDelay to >20 seconds.
- When the Notarization fails with a message indicating that -itc_provider is needed to distinguish between multiple providers during the "Notarizing" phase, pass the additional parameter to the App Notarization Command.