Web Server Application Wizard for Linux
Go Up to New Web Server Application
File > New > Other > Delphi Projects > WebBroker > Web Server Application
To create a web server application for Linux, select Linux in the New Web Server Application Wizard and follow the steps below.
Contents
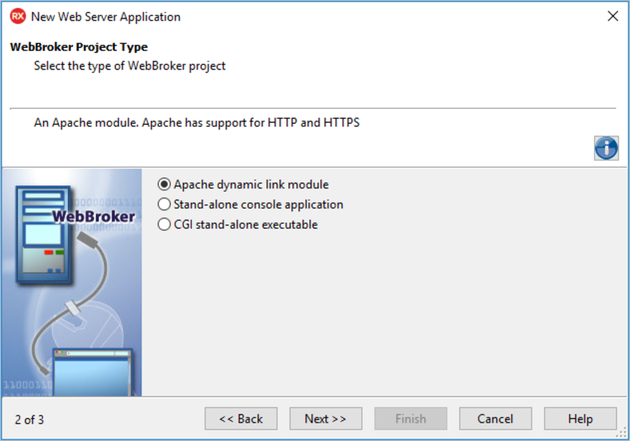
WebBroker Project Type page
On this page, select the type of project.
- Select the required type of web server application:
- Apache dynamic link module: a server that hosts static or dynamic websites, providing secure and efficient web server features as SSL (Secure Sockets Layer) and virtual domains. Apache supports HTTP and HTTPS.
- Stand-alone console application: sets up an environment for developing web server applications that display a form.
- CGI stand-alone executable: a console application that receives client request information on standard input and passes the results back to the server on standard output. This data is evaluated by
TCGIApplication. Each request message is handled by a separate instance of the application. Selecting this type of application adds the library header of the project files and required entries to the uses list and exports clause of the project file.
- Click Next.
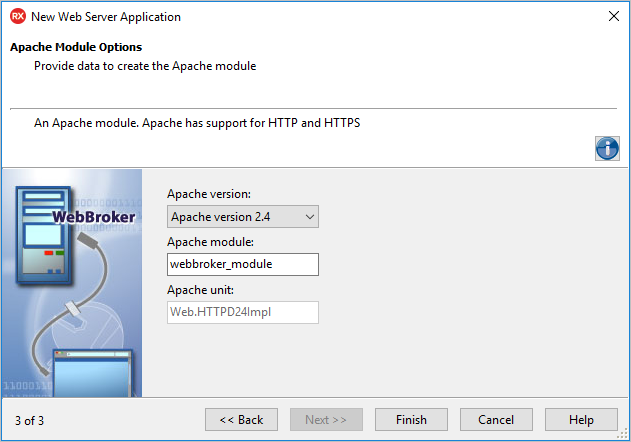
Apache Module Options page
This page opens only if you selected the Apache dynamic link module on the WebBroker Project Type page.
Specify the following:
- Apache version
- Apache module
- Apache unit: this value is predefined. You cannot edit it.
- Click Finish.
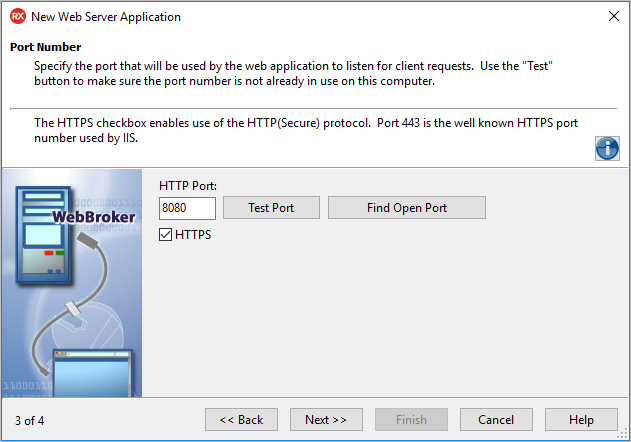
Port Number page
On this page, specify the ports that the web server application will use to listen to the client requests.
- To check the availability of the specified port, click Test Port.
- To select an open port automatically detected by the DataSnap Server, click Find Open Port.
- Note: Select the HTTPS check box to use the HTTPS protocol. The HTTPS communications port will be set to 443, which is a commonly used port by IIS, and the wizard will display an additional step that prompts for information regarding the X.509 certificate files.
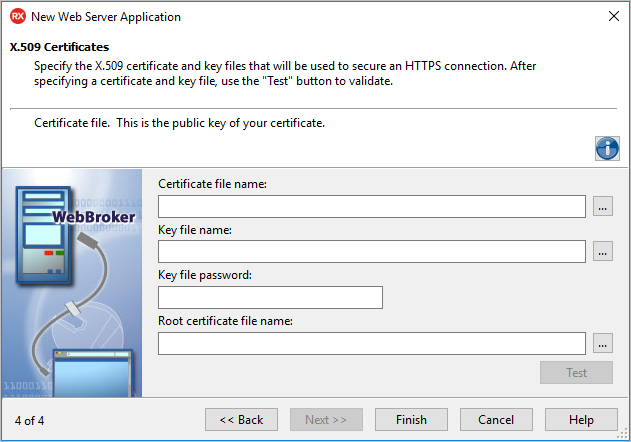
X.509 Certificates page
This step appears only if you select the HTTPS communication protocol on the Port Number page.
- To use the X.509 certificates, enter the following data:
- Certificate file name: holds the X.509 certificate (*.pem).
- Key file name: holds the key.
- Key file passowrd: contains the password for the key file.
- Root certificate file name: holds the root certificate.
- To validate the selection, click Test.
- Click Finish


