Working with Images in the Bitmap Style Designer
Go Up to Working with VCL Styles
Exporting images from a Style
- Select File > Open from the Bitmap Style Designer menu to open a Style file.
- Select an image item from the Images node in the Object Tree.
- Choose Image > Export or click the Export (
 ) button in the toolbar.
 - In Destination folder specify the folder where you want your images to be saved.
- Click Export to save all images from the style to the destination folder. The Export status memo displays the full paths of the saved images.
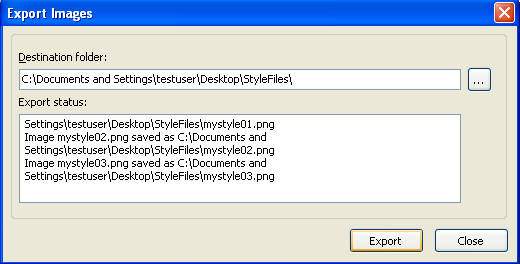

The Bitmap Style Designer converts bitmaps to png images and saves all the images to disk.
Importing images to a Style
- Select File > Open from the Bitmap Style Designer menu to open a Style file.
- Select the image item in the Object Tree.
- Choose Image > Update or click the Update (
 ) button in the toolbar.
 - Select the new image from the Select Image dialog.
- See the display in the With mask viewer in order to make sure that the Bitmap Style Designer correctly converted the image to an internal bitmap with alpha channel.
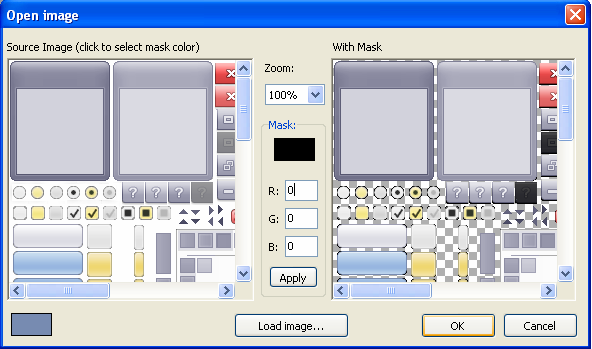
- Click Load Image in the Open Image dialog if you want to open another image from the disk.
- Click OK to update the image.
