macOS Notarization
Follow the steps below to notarize a macOS 64-bit app:
- Create an application-specific password to use with Notarization at the Apple ID site.
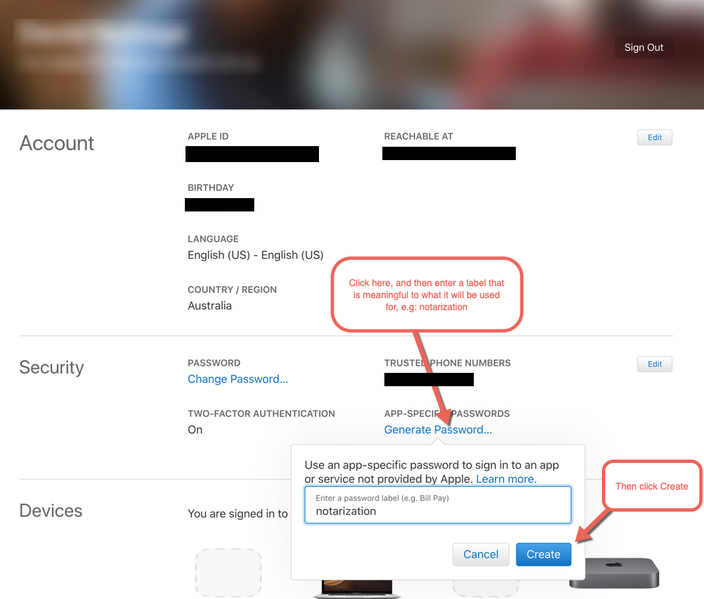
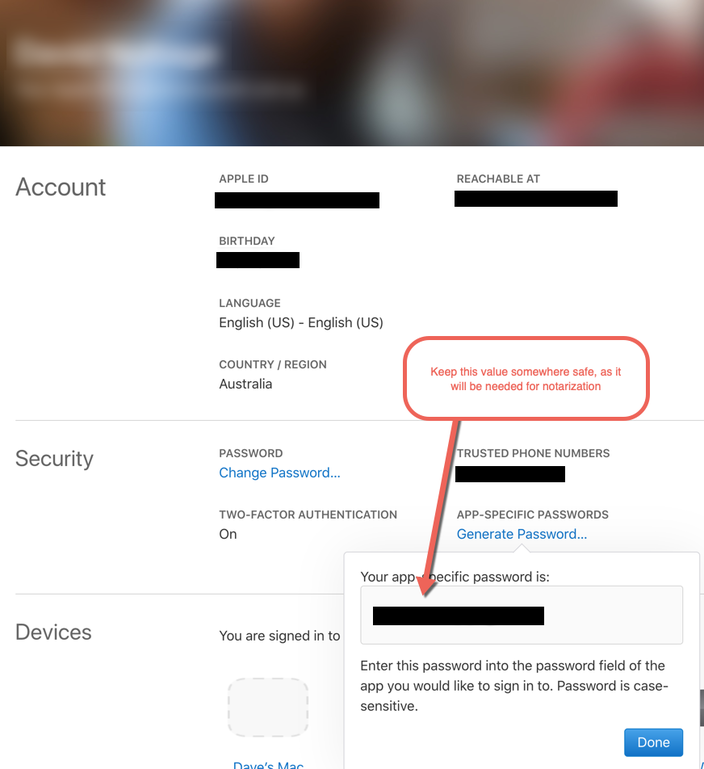
- Assuming the password is 'myPassword', and the Apple ID is 'myAppleID'.
- Create Developer ID certificate using Xcode or Apple Developer site.
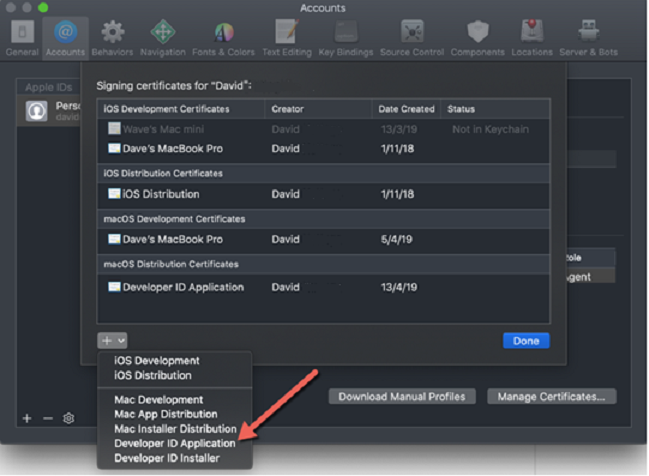
- Assuming the certificate is myDeveloperIDCertificate.
- Create an application in the IDE.
- Create an application (assuming this application name is myApp).
- Create a connection profile to the Mac machine (assuming this connection profile is called myMac).
- Set target platform to macOS 64-bit.
- Set target platform configuration to Developer ID.
- Set connection profile to myMac.
- Go to Project > Options > Deployment > Provisioning and do the following:
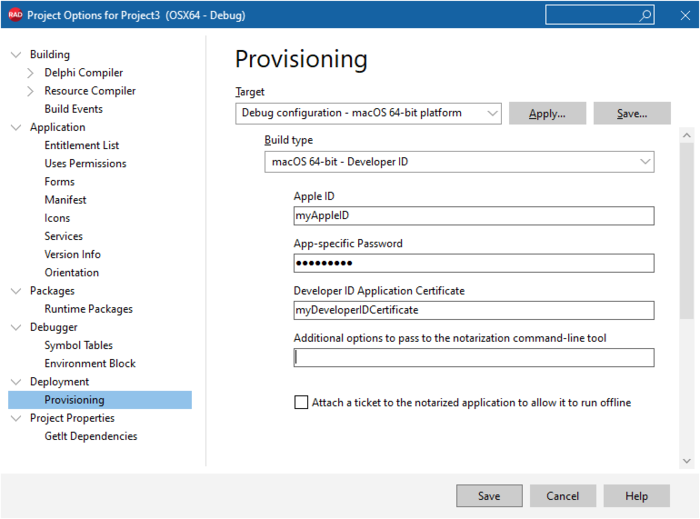
- Make sure that the Build type be macOS 64-bit - Developer ID.
- Enter your Apple ID.
- Enter the App-specific password.
- Enter the complete name of your Developer ID Application Certificate.
- Enter the Additional options to pass to the command-line tool. Note: Before RAD Studio 10.4.2 release, to add aditional options to the App Notarization Command, you should modify the codegear.deployment.targets. Now you can add it by the Additional options to pass to the command-line tool field.
- Select Attach a ticket to the notarized application to allow it to run offline, if needed.
- Click Run or Run Without Debugging, or go to Project > Build and Project > Deploy.
Attention:
- To prevent the app from crashing after being notarized, macOS notarization requires that Allow unsigned executable memory entitlement is enabled.
- When an Apple Service error appears indicating that supplied UUID was not found during the "Checking Notarization Status" phase, increase the NotarizationInfoDelay value.
To increase the NotrizationInfoDelay value, navigate to <bds>\bin\codegear.deployment.targets, search for NotarizationInfoDelay="20", and change the NotarizationInfoDelay to >20 seconds.
- When the Notarization fails with a message indicating that -itc_provider is needed to distinguish between multiple providers during the "Notarizing" phase, add -itc_provider <provider> to the "Additional options to pass to the notarization command-line tool" field.
Warning: Notarization fails when an application is targeted for Developer ID compilation to a system with multiple providers. It also may fail when certificates for multiple AppleIDs or multiple developer programs are present.