Tutoriel mobile : Utilisation des notifications (iOS et Android)
Sommaire
- 1 Trois notifications élémentaires ou styles d'alerte
- 2 Centre de notifications sur les périphériques mobiles
- 3 Accéder au service de notifications
- 4 Ajouter FMLocalNotificationPermission (iOS)
- 5 Définir le numéro de badge d'icône et le numéro de notification à partir du code
- 6 Planifier les notifications
- 7 Répéter un message de notification
- 8 Mettre à jour ou annuler un message de notification planifié ou répété
- 9 Présenter immédiatement le message de notification
- 10 Personnalisation du son de notification
- 11 Bannière de notification ou alerte de notification
- 12 Ajouter des actions à l'alerte de notification (iOS seulement)
- 13 Ajouter une action aux notifications
- 14 Exécution de l'application
- 15 Voir aussi
Remonter à Tutoriels mobiles : Développement d'applications mobiles (iOS et Android)
Ce tutoriel décrit les étapes élémentaires relatives à l'utilisation des notifications sur votre périphérique mobile. Pour plus de détails, voir utilisation des notifications.
Trois notifications élémentaires ou styles d'alerte
Lorsque les utilisateurs définissent des notifications pour des apps de leurs périphériques mobiles, celles-ci peuvent être transmises par les apps sous les trois styles élémentaires suivants. La bannière apparaît rapidement, mais la boîte de dialogue d'alerte requiert que l'utilisateur la supprime.
Bannière de notification sur les périphériques mobiles
| iOS |
|---|
|
|

| Android |
|---|
|
|

Dialogues d'alerte : Numéro de badge iOS et numéro de notification Android
| Numéro de badge iOS | |
|---|---|
 iPad |
| Numéro de notification Android |
|---|
 Android |
Centre de notifications sur les périphériques mobiles
Les images suivantes illustrent le centre de notifications sur un iPad (Notification Center) et un périphérique Android (Notification Drawer), où l'utilisateur peut faire dérouler la liste des notifications récentes.
| iOS |
|---|
|
|

| Android |
|---|
|
|

Accéder au service de notifications
RAD Studio fournit le composant TNotificationCenter qui vous permet d'accéder facilement au service de notifications.
Pour accéder au service de notifications, procédez comme suit :
- Créez une nouvelle application mobile :
- Pour Delphi : Fichier > Nouveau > Application multi-périphérique - Delphi
- Pour C++ : Fichier > Nouveau > Application multi-périphérique - C++Builder
- Sélectionnez le composant TNotificationCenter dans la palette d'outils et déposez-le sur le Concepteur de fiches.
- Vérifiez que l'unité suivante a bien été ajoutée automatiquement ajoutée au projet :
- Pour les applications Delphi, ajoutez l'unité suivante à la clause uses si elle n'est pas présente :
uses
  System.Notification;
- Pour les applications C++, ajoutez l'opérateur include suivant dans le fichier d'en-tête du projet (fichier .h) :
#include <System.Notification.hpp>
La méthode System.Notification.TNotificationCenter.CreateNotification permet de créer une instance de l'objet de classe TNotification.
Ajouter FMLocalNotificationPermission (iOS)
Afin d'utiliser les notifications sur les périphériques iOS 8+, vous devez vous assurer que la paire clé/valeur FMLocalNotificationPermission est activée sur la page Informations de version de Options de projet.
- Choisissez Projet > Options > Informations de version.
- Dans le champ Cible, sélectionnez Configuration Débogage - Périphérique iOS - Plate-forme 32 bits.
- Définissez le champ Valeur de FMLocalNotificationPermission sur true.
- Le paramètre FMLocalNotificationPermission active les notifications locales sur les périphériques iOS 8+ :

Définir le numéro de badge d'icône et le numéro de notification à partir du code
TNotification.Number définit le numéro de badge d'icône (pour les périphériques iOS) et le numéro de notification (pour les périphériques Android).
Pour définir le numéro de badge d'icône iOS (pour Delphi ou C++) ou le numéro de notification Android (uniquement pour les apps Delphi), vous devez implémenter la méthode correspondante.
- Déposez un TButton sur la fiche.
- Dans l'inspecteur d'objets, définissez la propriété Name sur SetNumber.
- Créez l'événement OnClick du bouton SetNumber en double-cliquant sur le bouton.
- Implémentez le gestionnaire d'événement pour l'événement OnClick du bouton SetNumber en ajoutant le code suivant :
- Pour Delphi :
procedure TForm1.SetNumberClick(Sender: TObject);
var
  MyNotification: TNotification;
begin
  // Create an instance of TNotification
  MyNotification := NotificationCenter1.CreateNotification;
  try
      // --- your code goes here ---
      // Set the icon or notification number
      MyNotification.Number :=18;
      // Set the alert message
      MyNotification.AlertBody := 'Delphi for your mobile device is here!';
      // Note: You must send the notification to the notification center for the Icon Badge Number to be displayed.
      NotificationCenter1.PresentNotification(MyNotification);
  finally
    MyNotification.DisposeOf;
  end;
end;
- Pour C++ :
void __fastcall TForm1::SetNumberClick(TObject *Sender)
{
        if (NotificationCenter1->Supported()) {
                TNotification *myNotification = NotificationCenter1->CreateNotification();
                __try {
                        myNotification->Number = 18;
                        myNotification->AlertBody = "C++ for your mobile device is here!";
                        NotificationCenter1->PresentNotification(myNotification);
                }
                __finally {
                        myNotification->DisposeOf();
                }
        }

}
- Pour Delphi :
Une fois votre application exécutée en appuyant sur F9, les éléments suivants s'affichent lorsque vous cliquez sur le bouton SetNumber :
- Un badge sur l'icône d'application (sur l'écran d'accueil iOS) :
- Un numéro auprès du message de notification dans le Centre de notifications (sur Android) :
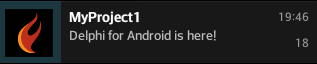 Android
Planifier les notifications
Vous pouvez aussi planifier les messages de notification en utilisant la méthode ScheduleNotification que la classe TNotificationCenter hérite de TCustomNotificationCenter.
Pour afficher un message de notification, vous devez créer une instance de la classe TNotification, puis définir les champs Name, AlertBody et FireDate.
- Déposez un nouveau TButton sur la fiche.
- Dans l'inspecteur d'objets, définissez la propriété Name sur ScheduleNotification.
- Créez l'événement OnClick du bouton ScheduleNotification en double-cliquant sur le bouton.
- Implémentez le gestionnaire d'événement pour l'événement OnClick du bouton ScheduleNotification en ajoutant le code suivant :
- Pour Delphi :
procedure TForm1.ScheduleNotificationClick(Sender: TObject);
var
  MyNotification: TNotification;
begin
  MyNotification := NotificationCenter1.CreateNotification;
  try
    MyNotification.Name := 'MyNotification';
    MyNotification.AlertBody := 'Delphi for your mobile device is here!';
    // Fired in 10 seconds
    MyNotification.FireDate := Now + EncodeTime(0, 0, 10, 0);
    // Send notification to the notification center
    NotificationCenter1.ScheduleNotification(MyNotification);
  finally
    MyNotification.DisposeOf;
  end;
end;
- Pour C++ :
void __fastcall TForm1::ScheduleNotificationClick(TObject *Sender)
{
        if (NotificationCenter1->Supported()) {
                TNotification *myNotification = NotificationCenter1->CreateNotification();
                __try {
                        myNotification->Name = "MyNotification";
                        myNotification->AlertBody = "C++ for your mobile device is here!";
                        // Fire in 10 seconds
                        myNotification->FireDate = Now() + EncodeTime(0, 0, 10, 0);
                        // Send notification to the notification center
                        NotificationCenter1->ScheduleNotification(myNotification);
                }
                __finally {
                        myNotification->DisposeOf();
                }

        }
}
Une fois votre application exécutée en appuyant sur F9, vous pouvez voir le message de notification AlertBody en haut de l'écran d'accueil de votre périphérique lorsque vous cliquez sur le bouton ScheduleNotification. Pour les périphériques iOS, ce message est similaire à l'écran suivant :

Répéter un message de notification
Vous pouvez également répéter un message de notification en utilisant la propriété RepeatInterval de l'objet TNotification.
Pour répéter un message de notification, vous devez créer une instance de la classe TNotification, puis définir les champs Name, AlertBody, et FireDate fields.
Vous devez également utiliser la méthode ScheduleNotification et définir la propriété RepeatInterval. Dans le code suivant, l'intervalle de répétition est défini à une minute.
- Déposez un nouveau TButton sur la fiche.
- Dans l'inspecteur d'objets, définissez la propriété Name sur RepeatedNotification.
- Créez l'événement OnClick du bouton RepeatedNotification en double-cliquant sur le bouton.
- Implémentez le gestionnaire d'événement pour l'événement OnClick du bouton RepeatedNotification en ajoutant le code suivant :
- Pour Delphi :
procedure TForm1.RepeatedNotificationClick(Sender: TObject);
var
  MyNotification: TNotification;
begin
  MyNotification := NotificationCenter1.CreateNotification;
  try
    MyNotification.Title := 'MyNotification';
    MyNotification.AlertBody := 'Repeating notification each minute!';
    //Fired in 10 seconds
    MyNotification.FireDate := Now + EncodeTime(0, 0, 10, 0);
    //Repeated each minute
    MyNotification.RepeatInterval := TRepeatInterval.Minute;
    // Send notification to the notification center
    NotificationCenter1.ScheduleNotification(MyNotification);
  finally
    MyNotification.Free;
  end;
end;
- Pour C++ :
void __fastcall TForm1::RepeatedNotificationClick(TObject *Sender) {
    if (NotificationCenter1->Supported()) {
        TNotification *myNotification =
            NotificationCenter1->CreateNotification();
        __try {
            myNotification->Name = "MyNotification";
            myNotification->AlertBody = "Repeating notification each minute!";
            // Fire in 10 seconds
            myNotification->FireDate = Now() + EncodeTime(0, 0, 10, 0);
            // Repeated each minute
            myNotification->RepeatInterval = TRepeatInterval::Minute;
            // Send notification to the notification center
            NotificationCenter1->ScheduleNotification(myNotification);
        }
        __finally {
            myNotification->Free();
        }

    }

}
Une fois votre application exécutée en appuyant sur F9, vous pouvez voir le message de notification (AlertBody) en haut de l'écran d'accueil de votre périphérique lorsque vous cliquez sur le bouton RepeatedNotification. Pour les périphériques iOS, ce message est similaire à l'écran suivant :

Mettre à jour ou annuler un message de notification planifié ou répété
Chaque message de notification planifié est identifié par la propriété Name de l'objet TNotification.
- Remarque : Pour la plate-forme iOS, CancelNotification et ScheduleNotification peuvent annuler ou mettre à jour les notifications qui n'ont pas encore été présentées.
Pour mettre à jour une notification planifiée, appelez simplement la méthode ScheduleNotification une nouvelle fois avec une instance de TNotificationCenter qui porte le même nom (propriété Name).
Pour annuler une notification planifiée, vous pouvez simplement appeler la méthode CancelNotification avec l'identificateur que vous avez utilisé.
- Déposez un nouveau TButton sur la fiche.
- Dans l'inspecteur d'objets, définissez la propriété Name sur CancelNotification.
- Créez l'événement OnClick du bouton CancelNotification en double-cliquant sur le bouton.
- Implémentez le gestionnaire d'événement pour l'événement OnClick du bouton CancelNotification en ajoutant le code suivant :
- Pour Delphi :
procedure TForm1.CancelNotificationClick(Sender: TObject);

begin
   NotificationCenter1.CancelNotification('MyNotification');
end;
- Pour C++ :
  void __fastcall TForm1::CancelNotificationClick(TObject *Sender)
{
   NotificationCenter1->CancelNotification("MyNotification");
}
Présenter immédiatement le message de notification
Vous pouvez également afficher le message de notification immédiatement en utilisant la fonction PresentNotification.
Pour afficher un message de notification, vous devez créer une instance de la classe TNotification, puis définir les champs Name et AlertBody.
- Déposez un nouveau TButton sur la fiche.
- Dans l'inspecteur d'objets, définissez la propriété Name sur PresentNotification.
- Créez l'événement OnClick du bouton PresentNotification en double-cliquant sur le bouton.
- Implémentez le gestionnaire d'événement pour l'événement OnClick du bouton PresentNotification en ajoutant le code suivant :
- Pour Delphi :
procedure TForm1.PresentNotificationClick(Sender: TObject);
var
  MyNotification: TNotification;
begin
  MyNotification := NotificationCenter1.CreateNotification;
  try
    MyNotification.Name := 'MyNotification';
    MyNotification.AlertBody := 'Delphi for your mobile device is here!';
    // Set Icon Badge Number (for iOS) or message number (for Android) as well
    MyNotification.Number := 18;
    MyNotification.EnableSound := False;
    // Send message to the notification center
    NotificationCenter1.PresentNotification(MyNotification);
  finally
    MyNotification.DisposeOf;
  end;
end;
- Pour C++ :
void __fastcall TForm1::PresentNotificationClick(TObject *Sender)
{
  if (NotificationCenter1->Supported()) {
           TNotification *myNotification = NotificationCenter1->CreateNotification();
           __try {
                   myNotification->Name = "MyNotification";
                   myNotification->AlertBody = "C++ for your mobile device is here!";
                   // Set Icon Badge Number (for iOS) or message number (for Android) as well
                   myNotification->Number = 18;
                   myNotification->EnableSound = False;
                   // Send notification to the notification center
                   NotificationCenter1->PresentNotification(myNotification);
          }
          __finally {
                   myNotification->DisposeOf();
          }
 }

}
Personnalisation du son de notification
Vous pouvez utiliser un son personnalisé pour le message de notification immédiatement par le biais de la propriété SoundName de l'objet TNotification.
Vous devez créer une instance de la classe TNotification, et définir les propriétés EnableSound et SoundName. Vous devez également indiquer le chemin complet du fichier son et l'extension de fichier.
- Déposez un nouveau TButton sur la fiche.
- Dans l'inspecteur d'objets, définissez la propriété Name sur SoundNotification.
- Créez l'événement OnClick du bouton SoundNotification en double-cliquant sur le bouton.
- Implémentez le gestionnaire d'événement pour l'événement OnClick du bouton SoundNotification en ajoutant le code suivant :
- Pour Delphi :
procedure TForm1.SoundNotificationClick(Sender: TObject);
var
  MyNotification: TNotification;
begin
  MyNotification := NotificationCenter1.CreateNotification;
  try
    MyNotification.Name := 'MyNotification';
    MyNotification.AlertBody := 'Delphi for your mobile device is here!';
    MyNotification.EnableSound := True;
    MyNotification.SoundName := GetSoundName;
    MyNotification.FireDate := Now + EncodeTime(0, 0, 10, 0);
    // Send message to the notification center
    NotificationCenter1.ScheduleNotification(MyNotification);
  finally
    MyNotification.Free;
  end;
end;
- Pour C++ :
- Dans le fichier .cpp, ajoutez le code suivant :
void __fastcall TForm1::SoundNotificationClick(TObject *Sender)
{
TNotification *myNotification = NotificationCenter1->CreateNotification();
        __try {
            myNotification->Name = "MyNotification";
            myNotification->AlertBody = "C++ for your mobile device is here!";
            myNotification->EnableSound = true;
            myNotification->SoundName = GetSoundName();
            myNotification->FireDate = Now() + EncodeTime(0, 0, 10, 0);
            // Send notification to the notification center
           NotificationCenter1->ScheduleNotification(myNotification);
        }
        __finally {
            myNotification->Free();
        }
}
- Déclarez la fonction GetSoundName.
- Pour Delphi :
- Définissez la déclaration GetSoundName dans la section private de l'unité.
- Ajoutez System.IOUtils à la clause uses du projet.
uses
  System.IOUtils;
private
    function GetSoundName: string;
- Pour C++ :
- Dans le fichier d'en-tête (fichier .h), ajoutez la déclaration suivante :
- Définissez la déclaration GetSoundName dans la section private de l'unité.
- Incluez
System.IOUtils.hppà la clause uses du projet.
#include <System.IOUtils.hpp>
private:    // User declarations
     __fastcall  UnicodeString GetSoundName ();
- Pour Delphi :
- Implémentez la fonction GetSoundName.
- Remarque : Selon le système d'exploitation cible, les données de son doivent avoir une extension de fichier différente.
- Pour Delphi :
{$R *.fmx}
function TForm1.GetSoundName: string;
begin
{$IFDEF IOS}
  Result := 'myiOSSound.caf';
{$ENDIF}
{$IFDEF ANDROID}
  Result := TPath.Combine(TPath.GetSharedDocumentsPath, 'myAndroidSound.mp3');
{$ENDIF}
end;
- Pour C++ :
- Dans le fichier .cpp, ajoutez le code suivant :
UnicodeString __fastcall TForm1::GetSoundName ()
{
    UnicodeString result;
#if defined(_PLAT_IOS)
    result = "myiOSSound.caf";
#endif
#if defined(__ANDROID__)
    result = System::Ioutils::TPath::Combine(System::Ioutils::TPath::GetSharedDocumentsPath(), "myAndroidSound.mp3");
#endif
    return result;
  //
}
- Ajoutez les fichiers son à votre projet :
- Recherchez les fichiers myAndroidSound.mp3 et myiOSSound.caf dans l'explorateur Windows, et déplacez-les dans le Gestionnaire de projets. Déposez-les sur le nom de votre projet.
- Remarque : Les fichiers son myAndroidSound.mp3 et myiOSSound.caf ne sont pas inclus dans l'installation de RAD Studio. Vous pouvez utiliser à la place les fichiers MP3 et CAF à votre disposition, mais n'oubliez pas de remplacer le nom dans l'extrait de code ci-dessus par le nom de vos fichiers. Voir ce lien pour plus d'informations sur la conversion de fichiers MP3 au format CAF : How to convert MP3 to CAF (EN)
- Dans le dialogue de confirmation, cliquez sur Oui pour ajouter les fichiers son à votre projet.
- Recherchez les fichiers myAndroidSound.mp3 et myiOSSound.caf dans l'explorateur Windows, et déplacez-les dans le Gestionnaire de projets. Déposez-les sur le nom de votre projet.
- Ouvrez le Gestionnaire de déploiement pour vous assurer que les fichiers son sont déployés avec votre application. Vous pouvez voir les entrées correspondantes dans la colonne du chemin distant :
- Pour iOS :
StartUp\Documents(voir la rubrique sur le déploiement des fichiers dans les applications iOS). - Pour Android :
assets\internal(voir la rubrique sur le déploiement des fichiers dans les applications Android).
- Pour iOS :
- Changez le chemin distant des fichiers ajoutés dans le Gestionnaire de déploiement :
- Pour iOS :
.\ - Pour Android :
assets\
- Pour iOS :
Bannière de notification ou alerte de notification
Par défaut, votre application affiche la bannière de notification :
- Bannière de notification sur l'iPad
- Bannière de notification sur les périphériques Android
- Android
- Alerte de notification (seulement pour les périphériques iOS)
Pour utiliser une alerte de notification plutôt qu'une bannière de notification (seulement pour les périphériques iOS), l'utilisateur final doit changer le style Alert en Alerts dans la page de configuration du Centre de notifications, disponible dans les paramètres du périphérique :

Ajouter des actions à l'alerte de notification (iOS seulement)
Vous pouvez aussi personnaliser une alerte en ajoutant un bouton Action qui ouvre l'application.
Pour personnaliser une action d'alerte, vous devez définir le champ AlertAction sur le nom du bouton Action, puis définir le champ HasAction sur True, comme suit.
- Déposez un nouveau TButton sur la fiche.
- Dans l'inspecteur d'objets, définissez la propriété Name sur ActionNotification.
- Créez l'événement OnClick du bouton ActionNotification en double-cliquant sur le bouton.
- Implémentez le gestionnaire d'événement pour l'événement OnClick du bouton ActionNotification en ajoutant le code suivant :
- Pour Delphi :
procedure TForm1.ActionNotificationClick(Sender: TObject);
var
  MyNotification: TNotification;
begin
   MyNotification := NotificationCenter1.CreateNotification;
  try
    MyNotification.Name := 'MyNotification';
    MyNotification.AlertBody := 'Delphi for iOS is here! ';
    MyNotification.Number := 2;
    MyNotification.AlertAction := 'Launch';
    MyNotification.HasAction := True;
    MyNotification.FireDate := Now + EncodeTime(0, 0, 20, 0);
    NotificationCenter1.ScheduleNotification(MyNotification);
  finally
    MyNotification.DisposeOf;
  end;
end;
- Pour C++ :
void __fastcall TForm1::ActionNotificationClick(TObject *Sender)
{
   if (NotificationCenter1->Supported()) {
           TNotification *myNotification = NotificationCenter1->CreateNotification();
           __try {
                   myNotification->Name = "MyNotification";
                   myNotification->AlertBody = "C++ for iOS is here!";
                   myNotification->Number = 2;
                   myNotification->AlertAction = "Launch";
                   myNotification->HasAction = True;
                   myNotification->FireDate = Now() + EncodeTime(0,0,20,0);
                   NotificationCenter1->ScheduleNotification(myNotification);
           }
           __finally {
                   myNotification->DisposeOf();
           }
   }
 }
Remarque : Seuls les périphériques iOS prennent en charge la fonctionnalité d'alerte de notification.
L'alerte de notification s'ouvre au moment spécifié via le champ FireDate.

Ajouter une action aux notifications
La classe TNotificationCenter fournit le gestionnaire d'événement onReceiveLocalNotification qui vous permet d'écrire une réponse quand l'utilisateur clique sur le message de notification dans le centre de notifications. Pour écrire la réponse, double-cliquez sur le composant TNotificationCenter sur le Concepteur de fiches, puis implémentez le gestionnaire d'événement OnReceiveLocalNotification.
L'extrait de code suivant implémente une réponse pour afficher une zone de message indiquant "The <Notification name>" notification clicked."
- Pour Delphi :
 procedure TForm1.NotificationCenter1ReceiveLocalNotification(Sender: TObject; ANotification: TNotification);
   begin
     ShowMessage('The ' + ANotification.Name + ' notification clicked.' );
   end;
- Pour C++ :
void __fastcall TForm1::NotificationCenter1ReceiveLocalNotification(TObject *Sender, TNotification *ANotification)
{
       ShowMessage("The " + ANotification->Name + " notification clicked.");
}

Exécution de l'application
Pour exécuter l'application, choisissez Exécuter > Exécuter ou appuyez sur F9. Cliquez sur les différents boutons pour planifier ou présenter des notifications sur votre périphérique.
Voir aussi
- Utilisation des notifications
- Tutoriel mobile : Prendre une photo et la partager, et partager du texte (iOS et Android)
- Tutoriel mobile : Utilisation de détecteurs d'emplacement (iOS et Android)
- Tutoriel mobile : Utilisation des notifications distantes (iOS et Android)
- Extraits de code mobile : Notifications
- Création d'événements - Index
- Utilisation du Centre de notifications macOS
- How to convert MP3 to CAF (EN)
Exemples
- Exemple FireMonkey Send Cancel Notification
- Exemple FireMonkey Android Notification Service
- Exemple FireMonkey Set Reset Badge Number
- macOS Dock Badges (Delphi)
- FireMonkey Notification Mac (Delphi)
- FireMonkey Notification Mac (C++)