Creating the Web Interface (InterBase Tutorial)
Go Up to Tutorial: Using an InterBase Database in a Delphi or C++ Application
This section shows how to create a server client as a Web application rather than a local application.
This client uses the same server that we created in Creating the Server Side with DataSnap Server. It doesn't matter whether the server was implemented in Delphi or C++. You can have a Delphi server and a C++ client—or vice versa.
With RAD Studio, you can develop a Web application much like you develop a local application. However, for the visual components, you use IntraWeb components that work with the Web—instead of the visual components we used in the previous section. Many of these components have the same name as non-Web components, but use a "TIW" prefix instead of "T". In the example below, we'll use TIWButton, TIWDBGrid and TIWDBNavigator components that have the same purpose as the TButton, TDBGrid and TDBNavigator components. For the database, we use the same components—for a local client or a Web client.
Here are the steps to create a Web client.
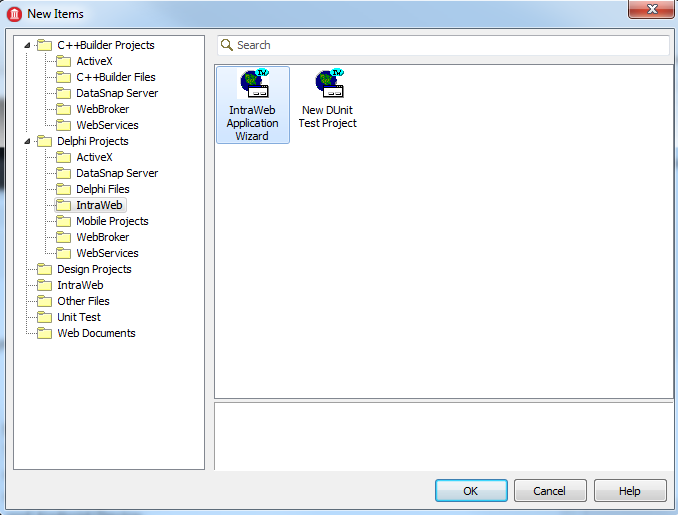
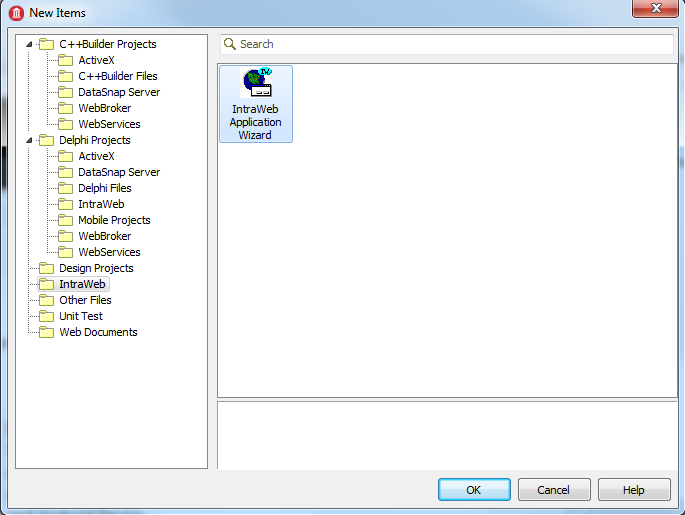
- Create a new project. Click the main menu item File > New > Other... to display the New Items dialog.
- For Delphi, select Delphi Projects > IntraWeb > IntraWebApplicationWizard.
- For C++, select IntraWeb > IntraWebApplicationWizard.
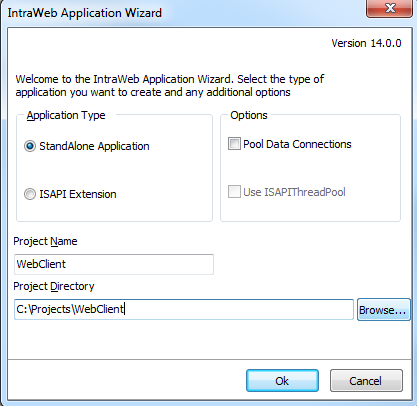
- Click OK to display the wizard:
- Name the project "WebClient". Click the Browse... button and select a directory for the project. Click Ok. The wizard creates a set of files for you.
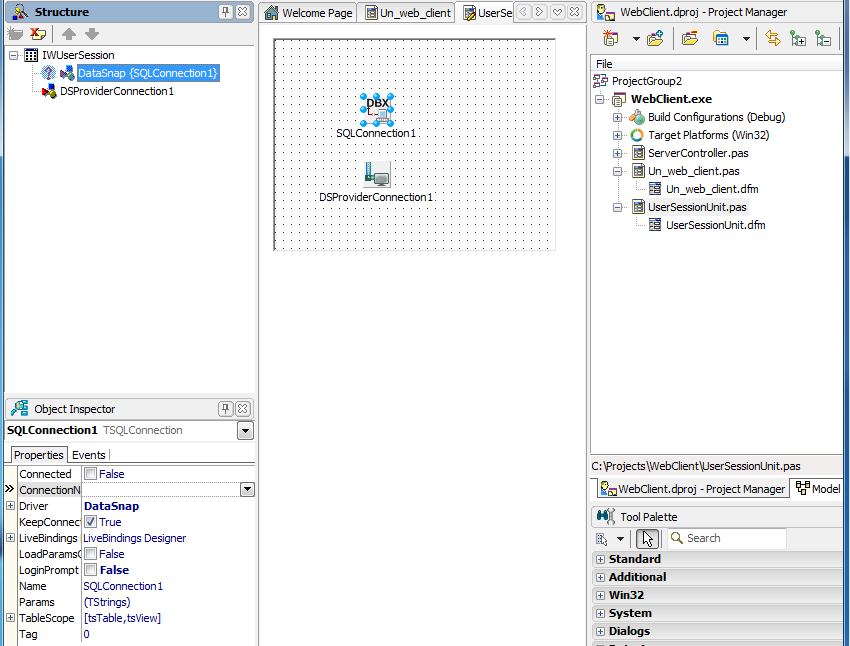
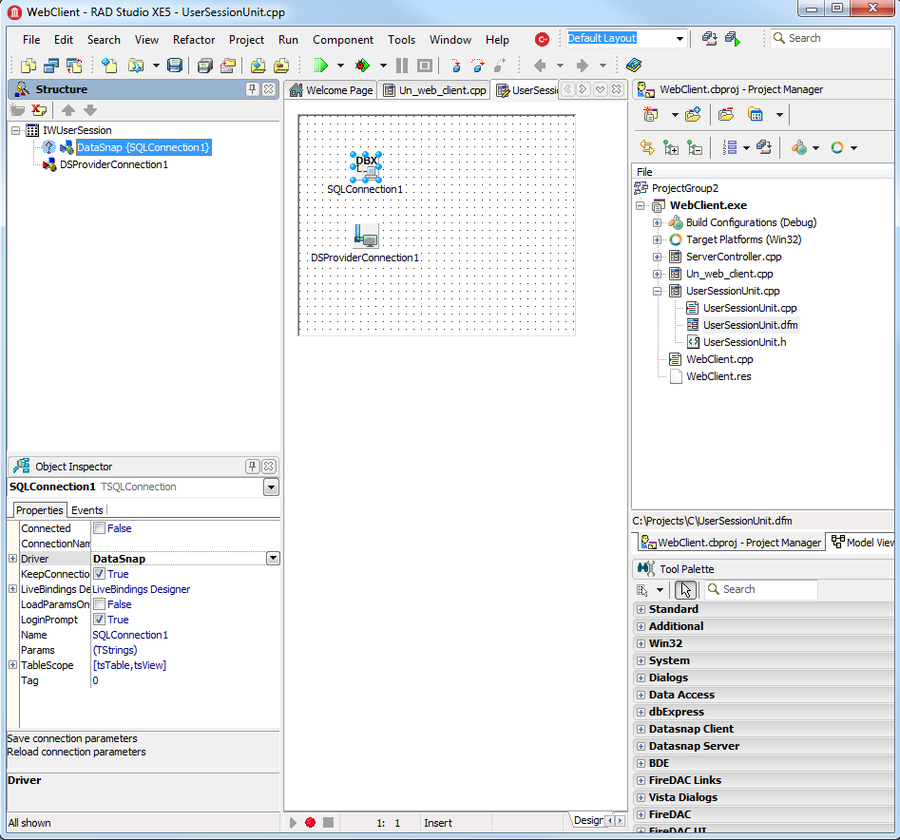
- In the Project Manager, display the UserSessionUnit. We add two components to this form, as shown in the figure below.
- Just as for the local application, the server must be running for us to create the client. If the server is not running, follow the instructions in Creating a Rich-Client Interface to run the server without debugging.
- Place the following components on the UserSessionUnit form, which is a IWUserSession object.
- Add a TSQLConnection, configured just as in Creating a Rich-Client Interface:
- Set the TSQLConnection's Driver property to "DataSnap".
- Set LoginPrompt to false.
- Set the Connected property to true.
- Right-click the TSQLConnection and select Generate DataSnap Client classes. Save this newly generated unit, which contains the client classes:
- Save the unit as Un_web_client_proxy.pas for Delphi.
- Save the unit as Un_web_client_proxy.cpp for C++.
- Place a TDSProviderConnection component on the form.
- Set its SQLConnection property to "SQLConnection1".
- Set the ServerClassName property to "TDSServerModule1.
- Add a TSQLConnection, configured just as in Creating a Rich-Client Interface:
- Create the Web interface.
- For Delphi, rename this unit Un_web_client.pas. Add UserSessionUnit to the
usesclause in Un_web_client.pas. - For C++, rename this unit Un_web_client.cpp. Add the line
- after the other includes in Un_web_client.cpp.
- Add the components needed to make a database connection.
- Place a TClientDataSet on the form.
- Set the ProviderName property to "ServerDataSetProvider1" using the drop-down menu.
- Add a TDataSource.
- Set the DataSet property to ClientDataSet1 using the drop-down menu.
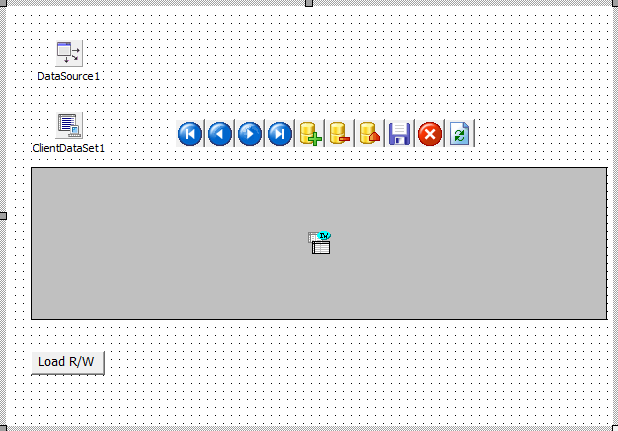
- Place the visual components on the form as shown in the above figure.
- Place a TIWDBNavigator.
- Drag a TIWDBGrid onto the form. Set its Caption to "Client Demo".
- Set the DataSource property on both the TIWDBNavigator and TIWDBGrid to "DataSource1" from the drop-down menu.
- Add a TIWButton. Change its Caption to "Load R/W". This TIWButton serves exactly the same function as the corresponding button in the local client application: to display table data in the grid. Create an event handler for the
OnClickevent of the TIWButton, using the following code: - Save all files and build the project.
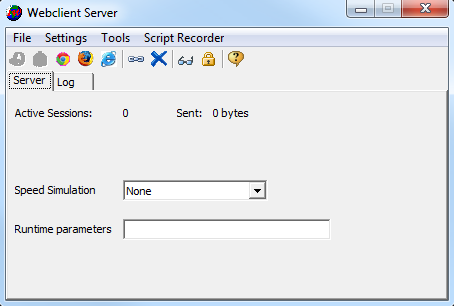
- Run the project to display the IntraWeb Application Server.
Delphi
Double-click UserSessionUnit.pas to display its form.
C++
Double-click UserSessionUnit.cpp to display its form.
Note: TDSServerModule1 is the name of the server class we created in Creating the Server Side with DataSnap Server. The name of the server class is also used in the proxy class in Un_web_client_proxy.pas or Un_web_client_proxy.cpp you just created. The server class's name is used in the following line of code that calls a stored procedure:
Delphi
FcallStoredProcedureCommand.Text := 'TDSServerModule1.callStoredProcedure';
C++
FcallStoredProcedureCommand->Text = "TDSServerModule1.callStoredProcedure";
In the Project Manager, double-click the Unit1 module.
#include "UserSessionUnit.h"
The following figure shows the components that we will add to the form that provides our Web interface:
Click the Design tab to display the Web form for Un_web_client.
Delphi
procedure TIWForm1.IWButton1Click(Sender: TObject);
begin
  ClientDataSet1.RemoteServer := UserSession.DSProviderConnection1;
  ClientDataSet1.Active := true;
end;
C++
void __fastcall TIWForm1::IWButton1Click(TObject *Sender)
{
  ClientDataSet1->RemoteServer = UserSession->DSProviderConnection1;
  ClientDataSet1->Active = true;
}
Note: UserSession.DSProviderConnection1 is the TDSProviderConnection component we added to UserSessionUnit 's IWUserSession (form) earlier. Also, you need to add ServerController unit to the uses clause in Un_web_client.pas.
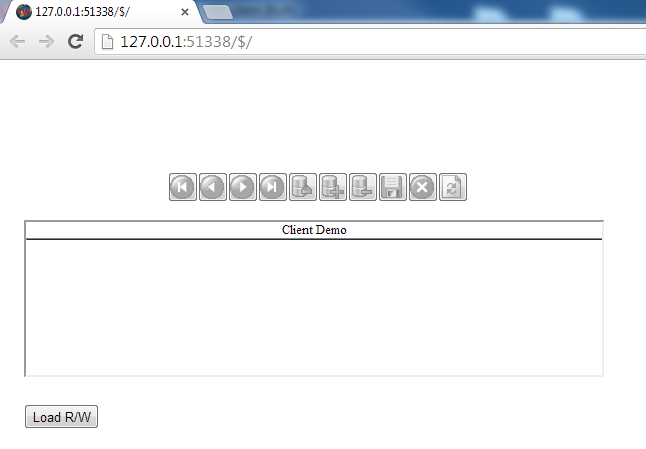
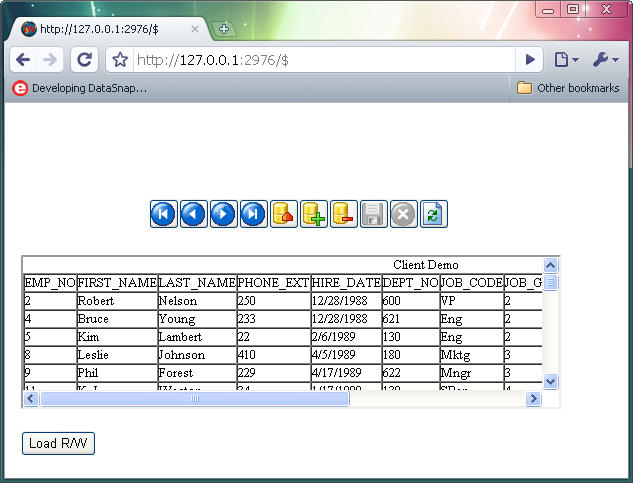
Click the Load R/W button to display the table data in the TIWDBGrid:
This completes the Web interface to the server. You could enhance this Web interface to have all the functions of the local client, created in the previous section. You would add the corresponding IntraWeb visual components and the same database components used in Creating a Rich-Client Interface.
Previous
Creating a Rich-Client Interface
