Using project templates from the Object Repository (IDE Tutorial)
Go Up to Starting your first RAD Studio application Index (IDE Tutorial)
In the IDE, you typically create projects by opening project templates from the Object Repository, and you do this by clicking File > New.
To create this project in RAD Studio, click File > New and then (depending on the language you want to use) choose either:
- Multi-Device Application - C++Builder
- Multi-Device Application - Delphi.
At this point, the File menu and its New command submenu should be displayed as in the two following screenshots.
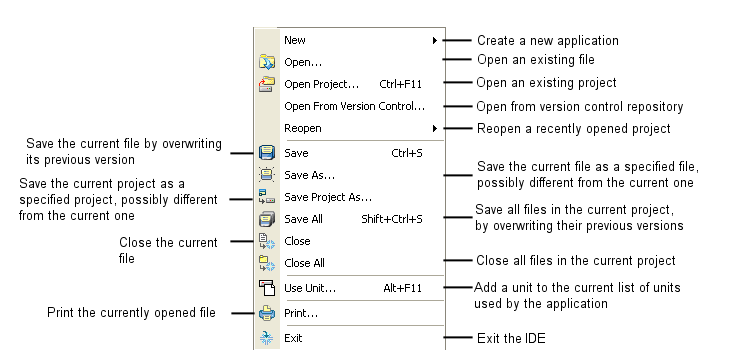
- Description of basic options in the File menu

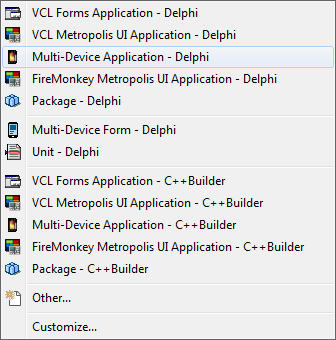
- The File > New submenu

This tutorial uses the Multi-Device Application template available on the File > New submenu. But many additional project templates are available on the New Items dialog box, which you can open by choosing File > New > Other....
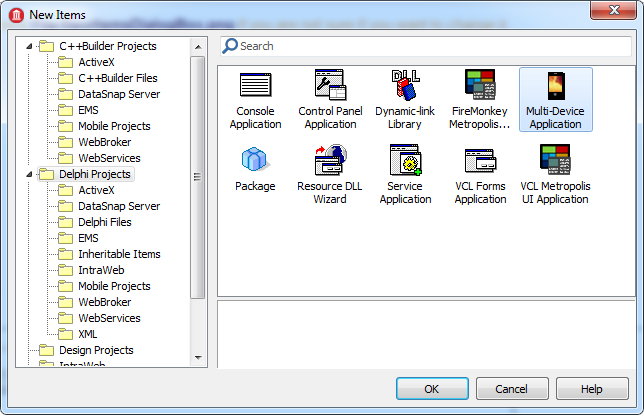
- The New Items dialog box

From the New Items dialog box you can create many types of projects, as well as unit tests, 3rd-party projects, and more.
After you click the Multi-Device Application menu item to create a FireMonkey desktop project, several files are automatically generated, including the main form. After files are generated, the main form is displayed in the Form Designer.
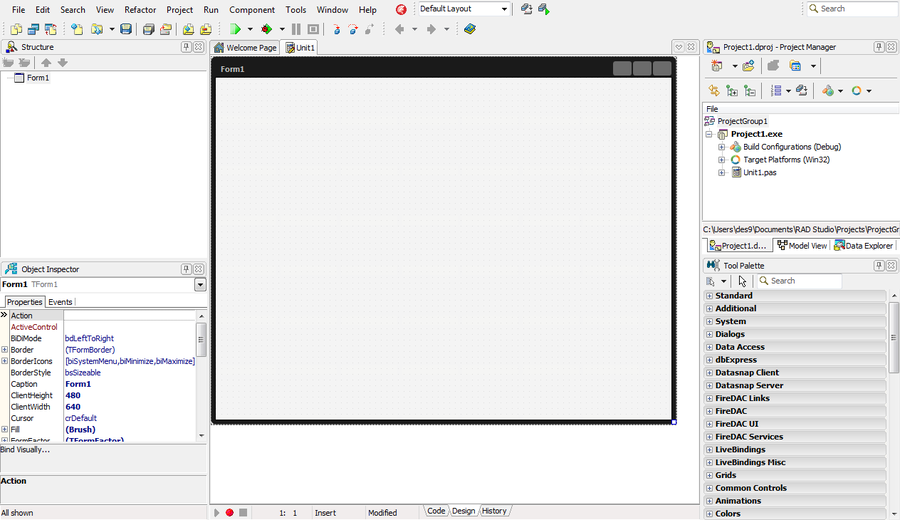
- The default layout for creating a RAD Studio application (Delphi view)

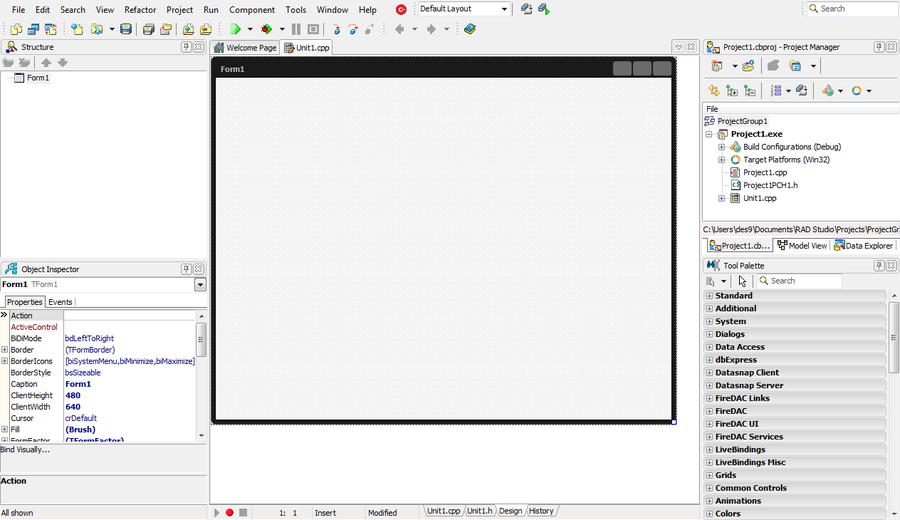
- The default layout for creating a RAD Studio application (C++Builder view)
