Using FireMonkey Image Effects
Go Up to FireMonkey Quick Start Guide - Using Image and Animation Effects
FireMonkey provides many different types of built-in image effects that modify an image either individually or in concert with others to achieve various visual effects.


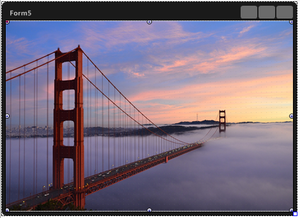
How a ripple effect applies to a picture
In this tutorial, you will use several basic image effects in a FireMonkey application.
Contents
Step 1: Apply an Effect to a Picture
In FireMonkey, applying an image effect to a picture is a straightforward process. Simply create a component that holds a picture, and then apply one of the image effect components.
- Create a new FireMonkey application (File > New > Multi-Device Application > Blank Application).
- Place a TImage component on the form. To do so, type “image” in the search box on the Tool Palette, and then double-click the TImage component:
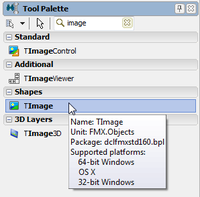
- Selecting a TImage component on the Tool Palette

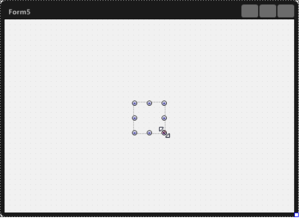
- Placing a TImage component on the Form Designer
- You can see that the TImage component is not placed at the center of the Form Designer. As shown in the image, you need to make the size of the image area as big as possible. To do so, select the TImage component on the Form Designer, and then change the Align property to
Clientin the Object Inspector to make the size of the TImage component be the same as the client area of the form.
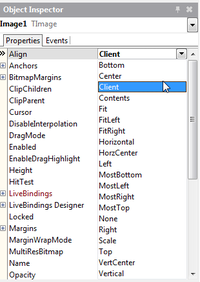
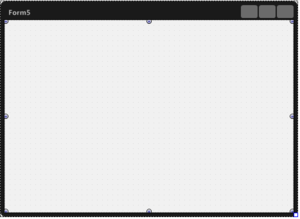
- Changing the Align property to
Client
- Select the picture to which you want to apply the image effect. Open the MultiResBitmap Editor from the MultiResBitmap property from the Object Inspector.
- Note: The MultiResBitmap property allows you to have images of different scales for different device resolutions.
- Selecting a picture on a TImage component
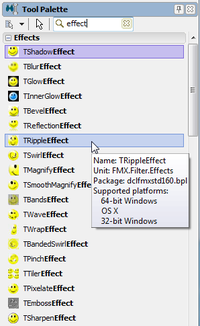
- Now you can select an Image Effect Component. Go to the Tool Palette, type “effect” in the search box, and select TRippleEffect. In the Tool Palette you can find many effects available. You can read detailed explanations of these effects at our API Reference (FMX.Filter.Effects).
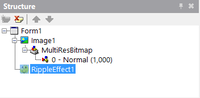
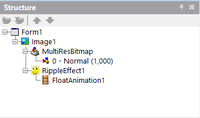
- Now the RippleEffect component is displayed on the Structure Pane.
- To apply an effect, an effect component has to be defined as a child of another component. In this case, RippleEffect1 should be defined as a child of Image1. To do so, drag RippleEffect1 and drop it to Image1 component on the Structure Pane.
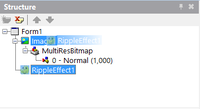

- Making the RippleEffect component a child of the Image1 component
- Now you can see that RippleEffect is already in works on the Form Designer.
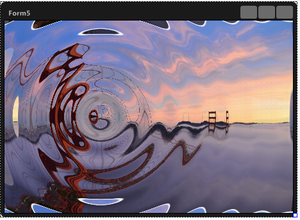
- Applying a ripple effect to a picture on the Form Designer
- You can also change how this effect applies to the image by changing some properties. For example, changing the Frequency property to
20changes the effect as displayed in the following image.


Step 2: Apply an Animation Effect to a Property of an Image Effect
As discussed in FireMonkey Animation Effects, any numeric property can use animation effects (changing value over time). At this step, apply one of the typical animation effects, TFloatAnimation, to this sample application.
- Select RippleEffect1 on the Structure Pane.
-
Select the Phase property in the Object Inspector, and select Create New TFloatAnimation from the drop-down menu.
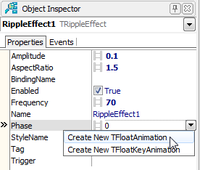
Make sure that now FloatAnimation1 is defined as a child of RippleEffect1.
-
Change the properties of FloatAnimation1 as follows:
Property Value Description Duration
10
The amount of time (in seconds) to animate from the start value to the stop value.
Enabled
True
Starts the animation during the initialization of the runtime.
Loop
True
Repeats the animation indefinitely.
PropertyName
Phase
Specifies the name of the property to animate.
StopValue
20
Terminates the animation of this property when it reaches this value.

Setting the properties of FloatAnimation1
- Execute the application. Now you can see how the ripple effect progresses over time.


Applying Multiple Effects to a Picture
FireMonkey does not support multiple effects for objects, but it can be implemented using a container TLayout, for each different effect.
For example:
To apply two effects to the Bitmap of a TImageControl, apply each effect in a different TLayout:
- Place a TLayout (first container) on the TForm.
- Place another TLayout (second container) on the TForm, hierarchically hanging from the first container.
- Place a TImageControl hanging from the second container.
- Edit the Bitmap property to load an image.
- Place the effect TBlurEffect hanging from the second container.
- Place the effect TReflectionEffect hanging from the first container.
The effects apply at design time and at run time.
See the result in the Structure panel.

See Also
Samples
- FireMonkey Image Filters sample