Adding the components using the Form Designer (IDE Tutorial)
Go Up to Starting your first RAD Studio application Index (IDE Tutorial)
Now that you have set up the main form, you can proceed with arranging the necessary components to create your text editor application. First, you need to add a menu
bar providing the basic options for file manipulation, editing, and other options like toggling word wrap.
Contents
Adding an action list
Add an action list to the form to automatically provide the basic functionality of your application. To do so, make sure the Design tab is selected, go to the Tool Palette and type "action" in the search box. This results in displaying only components with the string "action" in their name, including the TActionList component. The Tool Palette should look as follows:
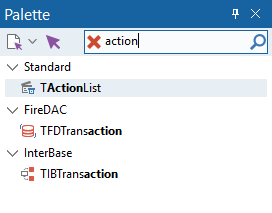
Using theactionfilter in the Tool Palette to select TActionList

Double-click the TActionList button to add it to the form. Now you should change the name of the TActionList to suit your application. Click the TActionList icon ![]() to
activate it. In the Object Inspector, click the Name property and change its value to
to
activate it. In the Object Inspector, click the Name property and change its value to ActionList.
- Tip: Naming your components properly is very important because your code may need to access them using their name. It is useful to set a name you can easily remember.
Next, place a main menu bar on the form. To do this, type "menu" in the search box of the Tool Palette to easily locate the TMainMenu component. When using this filter, the Tool Palette looks as follows:
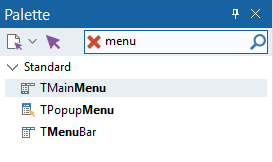
Using the status filter in the Tool Palette to select TMainMenu

Double-click TMainMenu to add it to the form, and use the Object Inspector to change its Name to MainMenu.
Adding a status bar
Next, place a status bar on the form. To do this, type "status" in the search box of the Tool Palette to easily locate the TStatusBar component. When using this filter, the Tool Palette looks as follows:
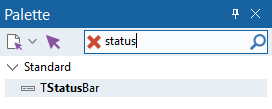
Using the menu filter in the Tool Palette to select TStatusBar

As with the previous components, double-click TStatusBar to add it to the form, and use the Object Inspector to change its Name to StatusBar.
Adding a text box
The most important component to add is a text box that gives your application its main functionality—that of a text editor. Type "memo" in the search box of the Tool Palette to easily locate the TMemo component. When using this filter, the Tool Palette looks as follows:
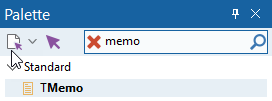
Using the memo filter in the Tool Palette to select TMemo

Double-click TMemo to add it to the form, and use the Object Inspector to change its Name to Editor.
Adding dialogs to open and save files
The only remaining components to add are nonvisual components that provide dialog boxes to open and save files, which you need in order to implement basic open and save functionality in your editor. Click the Dialogs category in the Tool Palette.

Double-click both TOpenDialog and TSaveDialog to add one instance of each of these components to your form. Then, use the Object Inspector to change their Name property to OpenFileDialog and SaveFileDialog respectively.
The main form should now display the action list component, the main menu bar component, the status bar, the memo and the dialog box components you have added to the form:
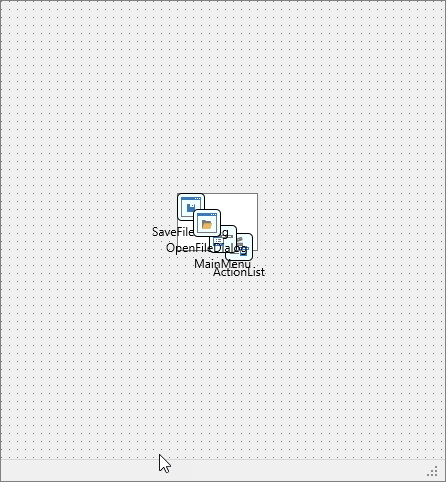
Basic text editor form

Defining your actions
To finish designing the form, you must add the items in the main menu. Start by double-clicking the action list component on the form to open the Action List editor:

You are now ready to create the items to the main menu.
The text editor needs a few file capabilities, so you must define some actions. Click the New Action button to create a new custom action.
With your new action selected, on the Object Inspector change its Category to File. RAD Studio displays this new category in the Categories list on the Action List editor, and displays your new action inside this new category. With your new action still selected, change its Name to NewAction, its Text to New and its ShortCut property to CTRL+N:

Now that the File category is available in the Action List editor, select this category from the Categories list and click the New Action button four times to create four additional actions under the File menu. You can now customize your newly created actions:
- Click Action1 and change its Name to
OpenAction, its Text toOpen...and its ShortCut property toCTRL+O. - Click Action2 and change its Name to
SaveAction, its Text toSaveand its ShortCut property toCTRL+S. - Click Action3 and change its Name to
SaveAsActionand its Text toSave As.... - Click Action4 and change its Name to
ExitActionand its Text toExit.
Your Action List editor should look as follows:
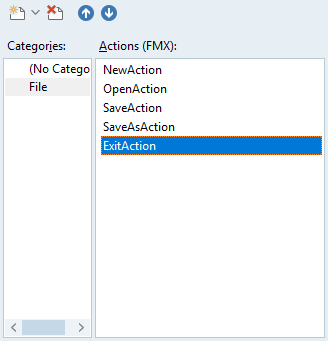
Defining the actions in the File menu

The text editor needs a few edit capabilities as well.
Click (No Category) from the Categories list and press the New Action button to create a new custom action. With your new action selected, on the Object Inspector change its Category to Edit, its Name to CutAction, its Text to Cut and its ShortCut property to CTRL+X.
With the Edit category still selected in the Categories list, press the New Action button five times to create five additional actions under the Edit menu. You can now customize your newly created actions:
- Click Action1 and change its Name to
CopyAction, its Text toCopyand its ShortCut property toCTRL+C. - Click Action2 and change its Name to
PasteAction, its Text toPasteand its ShortCut property toCTRL+V. - Click Action3 and change its Name to
SelectAllAction, its Text toSelect Alland its ShortCut property toCTRL+A. - Click Action4 and change its Name to
UndoAction, its Text toUndoand its ShortCut property toCTRL+Z. - Click Action5 and change its Name to
DeleteAction, its Text toDeleteand its ShortCut property toDel.
You need an additional action to give your text editor a word-wrapping feature. Click (No Category) from the Categories list and press the New Action button to create a new custom action. With your new action selected, on the Object Inspector change its Category to Format, its Name to WordWrapAction and its Text to Word Wrap.
Your actions are now defined. Close the Action List editor to continue.
On the Form Designer, double-click your main menu component to open the Items Designer:

On the Items Designer, you must define the visual items that represent those actions you have defined. Press the Add Item button three times to add instances of TMenuItem for the File, Edit and Format menu entries. Then select each added TMenuItem from the list, and press the Add Child Item button five times for the first menu item, six times for the second menu item and once for the third menu item:

To associate these visual menu items with their actions:
- Select each of the three main items, and on the Object Inspector:
- Select each one of the submenu items, and on the Object Inspector give it a proper name and change its Action property to its corresponding action. For example, select the first submenu item under File in the Items Designer list, and on the Object Inspector change its Name to
NewMenuand its Action property toNewAction.
The following image shows how the list in the Items Designer should now look.
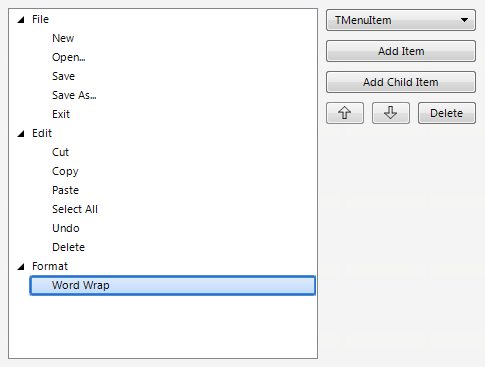
Final content on the Items Designer

Close the Items Designer.