Usages
Go Up to ER/Studio Business Architect Tools
You can show the create, read, update, or delete database attributes on a connection. When this connection is created they are labeled with the attributes you selected at the time of creation. These elements can consist of reference objects, data objects, and elements within a diagram. Once you create these usage indicators, you can edit and export the usage. You can also create an Impact Analysis Diagram displaying the created usage.
- Note: When you create a usage, the wizard creates a many-to-one relationship.
Creating a Usage
- 1 In the Model View tree, right-click an element (i.e., project, model, pool, lane, or element) and select Usage (CRUD)>
New.
- OR
- On the main menu select Tools > Create Usage and the Create Usage Wizard opens for the selected element.
- OR
- Right-click an element in the diagram and select Usage (CRUD) > New to open the Create Usage Wizard.
- OR
- Note: You can also draw a usage between two elements by using the Usage icon (
) on the Reference Objects palette.
- 2 In the Create Usage dialog, you can specify the details for the new usage:
- 3 Once you have specified all the details for the new usage click OK. You can view this newly created usage five different ways:
- Create an Impact Analysis Diagram.
- Right-click either the source or target element and select Connections > Show > Usages.
- Right-click an element in the Model View and select Usage(CRUD) > Edit or View... and the Property View opens. Click the Impact Analysis tab for either one of the connected elements.
- The created usage appears in the Model View tree in either an Incoming Relationships or Outgoing Relationships node (depending on whether you selected the source or target element). In the following example the task “Task in Invisible Pool” has an outgoing “usage” relationship to the task “Task”.
- 4 You can show the usage name by right-clicking on the link and selecting Show > Name.
- 5 The CRUD attributes are shown by default. You can hide these attributes by right-clicking on the Usage and deselecting the Show > Usage command.
Editing Usage
You can edit the names, attributes, descriptions and notes for usages by using the Usage (CRUD) property view.
- 1 Right-click the source element in the Model View tree and select Usage (CRUD) > Edit. The Property View for that element opens with the Usage (CRUD) tab displayed. This tab displays the receivers and their usage settings in the grid.
- 2 Select a receiver from the grid and click the Edit Usage
. You can edit the name and usage settings for the selected usage under the General tab. You can also add or edit descriptions and notes.
- Note: You can also double-click the usage you just created, either in the Model View or in the diagram, and you are taken directly to the Property View for the usage.
- 3 If you want to edit just the usage setting, select the receiver in the grid and press F2. This places you in an edit mode for that cell.
Exporting a Usage
You can export the Usage (CRUD) report from the Property View using four different formats: CSV, HTML, PDF, and RTF.
- 1 From the Model View or the diagram, double-click the source element of the Usage (CRUD) relationship to open the Property View. For example if you created a usage from “Task A” to “Task B”, you would double-click on “Task A”.
- 2 Click the Usage (CRUD) tab to open the report and click export icon (
).
- 3 In the Export dialog export the folder location you want to save the report in. The default location is the current workspace folder.
- 4 You can use the default file name or rename it.
- 5 Select the type of report you want to generate: CSV, HTML, PDF, or RTF and click Save. A file is generated and the Export dialog closes.
- 6 Open the folder where you saved the report and double-click to open it. The following example shows a report exported in the CSV format.
Drawing a Usage
Instead of using the Create Usage wizard, you can create a usage in the Diagram View using the Usage () icon in the Reference Objects palette or Reference Objects toolbar.
- 1 Click the drop-down arrow on the Reference Objects palette and select
Usage, or select
from the Reference Objects toolbar.
- 2 Click the element that is the origination of the usage.
- 3 Click the element that you want the first element connected to and a usage is created.
- Note: The usage that is placed in the diagram has an editable text field containing the usage settings (C, R, U, D). You can change these settings in the text field.
- 4 Right-click the usage and select Show > Name. The connection is labeled with the source and target name (for example “Lending.Securities”.
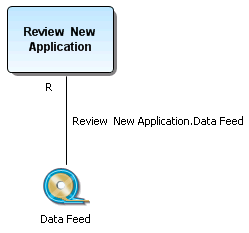
- 5 You can set the usage type in the Property View, which can be shown as well. In the following example the usage indicator is “R” for read.


