Tutorial: Using TPrototypeBindSource and the LiveBindings Designer
Go Up to Database and LiveBindings Tutorials
This tutorial shows how to use LiveBindings Designer and TPrototypeBindSource in order to visually create LiveBindings between controls for fast developing of applications that require little or no source code.
- Note: TPrototypeBindSource can be used to generate sample data for the LiveBindings in your project. After you prototype an application, configure the real data source so that you see the new data source fields in the LiveBindings design. Use the LiveBindings Designer to connect all the controls and properties to the new data source. When a control or property is connected to the new data source, the connection to the Prototype bind source is automatically removed.
Contents
Step 1: Creating the Project
Create a new project. Choose an HD Multi-Device Application for this example.
- Drag and drop a TPrototypeBindSource component onto the Form Designer.
- In the Tool Palette, locate a TBindNavigator component and drop it onto the form.
- Do the same with a TColorListBox, a TRectangle, and a TEdit control.
In this tutorial you will learn how to build an application that uses multiple methods (navigating a random data set with colors, direct typing of a color ID, or selecting a color from a list) for changing the fill color of a rectangle.
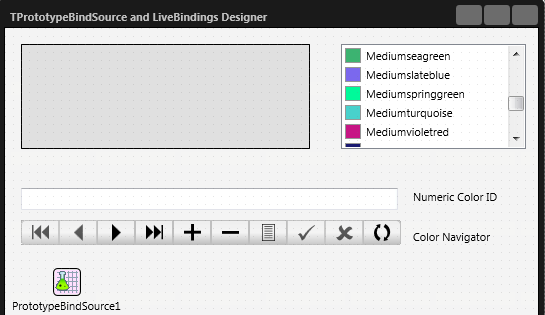
After placing the components on the form, it should look as in the following image:
Step 2: Adding Fields
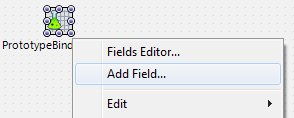
Right-click the TPrototypeBindSource component and select the Add Field... command:
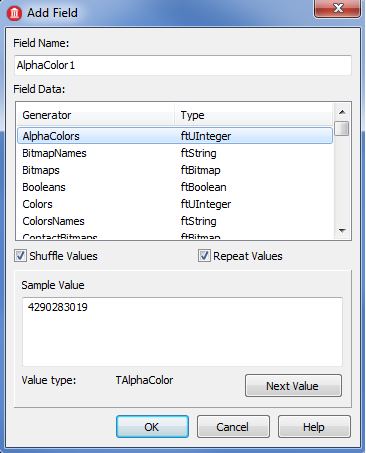
From the Add Field dialog box, select AlphaColors to add a color field to the object bind scope:
Step 3: Creating LiveBindings
Start the LiveBindings Designer if it is not already opened (View | LiveBindings Designer).
At the beginning, your bindings diagram should be similar to the one pictured below, with no connection lines, thus no bindings:
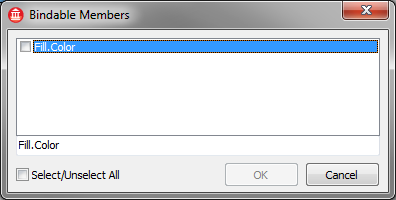
Now click the three dots on the Rectangle1 block in the LiveBindings Designer, and from the Bindable Members dialog box, choose the Fill.Color property. Click OK:
At this point, just create the bindings:
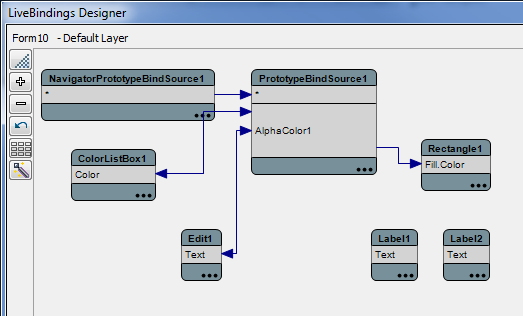
- Bind the
AlphaColor1member of the PrototypeBindSource1 object to theColormember of the ColorListBox1 object. - Bind the
AlphaColor1member of the PrototypeBindSource1 object to theTextmember of the Edit1 object. - Bind the
AlphaColor1member of the PrototypeBindSource1 object to theFill.Colormember of the Rectangle1 object. - Bind the
*member of the BindObjectScope1 object to the*member of the BindNavigator1 object.
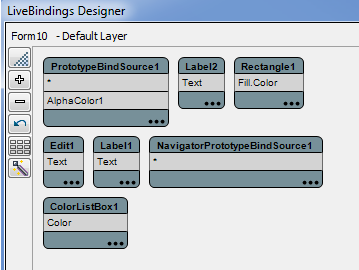
Your binding diagram should look as in the following image:
The Results
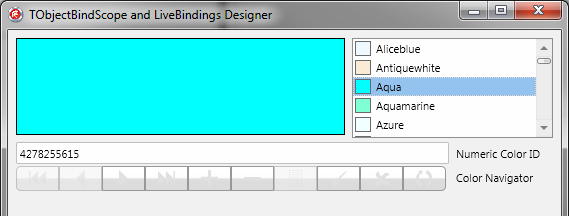
Writing no code, you just obtained a functional application that you are ready to test. Run the application by pressing F9 or using the Run > Run menu command.
Use the application by:
- Changing the colors from the bind navigator. The data source (TPrototypeBindSource) has a set of random colors that will be used to fill the rectangle, update the edit box, or if the color ID is matching an existing color in the list, update the color list box.
- Changing the color from the color list box.
- Typing a color ID in the edit box (try 4292613180, for instance; it should turn to a shade of red).
- Typing a color ID in the edit box, or selecting a color from the color list box, and pressing Apply on the bind navigator to store the color in the data source.
