Adding A Java Library to Your Application Using the Project Manager
Go Up to Using a Custom Set of Java Libraries In Your RAD Studio Android Apps
Using the Projects Window is the simplest approach to add your Java libraries to your application. This approach should work for most people. If you need to modify or remove built-in RAD Studio Java libraries for Android, see Creating and Deploying a classes.dex File Manually.
To add a Java library file (.jar) to your Android application
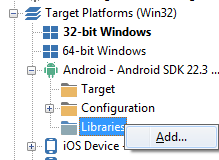
- In the Project Manager, extend the Target Platforms node of your project. Within the Target Platforms node, extend the Android node.
- Right-click the Libraries node and select Add.
- In the dialog box that opens, select the
.jarfile that you want to add to your application for Android, and select Open.
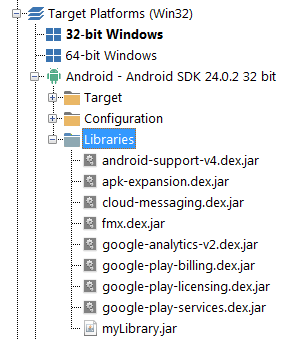
- Now the Project Manager displays your custom Java library under the Libraries node.
- You can now use your Java library.
- Remember to create a native bridge file for your Java library if you do not have one yet.
- For more information, see Using a Custom Set of Java Libraries In Your RAD Studio Android Apps.
To remove a previously-added custom Java library
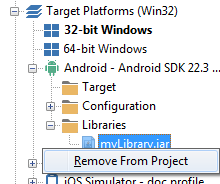
- Right-click the node of your Java library on the Project Manager.
- Select Remove From Project.


