Adding a Windows 10 SDK
A software development kit (SDK) provides a set of files that are used to build applications for a target platform. To create the .appx packages, you need to have the Windows 10 SDK on your development system.
RAD Studio Provides a Windows 10 SDK
During the RAD Studio installation, the installer adds the required Windows SDK to your system. You can also download the standalone SDK and configure RAD Studio manually to use it.
Adding a Windows SDK to RAD Studio
To add a Windows 10 SDK to RAD Studio:
- Select Tools > Options > Environment Options > SDK Manager and click the Add button.
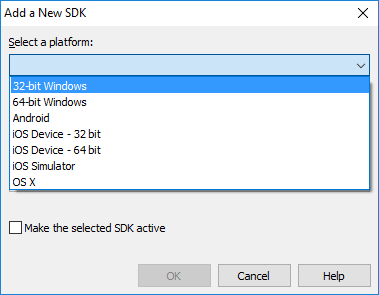
- In the Add a New SDK dialog box, select 32-bit Windows or 64-bit Windows from the Select a platform drop-down list.
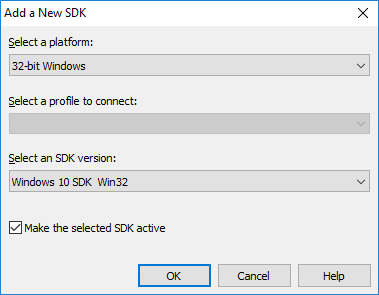
- In the Select an SDK version drop-down list, select Add new and complete the steps of the Create a New Windows 10 SDK wizard:
- In the Windows SDK Base Path, click
 to browse to the location where you installed the SDK and click Next.
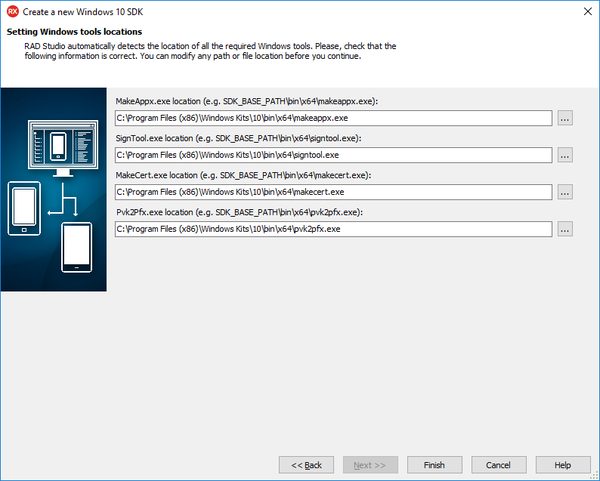
 - On the Setting Windows tools locations page, the wizard automatically fills in all fields.
- For any fields that are not auto-populated or are marked with
 , click the entry field and browse to the location of the specific utility on the disk.
- Click Finish to create the new SDK.
- Note: The Finish button is disabled until all fields are filled in correctly.
- In the Windows SDK Base Path, click
- In the Add a New SDK dialog box, select Make the selected SDK active if you want the new SDK to be the default SDK for Windows.
- Click OK to continue.
The Windows 10 SDK version is now listed in the SDK Manager:


