Using FireMonkey Text Layout Features
Go Up to FireMonkey Text Layout
The following example shows how to use the text layout features available in FireMonkey.
The example contains the code showing how to render text on a TImage object, and how to use the PositionAtPoint, RegionForRange and ConvertToPath methods.
Contents
Creating a Multi-Device Blank Application
- Create a new multi-device blank application.
- From the Tool Palette, add the following components to your form:
- A TImage
- A TRadioButton
- Three TButtons
- From the Object Inspector, create event handlers for the OnCreate event of the TForm, the OnPaint event of the TImage, and the OnClick event of each TButton.
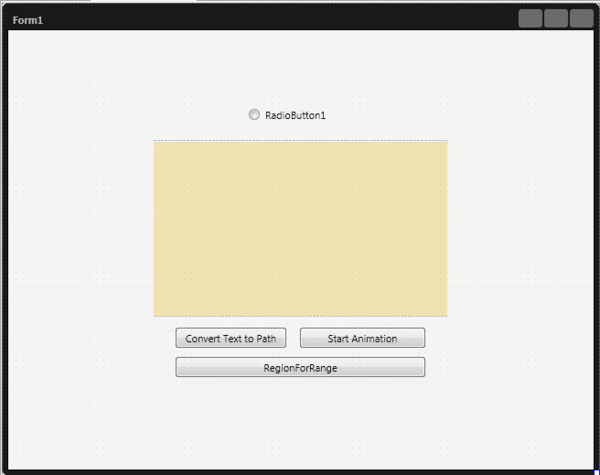
- Here is the result at design time:

Adding the Code that Uses Text Layout
- Add the following declarations:
In Delphi:
MyLayout: TTextLayout;
PathAnimation1: TPathAnimation;
In C++:
//header file
TPathAnimation *PathAnimation1;
TTextLayout *MyLayout;
In Delphi:
procedure TForm1.FormCreate(Sender: TObject);
begin
  RadioButton1.Position.X := Image1.Position.X - 5;
  RadioButton1.Position.Y := Image1.Position.Y - 5;
  RadioButton1.Text := '';
end;
In C++:
void __fastcall TForm1::FormCreate(TObject *Sender) {
	RadioButton1->Position->X = Image1->Position->X - 5;
	RadioButton1->Position->Y = Image1->Position->Y - 5;
	RadioButton1->Text = "";
}
In Delphi:
procedure TForm1.Image1Paint(Sender: TObject; Canvas: TCanvas;
  const ARect: TRectF);
var
  WPosition: Integer;
begin
  MyLayout := TTextLayoutManager.DefaultTextLayout.Create;
  MyLayout.BeginUpdate;
  MyLayout.TopLeft := TPointF.Create(0, 0);
  MyLayout.Font.Size := 78;
  MyLayout.Font.Family := 'Tahoma';
  MyLayout.Font.Style := [TFontStyle.fsBold];
  MyLayout.Text := 'TEXT';
  MyLayout.Color := TAlphaColorRec.Brown;
  WPosition := MyLayout.PositionAtPoint(TPointF.Create(159, 120));
  MyLayout.AddAttribute(TTextRange.Create(WPosition, 3),
    TTextAttribute.Create(TFont.Create, TAlphaColorRec.Black));
  MyLayout.EndUpdate;
  MyLayout.RenderLayout(Canvas);
end;
In C++:
void __fastcall TForm1::Image1Paint(TObject *Sender, TCanvas *Canvas,
	const TRectF &ARect)

{
	int WPosition;
	Fmx::Graphics::TFont *font;
	MyLayout = TTextLayoutManager::TextLayoutForClass
		(TTextLayoutManager::DefaultTextLayout);
	MyLayout->BeginUpdate();
	MyLayout->TopLeft = TPointF(0, 0);
	MyLayout->Font->Size = 78;
	MyLayout->Font->Family = "Tahoma";
	MyLayout->Font->Style = TFontStyles(1);
	MyLayout->Text = "TEXT";
	MyLayout->Color = TAlphaColorRec::Brown;
	WPosition = MyLayout->PositionAtPoint(TPointF(159, 120));
	MyLayout->AddAttribute(TTextRange(WPosition, 3),
		TTextAttribute(font, TAlphaColorRec::Black));
	MyLayout->EndUpdate();
	MyLayout->RenderLayout(Canvas);
}
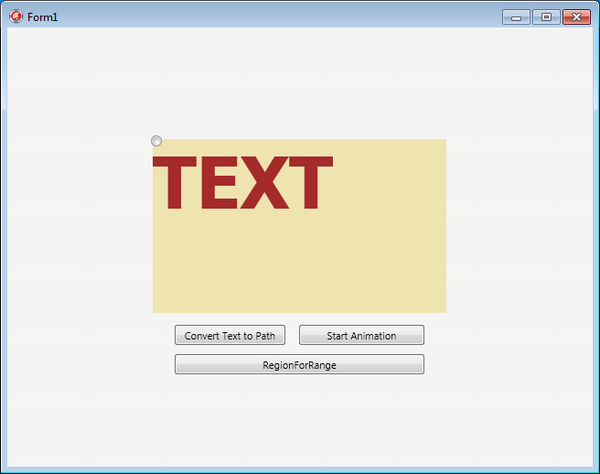
- Here is the result at run time:

- 3. Add the following code to the OnClick event handlers of the TButton in order to convert text to path and start animation:
In Delphi:
procedure TForm1.Button1Click(Sender: TObject);
var
  PathD: TPathData;
begin
  PathAnimation1 := TPathAnimation.Create(Self);
  PathAnimation1.Parent := RadioButton1;
  PathD := TPathData.Create();
  MyLayout.ConvertToPath(PathD);
  PathAnimation1.Path := PathD;
  PathAnimation1.Loop := True;
  PathAnimation1.Duration := 50;
end;

procedure TForm1.Button2Click(Sender: TObject);
begin
  PathAnimation1.Start;
end;
In C++:
void __fastcall TForm1::Button1Click(TObject *Sender) {
	TPathData *PathD;
	PathAnimation1 = new TPathAnimation(this);
	PathAnimation1->Parent = RadioButton1;
	PathD = new TPathData();
	MyLayout->ConvertToPath(PathD);
	PathAnimation1->Path = PathD;
	PathAnimation1->Loop = true;
	PathAnimation1->Duration = 50;
}

void __fastcall TForm1::Button2Click(TObject *Sender) {
	PathAnimation1->Start();
}
- Here is the result at run time:


In Delphi:
procedure TForm1.Button3Click(Sender: TObject);
var
  MyRects: TRegion;
begin
  MyRects := MyLayout.RegionForRange(TTextRange.Create(1, 1));
  Image1.Bitmap.Canvas.BeginScene;
  Image1.Bitmap.Canvas.DrawRect(MyRects[0], 0, 0, AllCorners, 100);
  Image1.Bitmap.Canvas.EndScene;
end;
In C++:
void __fastcall TForm1::Button3Click(TObject *Sender) {
	TRegion MyRects;
	MyRects = MyLayout->RegionForRange(TTextRange(1, 1));
	Image1->Bitmap->Canvas->BeginScene();
	Image1->Bitmap->Canvas->DrawRect(MyRects[0], 0, 0, AllCorners, 100);
	Image1->Bitmap->Canvas->EndScene();
}
- Here is the result at run time:


Uses
- TextLayout.TTextLayoutManager
- TextLayout.TTextLayout
- TextLayout.TTextLayout.AddAttribute
- TextLayout.TTextRange
- TextLayout.TTextAttribute
- TextLayout.TTextLayout.RenderLayout
- TextLayout.TTextLayout.PositionAtPoint
- TextLayout.TTextLayout.RegionForRange
- TextLayout.TTextLayout.ConvertToPath