User:Mariac/Creating the Server Side with DataSnap Server and FireDac (InterBase Tutorial)
Go Up to Tutorial: Using an InterBase Database in a Delphi or C++ Application
You can implement a server in either Delphi or C++. This example shows both. The client does not need to be implemented in the same language. DataSnap allows you to have a Delphi server and a C++ client—or vice versa.
Follow these steps to create a server.
- Create a new project.
- For Delphi, choose File > New > FireMonkey Desktop Application - Delphi to create a new Delphi project.
- For C++, choose File > New > FireMonkey Desktop Application - C++Builder to create a new C++Builder project.
- Drag the following components from the DataSnap Server category of the Tool Palette onto the form:
- Set the form's Caption property to "ServerForm". Click File > Save All to save the project.
- For Delphi, save the file as ServerForm.pas and save the project as ServerDemo.dproj.
- For C++, save the file as ServerForm.cpp and save the project as ServerDemo.cbproj.
- Set the form's Caption property to "ServerForm". Click File > Save All to save the project.
- Your server form should now look like this:

- Follow these steps to link the three components together:
- Select the TDSServerClass component on the form. On the drop-down menu, set its Server property to the name of your TDSServer component, DSServer1 in this example.
- Select the TDSTCPServerTransport component on the form. On the drop-down menu, set its Server property to the name of your TDSServer component, DSServer1 in this example.
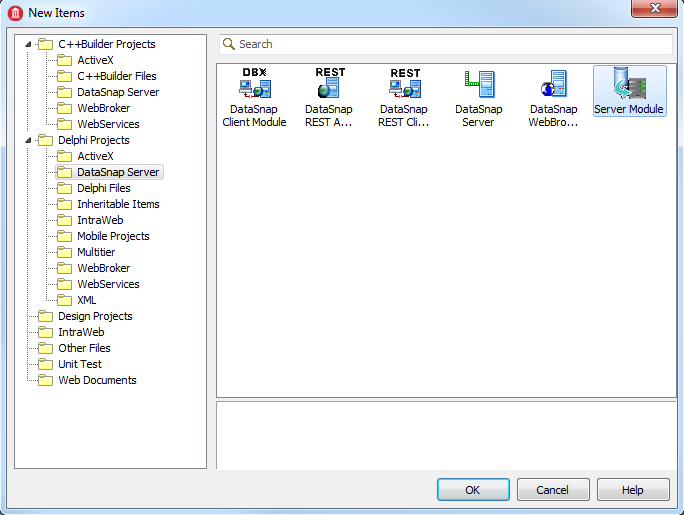
- Display the New Items dialog by doing either of the following:
- Click the New items tool button

- Choose File > New > Other.
Add a new Delphi file called a ServerModule by going to Delphi Projects > DataSnap Server. Select ServerModule and click OK. Save the module as Un_ServerModule.pas.
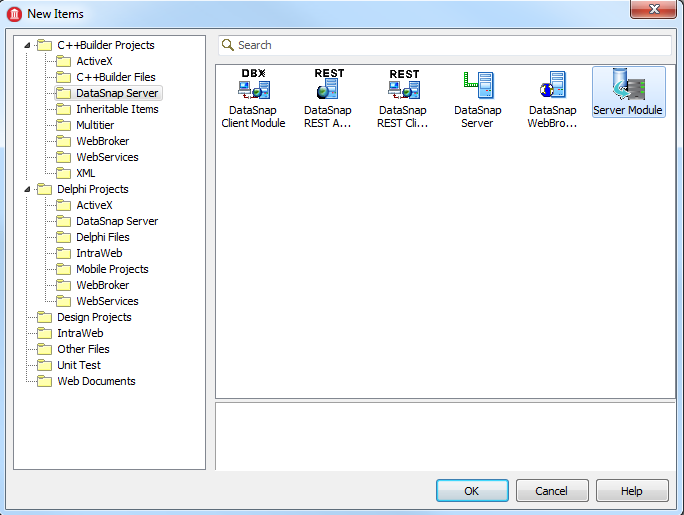
In C++
Add a new C++ file called a ServerModule by clicking the tab C++Builder Projects > DataSnap Server. Select ServerModule and click OK. Save the module as Un_ServerModule.cpp.
- Click the New items tool button
- Un_ServerModule is a Data Module to which you can add various database controls. You can also add public methods to its code using the Code Editor, as shown later.
- Add the following components:
- A TFDConnection component. Set its Name property to "EMPLOYEE_CONNECTION".
- Right-click the component and click Connection Editor. The FireDac Connection Editor window opens where you have to define the connection parameters.
- Select IB from the drop-down menu for the Driver ID field.
- Set the path to the Interbase database: C:\Users\Public\Documents\Embarcadero\Studio\19.0\Samples\Data\EMPLOYEE.GDB.
- Set the User_Name and Password. The values by default for these parameters are User_Name = sysdba and Password = masterkey.
- Click OK to save the changes.
- On the Object Inspector change the LoginPrompt property to False.
- Set the Connected property to True.
- A TFDTable component. Change its Name property to "EMPLOYEE_TABLE".
- On the Object Inspector set its Connection property to "EMPLOYEE_CONNECTION".
- Set its TableName property to "EMPLOYEE" on the drop-down menu.
- Add the functions to Un_ServerModule that you want to expose as
public. - In C++:
- Write code for the function you just added.
- In C++:
- Go back to ServerForm by clicking the ServerForm tab in the RAD Studio file list. Click the Design tab, then click on the form. Select the TDSServerClass component. In the Object Inspector for the TDSServerClass component, click the Events tab and double-click on OnGetClass. This event handler code determines which server class the server uses:
- For Delphi, go to the
usessection of the ServerForm unit and add Un_ServerModule, so that TDSServerModule1 is recognized. - For C++, add this line after the other includes in ServerForm.cpp:
- Save the unit. Build the server project and fix any errors, but do not run the server at this time.
- Click on the Project Manager tab in RAD Studio. Save the project group by right-clicking the project group and clicking Save Project Group. Save the project group as DSProj.groupproj. In the next section we will add another project to this project group.


The data module now looks like the figure below. Although this figure shows a Delphi project, the C++Builder project looks very similar.

Note: All server methods in the
publicsection of Un_ServerModule may be called by the client.
In Delphi:
Click the Code tab. In the type section under public, add this function declaration:
function GetTable: TDataSet;
Add this var before the implementation section:
var
  DSServerModule1: TDSServerModule1;
CTRL-SHIFT-C to create a stub for this function in the implementation section.
On the "Un_ServerModule.h" add this function declaration:
TDataSet * __fastcall GetTable(); // This function returns a TDataSet that contains the table from the IB connection.
In Delphi:
Add the following function to Un_ServerModule.pas':
function TDSServerModule1.GetTable (): TDataSet;
begin
 EMPLOYEE_TABLE.Close;
 EMPLOYEE_TABLE.TableName := 'employee';
 EMPLOYEE_TABLE.Open;
 Result := EMPLOYEE_TABLE;
end;
Add the following function to "Un_ServerModule.cpp" .
TDataSet *__fastcall TDSServerModule_EMPLOYEE::GetTable()
{
	EMPLOYEE_TABLE->Close();
	EMPLOYEE_TABLE->TableName = "employee";
	EMPLOYEE_TABLE->Open();
	return EMPLOYEE_TABLE;
}
In Delphi:
procedure TForm1.DSServerClass1GetClass(DSServerClass: TDSServerClass;
  var PersistentClass: TPersistentClass);
begin
  PersistentClass := TDSServerModule1;
end;
In C++:
void __fastcall TForm1::DSServerClass1GetClass(TDSServerClass *DSServerClass,
	TPersistentClass &PersistentClass)
{
	PersistentClass = __classid(TDSServerModule1);
}
Note that the variable PersistentClass is assigned to a class reference—not an object reference.
Provide the linkage needed in ServerForm to Un_ServerModule.
#include "Un_ServerModule.h"
This completes the server, which gets the employee table.
Previous
Creating a Database Connection