Tool Palette (IDE Tutorial)
Go Up to Tools Index (IDE Tutorial)
The Tool Palette contains the components you use to develop your application. The Tool Palette is displayed as a list of component categories and is usually located in the IDE's right column. Each of the categories in the Tool Palette contains icons that represent visual or nonvisual components.
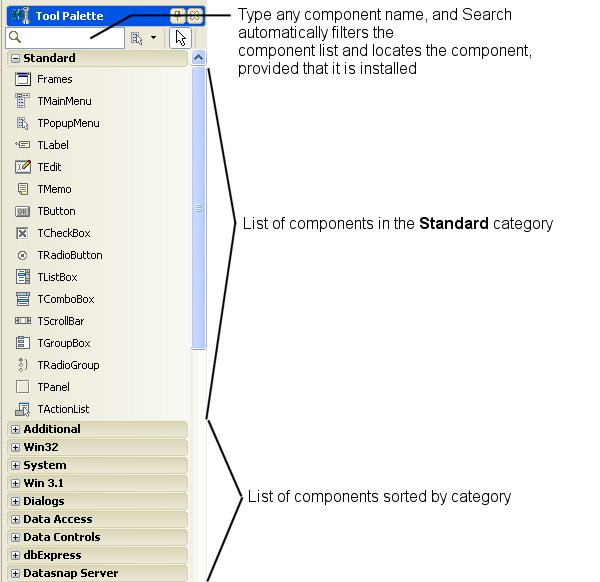
The categories divide the components into functional groups. For example, the Standard category includes common controls such as a button, or an edit box. The Dialogs category includes common dialog boxes to use for file operations, such as opening and saving files. Click the plus sign on a category tab to see all the components in that category.
The contents of the Tool Palette change when switching between displaying the Form designer (Design mode) and displaying the application's code in the Code Editor. More information on the Code Editor is given in the Code Editor section. Thus, if you are viewing a form in Design mode, the Tool Palette displays components that are appropriate for a form.
You can also filter the components you see in the Tool Palette. When you type text in the filter field, only components whose name contains that string are listed. Pressing CTRL+Alt+P forces focus to the palette's filter.
Double-clicking a component on the Tool Palette adds it to your form. You can also drag a control to a desired position on the form. After components are on the form, you can drag them to the precise positions you want.
Each component has specific attributes—properties, events, and methods—that enable you to control your application. Use the Object Inspector to customize the components' behavior, as shown in the following section.
Figure 2-8. The Tool Palette showing the Standard components category
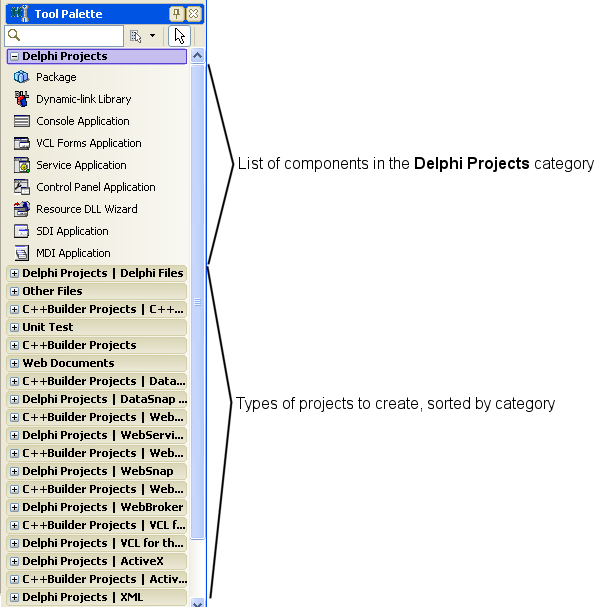
If you are viewing code in the Code Editor, the Tool Palette displays project types that you can add to your project group and file types that you can add to your project.
Figure 2-9. The Tool Palette in Code Editor mode, showing the standard Delphi Projects templates
You can customize the Tool Palette, changing the order of the categories by dragging them to a new location in the list. You can also create a new category and copy frequently used components into it.
In addition to the components that are installed with RAD Studio, you can add customized or third-party components to the Tool Palette and save them in their own category.
You can also create templates that are composed of one or more components. After arranging components on a form, setting their properties, and writing code for them, you can save them as a component template. Later, by selecting the template from the Tool Palette, you can place the preconfigured components on a form in a single step, which results in all associated properties and event-handling code being added to your project. You can reposition the components independently, reset their properties, and create or modify event handlers for them just as if you had placed each component in a separate operation.

