Tutorials: Using Data Dictionary Domains to Populate New Entity
Go Up to Introduction
As instructed in Getting Started, you have chosen to draw a new data model to begin a logical model from the ground up. Before we begin to add entities, we will populate ER/Studio Data Architect with some sample domains.
What is a Domain? Domains are simply re-usable Attributes/Columns and are valuable tools in establishing standards. They allow data modelers to create a data element once (such as an ID field you require all of your entities to leverage as its primary key) which has the same data type, definition, rule, and constraint no matter where the data element is distributed and bound. Read more about Domains in ER/Studio Data Architect User Guide.
- Choose Tools > Import Data Dictionary.
- Next to the File Location box, click the ellipsis and browse to the Sample Models folder, which is located at C:\ProgramData\IDERA\ERStudioDA_x.x\Sample Models .
- Double-click the Orders.dm1 sample model and then click OK.
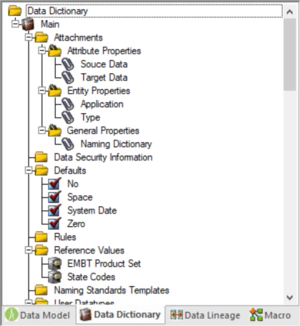
- This model contains a pre-populated, sample data dictionary.
 Note: Under Resolve Imported Objects with Duplicate Names, you can choose between a couple of options to determine how the dictionary objects are imported. This is important when importing into a diagram that already has dictionary objects in it.
- Once opened, you will see that the ER/Studio Data Architect Model Explorer has automatically switched to the Data Dictionary tab to allow immediate drag-and-drop access to domains.
- Now, to add an entity to the Data Model Window, click the Entity tool on the Insert ribbon, and then click in the Data Model Window to drop the entity.
 Tip: The cursor will change to an entity symbol once the Entity tool is clicked, so you can click to drop as many entities on the Data Model Window as you want.
- Right-click to return your mouse to the selection cursor.
- Right-click the entity and click Edit Entity to open the Entity Editor. In Entity Name, type Customer, replacing the default entity name, and then click OK.
- In the Domains folder of the Data Dictionary tab, locate the ID domain in the Numeric Domains folder.
- Click the ID domain (do not release your mouse), drag it onto the Customer entity, and then release it just below the entity’s name, which is the entity’s Primary Key field.
- Tip: You can edit or rename an entity and insert, edit or rename attributes by holding down the Shift key and then clicking the name or attribute. Pressing the Tab key cycles between the entity’s name, and primary key and non-primary key fields. After naming the field, press Return to insert a new field.
- Tip: If you need to zoom in on the entity to read the entity name and attributes, press F8 to view the Zoom Window, then use the scroll bars of the Zoom Window to center the entity on the Data Model Window. Press Shift while rolling the mouse wheel forward to increase the view magnification. You can use the Pan tool to reposition the view to better see the entity.
- Edit the entity again and in the Entity Editor, click ID, the name of the attribute we just created from the ID domain, and change its Attribute Name and Default Column Name properties to CustomerID, as seen in the illustration above. Then click OK.
- Repeat the process in step 7 and step 8 to populate the Customer entity with the following domains:
- Name and Phone from the Property Domains folder
- Address, City, State, Zip Code from the Address Domains folder.
- Drop another entity on the Data Model Window and call it Order.
- Drag the ID domain onto the Order entity’s Primary Key field, change the Attribute and Column name to OrderID.
- Right-click the Order entity and select Comments.
- Enter some text in the Comments editor, click Add and then click OK. You can add comments to any database object in the same manner. This can be very useful when you want to provide feedback on a model to other users.
- Save your data model. We will use it in the next session of this tutorial.


