Supporting high-DPI images with the Image Collection and Virtual ImageList components
Contents
Overview
RAD Studio allows you to include scaling, high-DPI, multiple-resolution images in your Windows VCL applications by using the TImageCollection component in combination with the TVirtualImageList component.
These paired components separate the concept of a collection of images (where each logical image can have multiple resolutions) from a list of images at a single specific size used for a control. Briefly, load multiple resolutions of images into an image collection. The image list holds a set of images sourced from an image collection and presents them at a specific size (say, 16x16.) Images are smoothly resized and scaled, and the image list’s actual presentation resolution can change based on DPI. It is fully compatible with and is a drop-in replacement for traditional image lists, including providing a HIMAGELIST handle, and can be used by both VCL controls and any code using Windows API image list calls.
Images support alpha channels, and you can load PNGs into the image collection. You can also load old-style color-keyed transparency bitmaps.
Using the Image Collection Component
TImageCollection allows you to store, scale, and draw images with native formats using the TWICImage class.
Each image in the collection can have a number of versions with different sizes. The component chooses the optimal size for scaling or uses an image if the available size is equal to the required size. It can also create a scaled 32-bit TBitmap version with an alpha channel, which can be directly added in TCustomImageList.
TImageCollection is inherited from TCustomImageCollection class (Vcl.BaseImageCollection unit), which defines the base methods for a collection.
The Image Collection Component Editor
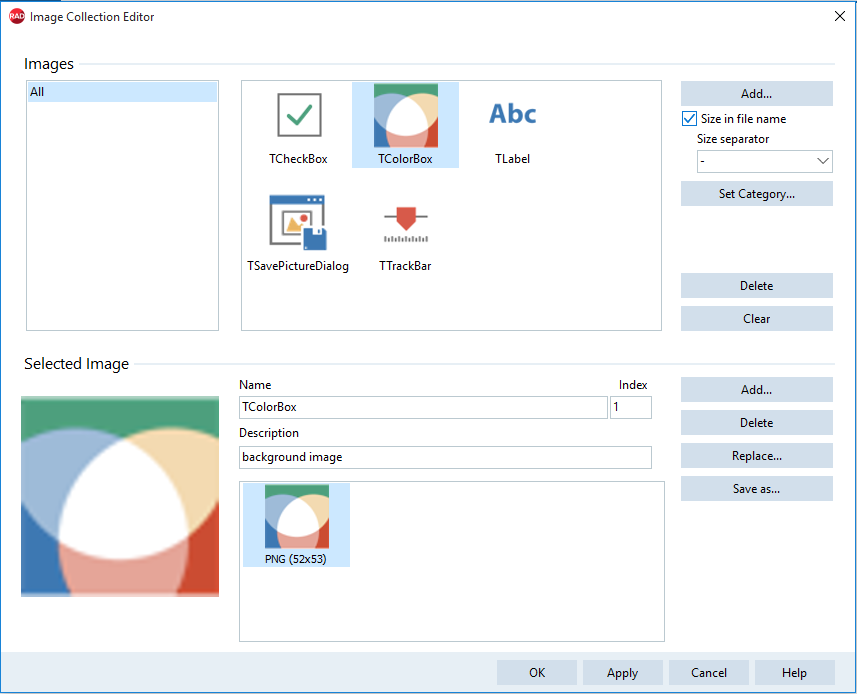
To open the Image Collection Editor, place a TImageCollection on your form or data module and either double-click the component in the form or right-click it and select the Show collection editor… option from the context menu. You can also double-click the TImageCollection.Images property in the Object Inspector.
The Image Collection Editor window allows you to add images to the component and organize them into categories.
Click Add to display the Open dialog box and browse to the folder where your images are stored. You can add one image at a time or you can select multiple images from a folder and add them simultaneously. The Image Collection Editor displays the images in alphabetical order.
When adding images, you may want to add multiple sizes of the same image. For example, you may have a pixel-tweaked 16x16 version of an image, and then a larger one that should be drawn ans scaled for other sizes. To do this, give the multiple version of a single image the same filename plus a separator character (such as a hyphen) and then a number indicating the size in pixels: for example, foo-16.png and foo-64.png. Then check the Check size in file name checkbox and change the image size separator from the drop-down options to the character your images use to separate the common name and the image size (in the previous example, a hyphen "-"). This automatically recognizes multiple resolutions of the same image with similar file names but for the pixel size, and add them as multiple resolutions of a single image in the collection.
The Image size separator setting controls how it parses to separate the common name and the image size, and contains options for common icon and image size filename conventions.
To add sources to a specific image, select the image from the collection and click Add… at the bottom of the window to display the Open dialog box and locate the image file.
Categories are currently only used for organization. (In VCL controls, images are still referred to only by index.)
To organize images in a category, select the images and click Set Category.
Use the Delete button on the top section to remove specific images from the collection and the Clear button to remove all the images in the collection.
After you add images to the collection, you can select any of the available images and perform the following actions:
- Modify the image Name.
- Assign a custom Description for the image.
- Assign an index value to modify the order of the images inside the collection.
- Add alternative sources for the same image.
- Delete a source of the image.
- Replace an existing source of an image.
- Change index[name] and Apply changes (VirtualImageList update images by index[name] using name[index] from collection).
- Change name[index] and Apply changes (VirtualImageList update images by name[index] using index[name] from collection).
- Save an image with a different name (Save as…).
Load existing TImageList into TImageCollection
To assist in converting old-style image lists to the new system, you can load images from old TImageList-s into a TImageCollection. When you have multiple sizes of the same image in different TImageList-s, you can load both at once; the images are merged so that the image collection contains multiple resolutions of the same image.
To be able to load images from TImageList into TImageCollection, you need to have both components in the same form.
Follow the steps below to load images from an existing TImageList on the form into TImageCollection:
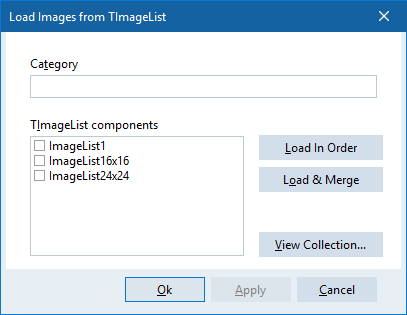
- Right-click the TImageCollection component in the form and select the Load from existing TImageList… option from the contextual menu.
- Select the TImageList you want to load and assign a category for the images. You can select more than one TImageList. This is especially useful to load multiple resolutions of the same image, previously stored in multiple image lists.
- Click Load in order to load the images in the same order of the Image Lists.
- Click Load with merging to merge different image sources from different Image Lists. When loading with merging, the Image Lists must have the same count of image files and different image sizes.
- Click View Collection… to verify how the images are imported in the TImageCollection without closing the dialog box.
- Click OK to apply the settings and close the dialog box.
- Click Apply to apply a specific set of changes and continue configuring settings.
- Click Cancel to close the dialog discarding all changes to the Image Collection.
Using the Virtual ImageList Component
TVirtualImageList allows you to generate a list of images and apply changes to all the images simultaneously.
TVirtualImageList uses TCustomImageCollection (TImageCollection) to generate a dynamic list of internal images.
With TVirtualImageList you can set custom width and height properties and the component automatically scales all images. When DPI changes, it scales the images for proper display on high DPI displays.
VCL controls can use TVirtualImageList without modifications because it is inherited from TCustomImageList.
The Virtual ImageList Component Editor
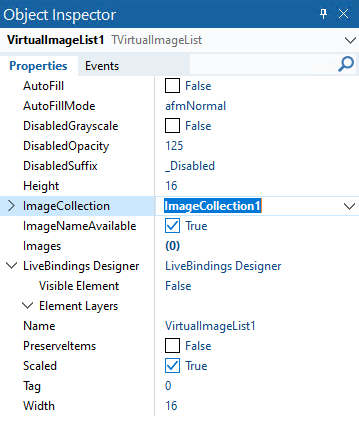
To be able to use the Virtual ImageList component and the Component Editor, you need to set the ImageCollection property in the Object Inspector first.
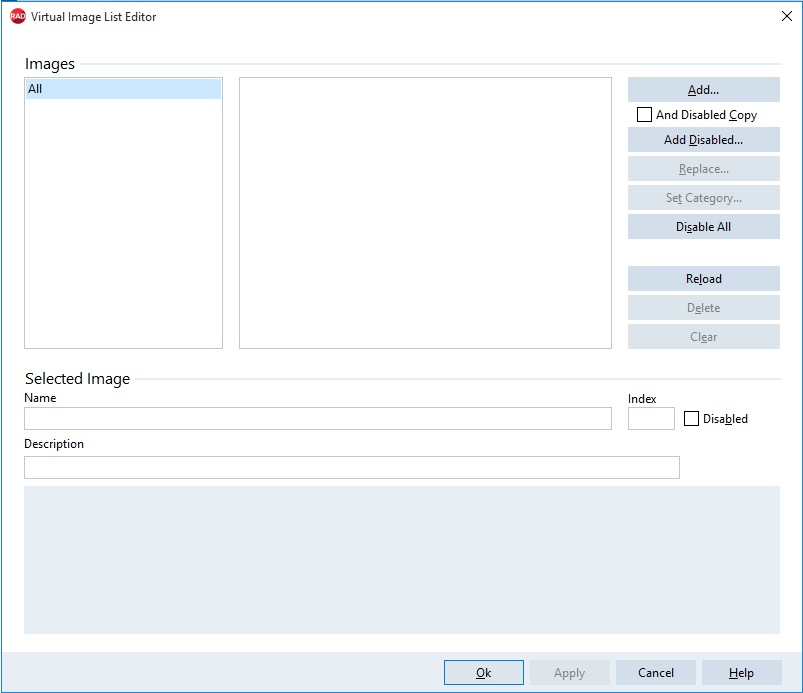
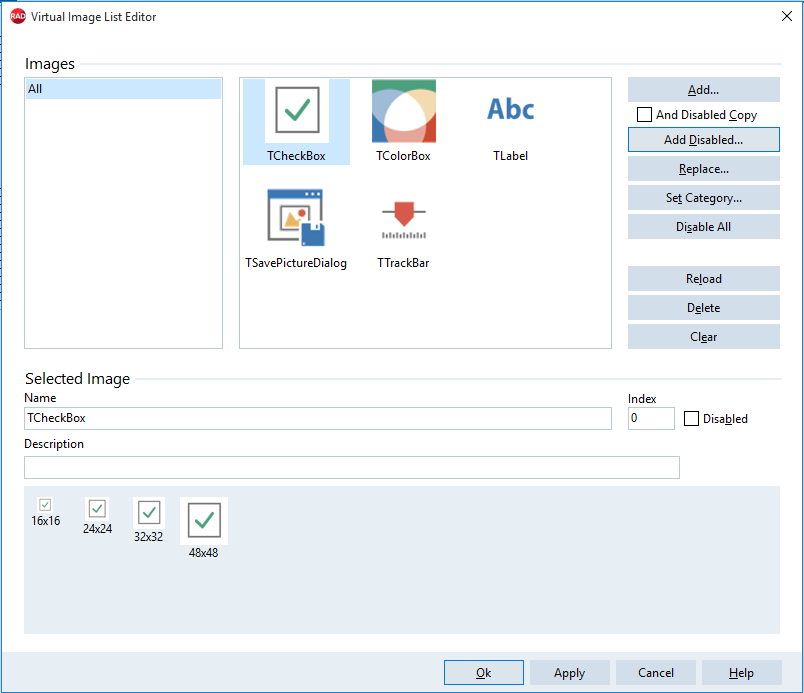
To open the Virtual Image List Editor, you can double-click the component in the form or right-click it and select the Show image list editor… option from the context menu.
If you set the AutoFill property to True, the virtual Image List will be auto-populated with all the images in the collection. Otherwise, you can manually add images from the collection to the list, by using the image list editor.
The Virtual Image List Editor window allows you to add images to the component, include disabled versions of the images, and organize them into categories.
Click Add to open the associated Image Collection and select the images you want to include in the Virtual Image List. You can select specific images from the Image Collection or select all images from the collection or an existing category.
Additionally, the Virtual Image List Editor window has the following options:
- Add Disabled: Allows you to create and add lower opacity or grayscale versions of the images you select. The appearance of disabled images is controlled by the DisabledGrayscale and DisabledOpacity properties of the image list.
- Add with Disabled Copy: Allows you to add images from the associated Image Collection and simultaneously create and add disabled versions of the images you select.
- Replace: Allows you to replace a selected image.
- Set Category: Allows you to group images into categories. To create a category, select the images you want to include in a category and click Set Category…, enter the name for the Category, and click OK to display it in the Categories list. The Component Editor adds the category name to the image name.
- Make All Disabled: Converts the images you added previously into disabled images.
After you add images to the Virtual Image List Component, you can perform the following actions:
- Reload: Reloads image names and descriptions from the ImageCollection.
- Delete: Removes the selected image or images from the Virtual Image List component.
- Clear: Removes all the images in the collection.
- Name: Modify the image name.
- Description: Assign a custom description for the image.
Using the Image Component with Multi-Resolutions
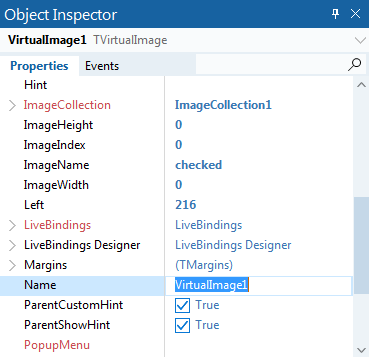
The TVirtualImage component supports multiple resolutions for a TImage-like component. The source of images come from an ImageCollection, and can have multiple resolutions depending on the screen DPI. The component uses the proper version depending on the monitor that is displayed.
Some configuration settings and key properties of the VirtualImage component are: ImageCollection, ImageHeight, ImageIndex, ImageName, and ImageWidth.
When you use the bitmap scaling logic for smooth drawing of any VCL TGraphic when scaled (eg StretchDraw), there is a TScaledGraphicDrawer class to enable HQ scaling drawing on the fly for different TGraphic classes, with calls like:
MyBitmap.EnableScaler(TD2DGraphicScaler);
Image1.Picture.Graphic.EnableScaler(TWICGraphicScaler);
Different solutions offer combinations of better or worse rendering and slower or faster performance. You can write custom TScaledGraphicDrawer derived classes defining additional scaling algorithms.
Best Practices
TVirtualImageList components scale with the DPI of the form on which they are placed. This allows controls on that form painting with the image list to always paint at the right scaled resolution. However, this means two things:
- Controls should always refer to an image list on the same form. If a control refers to an image list on a different form, then when the two forms have a different DPI, such as being on different screens, the images may draw incorrectly.
- A TVirtualImageList should always be placed on a form, not a data module. Forms have an associated monitor and DPI; data modules do not. A TImageCollection can be placed anywhere, since they are simply the source, and are unaffected by DPI changes: they are the source, while the virtual image list is the presentation.
Thus, if controls on a form use an image list, always place one or more TVirtualImageLists on that form and have controls refer to those local, same-form image lists only. Those TVirtualImageLists can all refer to the same TImageCollection.
The virtual image collection is a very useful control, separating the concept of a collection of images (TImageCollection) from a set of images at a specific, although scaling with DPI, size (TVirtualImageList). An image collection is not affected by DPI changes since it is simply a container. Virtual image lists can refer to images from a collection on another form or data module. Good design is to have a single image collection for related images - say, all toolbar and menu images - on your application’s main form or even better a shared data module. Other forms will each have their own virtual image list specific to each form, where those image lists use the central image collection.
Multiple sizes
If you need multiple sizes of the same image, such as for a TListView with SmallImages and LargeImages properties, use two TVirtualImageLists as you would with traditional TImageLists. Both virtual image lists refer to the same image collection.
Supporting high DPI in your applications: Converting old TImageLists
It is common to convert VCL applications from using TImageLists to TVirtualImageLists, allowing an upgrade in visual quality as well as assisting high DPI support.
TVirtualImageList is a descendant of TCustomImageList, so is a drop-in replacement at the code level, as well as providing a HIMAGELIST Handle property for directly calling Windows API methods.
There are two suggested approaches to convert your app to use the new high DPI image lists.
First, you may also be upgrading your icons at the same time, from an older style to a more modern style, or colorkeyed transparency to 32bit images with an alpha channel. If you do this, you may find it easiest to simply add these to a new image collection, create new image lists, and change your components to point at the new image lists.
Second, you may instead want to upgrade step by step, replacing old images incrementally or even not at all (although we do recommend taking advantage of the 32bpp alpha channel support in the new system.) To do so, place a TImageCollection and right-click and select Load from Existing TImageList(s). Select the image lists, and choose to either add image, or to merge images if they contain the same images at multiple resolutions. See TImageList into TImageCollection, load existing TImageList into TImageCollection above for full information.
This will result in your image collection containing your old images. Although using old images you will not see an increase in graphic quality or transparency as you would if you use newly designed images, this does allow you to have images scale with each form’s DPI. Create new TVirtualImageList components on each form and add the images from the collection: they will keep the same relative order, so same indexes unless there were images already in the collection. Then, change your components to use the new TVirtualImageLists.
Smooth scaling when drawing on a TCanvas
TCanvas.StretchDraw allows drawing a TGraphic to an arbitrary rectangle. While the TGraphic subclass implementation determines how to do this, in practice VCL drawing (such as for TBitmap) usually uses nearest neighbour resampling through GDI, often not resulting in ideal scaled or stretched image quality.
You can use a TImageCollection to hold an image (internally stored as and drawn with WIC), and draw it to an arbitrary rectangle. Doing so will use high quality resampling.
