Tutorial: Using LiveBindings to Create an Application Without Code
Go Up to Database and LiveBindings Tutorials
LiveBindings is a data binding technology that helps you develop database applications. This tutorial demonstrates how to build a small yet powerful database application using LiveBinding. You can do almost everything here with a few simple mouse clicks; no coding is required.
This tutorial uses the biolife.cds database, typically installed in the Samples directory at Start | Programs | Embarcadero RAD Studio 11 Alexandria | Samples and also available in . A code example that uses a similar database (DBDEMOS) is located at FishFact (Delphi) example.
Follow these steps to build a database application using LiveBinding:
- Select File > New > Multi-Device Application - Delphi > Blank Application to create a new project.
- Drag and drop a ClientDataSet component onto the Form Designer.
- Add the following controls to the form: a label, an edit box, a memo, and an image control component. To be able to cycle through the records of the database you chose to open, you need an additional TBindNavigator control.
At this point, your application should look like the following image.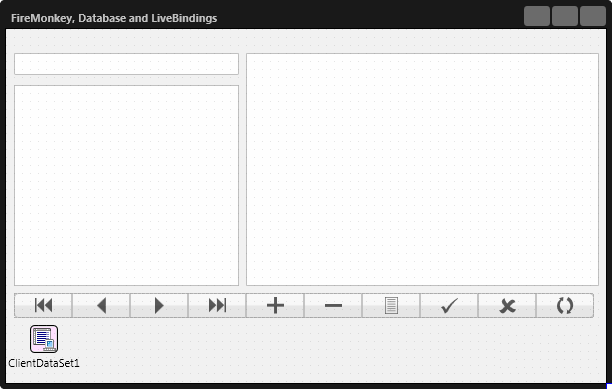
- Before using LiveBinding, you need to specify a database file for the ClientDataSet component. Use the FileName property to specify a ClientDataSet (*.cds) file, and select the biolife.cds file.
- Set the Active property to True.
- Now you can simply bind each graphical control on the form to its appropriate field in the database.
- Select the Label component and right-click it. Then select the Bind Visually... property in the context menu.
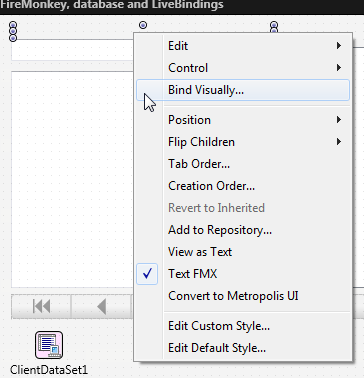
- The LiveBindings Designer appears. Open the LiveBindings Wizard by clicking the last button
 of the command buttons on the left-hand side.
 - On the LiveBindings Wizard, select Link a component property with a field.
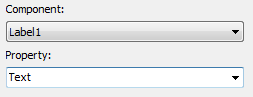
- Select the Label1 component and the Text property and click Next to continue.
- Select the ClientDataSet1 component as the source.

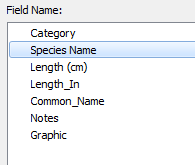
Click Next. - Select the Species Name field and click Finish to complete the LiveBinding. Click Next to continue.
- Select the Label component and right-click it. Then select the Bind Visually... property in the context menu.
- Repeat the steps above to connect the rest of the controls on the forms as following:
- Bind the Text property of the edit box component to the Category field.
- Bind the Text property of the memo component to the Notes field.
- Bind the Bitmap property of the image component to the Graphic.
- Finally, link the bind navigator to the binding source by assigning the DataSource property from the Object Inspector to BindSourceDB1.
- Note: You can link the components visually using the LiveBindings Designer.
- You can see that two new components, BindSourceDB1 and BindingsList1, have been added to the form. These components are not visual and are part of the LiveBindings engine. (To manually alter the bindings in the BindingsList1 component, double-click it, but that is not the purpose of this tutorial.)
Now your application should look like the following image.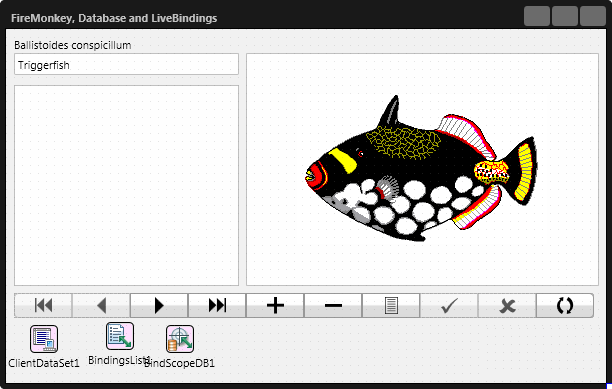
- At this point, you can run the application (either choose Run > Run or press
F9). - After the application is running, you can cycle through the database records, add a record, delete a record, or update the database.


The completed running application:

See Also
- LiveBindings in RAD Studio
- LiveBindings Wizard
- Developing Database Applications
- Developing DataSnap Applications
- HD Multi-Device Application
- ClientDataSet
- Tutorial: Using InterBase Express to Create an Application Without Code
- Object Inspector