Creating a Data Source (LiveBindings Wizard)
Go Up to LiveBindings Wizard
This procedure shows how to create a data source using the LiveBindings Wizard.
Contents
Start by creating an Multi-Device Application or a VCL Forms Application. Next create a data source and then use it to bind several objects to it.
Tip: In order for the LiveBindings Wizard to be available in the right-click context menu, you need to enable it in Tools > Options > LiveBindings by selecting "Display LiveBindings Wizard in right-click menu". (If you start the wizard from the LiveBindings Designer, then you do not need to enable the wizard command in the options dialog box.)
- Note: TPrototypeBindSource can be used to generate sample data for the LiveBindings in your project. After you prototype an application, configure the real data source so that you see the new data source fields in the LiveBindings design. Use the LiveBindings Designer to connect all the controls and properties to the new data source. When a control or property is connected to the new data source, the connection to the Prototype bind source is automatically removed.
Step 1: Binding Task
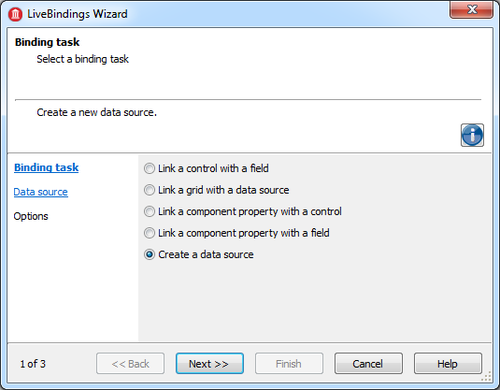
Right-click the form and select the LiveBindings Wizard command.
Then select Create a data source from the Binding Task wizard page.
Validate your selection by clicking the Next button.
Step 2: Data Source
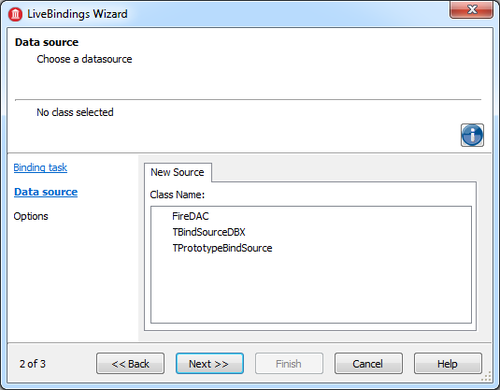
Select your new data source. Choose one of the following options:
- FireDAC: Connects to a data source using FireDAC components. This option adds components to your form that are needed to create the connection to the DBMS; for example:
- TFDConnection
- TFDPhys<DBMS>DriverLink. In our example, TFDPhysIBDriverLink.
- TBindSourceDBX: Connects to a data source using DBX (dbExpress) components. This option adds the components to your form that are needed to create the connection to the DBMS, such as TSQLConnection.
- TPrototypeBindSource: Generates a prototype data source for testing purposes. See Data.Bind.ObjectScope.TPrototypeBindSource.
Validate your selection by proceeding to the next step.
Step 3
Data Source Properties for FireDAC or TBindSourceDBX
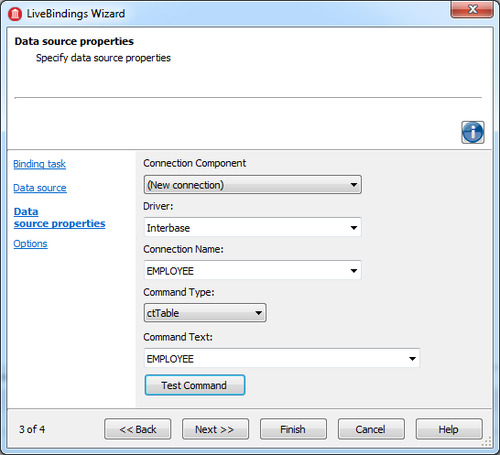
If you chose FireDAC or TBindSourceDBX as a Data Source, the Data Source Properties window appears on the next step.
| Field | Description |
|---|---|
|
Connection Component |
(New connection) |
|
Driver |
Select the appropriate driver from the drop-down menu in order to connect to the DBMS. |
|
Connection Name |
Select one of the available connections from the drop-down menu. |
|
Command Type |
Select one of the following options:
|
|
Command Text |
The available options depend on the Command Type previously selected. |
Fields for TPrototypeBindSource
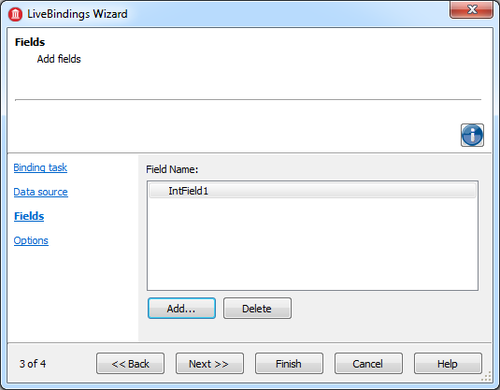
If you chose TPrototypeBindSource as a Data Source, the Fields window presents a list box where you need to add fields.
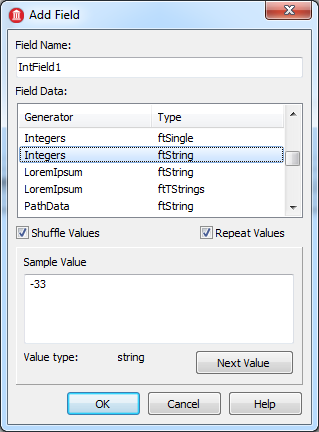
Click the Add button, and the Add Field dialog box appears.
For this example, add an ftString value under the field data name of Integers. Click OK to close the window and return to the wizard.
Click Next.
Step 4: Options
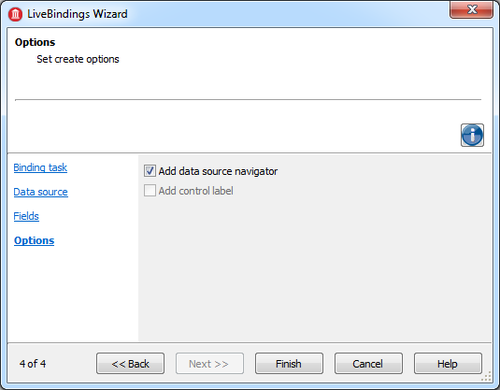
You are prompted whether you want a data source navigator to be created along with your binding expression.
Choose to add a data source navigator for this example.
Click Finish, as this is the last page of the wizard.
After the wizard closes, a new data source is created via a TPrototypeBindSource, TSQLConnection or TFDConnection.
Creating LiveBindings in the Designer
Now you need to use the new data source. For this purpose, start the LiveBindings Designer (View > LiveBindings Designer).
FireDAC
Add a TGrid to the form.
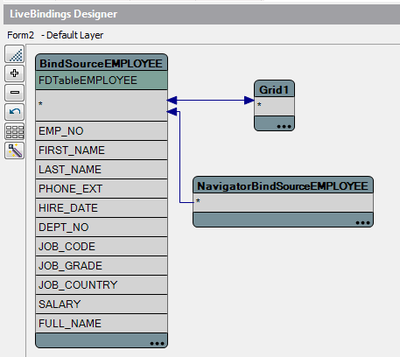
In the LiveBindings Designer, connect the Grid to the BindSourceEMPLOYEE.
The bindings diagram should look as in the following image.
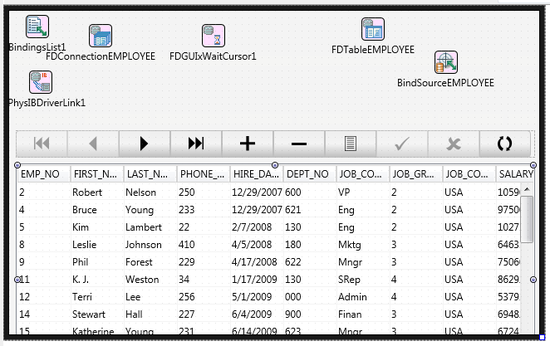
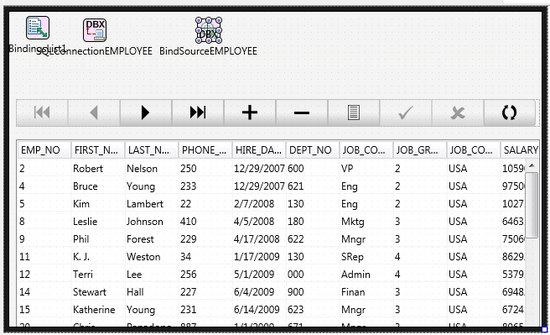
Your form should look as in the following picture.
Use the navigator to go through the records of the table.
TBindSourceDBX
Add a TGrid to the form.
In the LiveBindings Designer, connect the Grid to the BindSourceEMPLOYEE.
The bindings diagram should look as in the following image.
Your form should look as in the following picture.
Use the navigator to go through the records of the table.
TPrototypeBindSource
Add a TEdit and a TTrackBar to the form.
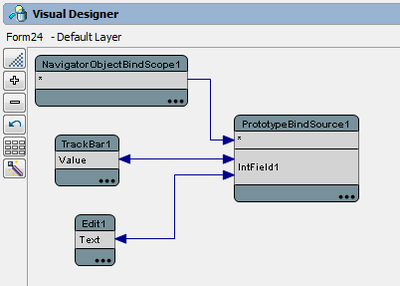
In the LiveBindings Designer, connect the IntField1 property of the PrototypeBindSource1 entity to the Text property of the Edit1 control. Do the same with the Value property of the track bar control. The bindings diagram should look as in the following image.
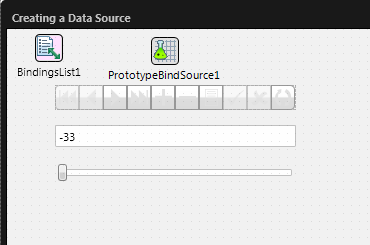
Your form should look as in the following picture. Notice the TPrototypeBindSource, the bindings list and your edit box, track bar, and binding navigator controls.
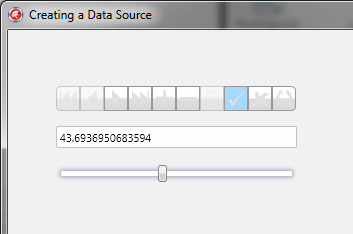
Now run the application (press F9) and test your binding expression by cycling through the records in the data source. You should see that the edit box updates correctly.
A screen shot of the running application is displayed below.
Advance random values by clicking Next or Previous in the bind navigator or move the track bar to your desired value and store it using the binding navigator. Now your new value is stored. Note that negative values force the track bar to 0.
