Install or Upgrade Team Server and Repository
Go Up to Installation and Upgrade Notes
The Team Server and Repository Installer is a single installer that includes necessary components for both Team Server and ER/Studio Repository.
Please ensure that you have read the Installation and Upgrade Notes before proceeding.
![]() Note: If you are upgrading from an ER/Studio Team Server/Repository version prior to 19.1, you must run the Diagram Data Version Upgrade in ER/Studio Data Architect to upgrade your diagrams to the latest release.
Note: If you are upgrading from an ER/Studio Team Server/Repository version prior to 19.1, you must run the Diagram Data Version Upgrade in ER/Studio Data Architect to upgrade your diagrams to the latest release.
To install or upgrade Team Server and Repository, run the new installer and follow the steps. You need a user with administrative privileges to run the installation wizard.
![]() Note: Before running the installer for an upgrade, stop the IderaTeamServer service from the Services control panel.
Note: Before running the installer for an upgrade, stop the IderaTeamServer service from the Services control panel.
![]() Tip: You may have to create a blank database before starting the installation, please check the Installation and Upgrade Checklist.
Tip: You may have to create a blank database before starting the installation, please check the Installation and Upgrade Checklist.
Contents
- 1 Running the Installer
- 2 Launching the Configurator
- 3 Installation Options
- 4 Repository DB Setup
- 5 Migrate Team Server (Upgrading from Team Server 4.0.9 or earlier ONLY)
- 6 Team Server Admin Account
- 7 Windows Service Account
- 8 HTTPS
- 9 Single Sign-On
- 10 Notification
- 11 Configuration Execution
- 12 Modify Configuration
- 13 See Also
Running the Installer
Run the Repository & Team Server installer.

- If you need to change the default port or install location, click Options, and then make the appropriate changes.
 Note: You cannot change the port after installing the product. Be sure you verify the port number before continuing.
- Agree to the license terms and conditions, and then click Install.
- After a successful setup, restart your machine to complete the installation process.
Launching the Configurator
Launch the Team Server Configurator. This step launches both the web browser and Team Server Configurator, which may take a few minutes.
Once the Configurator opens, log in using Admin/Admin (case sensitive).

Installation Options
On the Installation Options page, choose your installation options.

Note that the options change based on your selections.

- Complete the license information. Note that the server that you are installing on must have internet access to request a trial or register a serial number.
- Note: If the machine does not have internet access, first connect with a machine that does have internet connectivity using your serial number (provided in the license email), the URL and registration code displayed in the Unable to connect section at the bottom of the Installation Options page.
- In the IDERA Login or Email Address field, enter your existing account name. If you want to use the included trial license or want to request a custom trial license, select the option and complete the appropriate fields.
- In the Password field, enter the password associated with your IDERA login.
- If you already have a license, select that option and specify the serial number to register in the Serial Number field.
- Note: If you have a license file, please select the appropriate option and use the Import from File button to register.
- Click Next. The ER/Studio Repository Database Setup page appears.
Repository DB Setup
In the Repository Database Setup page, select the DBMS platform on which you want to install, and then specify the information to connect to your Repository database. The following image is from ER/Studio 19.0.
- Error creating thumbnail: /var/www/html/shared/BaseWiki31/includes/shell/limit.sh: line 61: ulimit: cpu time: cannot modify limit: Permission denied /var/www/html/shared/BaseWiki31/includes/shell/limit.sh: line 84: ulimit: virtual memory: cannot modify limit: Permission denied /var/www/html/shared/BaseWiki31/includes/shell/limit.sh: line 90: ulimit: file size: cannot modify limit: Permission denied convert: improper image header `/var/www/html/images/TeamServer/ERStudio/185/e/4/41/ConfiguratorPage2_190.png' @ error/png.c/ReadPNGImage/4191. convert: no images defined `/tmp/transform_60d10d575bc9.png' @ error/convert.c/ConvertImageCommand/3234. Error code: 1
- In the Host Name and Port fields, type the hostname of the machine that contains the Repository database. The port number appears by default.
- In the Specify Alias field, type the alias created with the SQL Server client utilities when a non-default port or named instance is used. An error in this field could cause Repository connection issues from ER/Studio Data Architect.
- Note: Windows Authentication Users. When you check Windows Authentication, the Domain field appears. You must specify the Windows account with the domain and username listed separately. In addition, the Windows account must have the Log on as a service permission on the local app server as the Repository services are changed to run under that account in order to connect to the database using Windows authentication. If the account does not have this permission, you will receive an error when testing the connection.
- In the Username and Password fields, enter the credentials needed to access the Repository database.
- In the Database field, type the name of the database that you have previously created to be your Repository database.
- If you want to specify different credentials to be used by Team Server to interact with the database, check the appropriate box, and then type the Username and Password (case-sensitive).
- Additional Notes: Depending on the database platform that you selected previously, complete the following fields:
- If you selected Oracle:
- In the SID field, type your database identifier.
- If you selected Use Oracle Service Name, the SID field is Oracle Service Name. Type the service name you use.
- If you selected Microsoft Azure SQL DB or Microsoft SQL Server:
- If the database server is a named instance, specify the Host Name in the HostName\NamedInstanceName format. For example, DEWKBOW01\DBServer.
- Optionally, for Azure and Microsoft SQL Server 2012-2019, you can check Use SSL to enable the Secure Sockets Layer (SSL) communication protocol, which encrypts messages. When SSL is enabled, Team Server uses ports 80 and 443 for secure communications. Please check SSL enablement requirements.
- It is possible to have the installer create your MSSQL database for you at this point. If you enter the name of a non-existent database, the installer pops up a confirmation window and then creates the database.
- Click Test to check your database connection.
- Click Next to continue. If you are upgrading from Team Server 4.0.9 or earlier ONLY, the Migrate Team Server page appears and you may continue with the next step. If you are upgrading from Team Server 16.0 or later continue with the Team Server Administrator Account page. If you are installing for the first time, the Windows Service Account page appears and you should continue with that section of this topic.
- Note: Please note that the configurator displays the Migration and Team Server Admin Account tabs only if you are upgrading.
Migrate Team Server (Upgrading from Team Server 4.0.9 or earlier ONLY)
![]() Note: Do not complete the Migrate Team Server page for upgrades from Team Server 16.0 or later.
Note: Do not complete the Migrate Team Server page for upgrades from Team Server 16.0 or later.

- If you are upgrading from Team Server 4.0.9 or earlier, specify the detail to connect to its database. The new installer copies the Team Server database tables into the Repository database, then both Repository and Team Server Web will share the same database.
- Complete the fields with the Team Server database information with the same structure you introduced previously for repository database.
- Click Next. The Team Server Administrator Account page appears.
Team Server Admin Account
The Team Server Administrator Account page allows you to enter the existing administrator Team Server login credentials, which is typically the Admin user and password used when logging into Repository from ER/Studio Data Architect.

- Complete the Username and Password fields.
- Click Test to check your Team Server credentials.
- Click Next. The Windows Service Account page appears.
Windows Service Account
In the Windows Service Accounts page, type the credentials for the Windows user account you want to use within Team Server. This page works best as a service account that is not required to have regular password changes.
Administrators need to ensure that the account used for the Windows Service Account has proper permissions on the application server. You can verify these settings by going to Administrative Tools > Local Security Policy > Local Policies > User Rights Assignment.
The user account should have local administrative privileges, and specifically the following privileges are required:
- Act as part of the operating system
- Create a token object
- Log on as a batch job
- Replace a process-level token
Note that this account must not have the Deny log on locally permission.

- In the Windows User field, enter the name of a Windows user that Team Server can use to log into the system. The user account must have local administrative privileges. The name should be in the format "machine_name\username".
- In the Password field, enter the password of the Windows user login credentials to be used by Team Server to interact with repository (case-sensitive):
- Leave it blank to keep using Admin/Admin to log into ER/Studio Repository.
- If you want to modify the super user login to enter into ER/Studio Repository, introduce the information. If the login does not exist, it is created.
- Click Test to check your Windows account credentials.
- Click Next to continue. The optional HTTPS Setup page appears.
HTTPS
In the optional HTTPS Setup page, you can choose to enable HTTPS (SSL). It is recommended that you enable secure communications as this will keep your password transmissions secure.

![]() Note: Self-signed certificates are valid for 90 days and are not intended as a long-term solution for production environments.
Note: Self-signed certificates are valid for 90 days and are not intended as a long-term solution for production environments.
- Optionally, select Enable Secure Communication (HTTPS) to enable it.
- If you do not have SSL set up on your server, you can select the Self-Signed option to walk you through the short wizard that creates a Keystore file allowing you to use encryption. Fill out the fields of the Self-Signed wizard, and then click Generate. The Keystore file is created in the location of your choosing.
- If you already have SSL set up on your server, directly enter the information required.
- Click Next. The optional Single Sign-On page appears.
Single Sign-On
In the optional Single Sign-On page, check Use LDAP server for authentication to use the Lightweight Directory Access Protocol (LDAP) and enable the ability for users to log into Team Server using their domain username and password. You can enable LDAP authentication any time later.

- In the LDAP URL field, enter the URL of the server running LDAP.
- In the Manager DN field, enter the distinguished name for the user that is used to authenticate users. Team Server uses this to connect to the LDAP server and validate user credentials. For example, CN=administrator,CN=Users,DC=mydomain,DC=com. In this example, administrator is used. In which case, Users is defined as a container rather than an organizational unit as is the Microsoft Active Directory default. Your user accounts may be in an organizational unit; in this case, you would specify it differently. For example, CN=user1,OU=sales,DC=mydomain,DC=com.
- In the Manager Password field, enter the password for the administrative user.
- In the Search Base field, enter the name of the root node in LDAP from which to search for users. For example, CN=Users,DC=mydomain,DC=com.
- In the Search Attribute field, enter the attribute in LDAP holding the user's login name. For example, sAMAccountName (for ActiveDirectory).
- In the Test User and Test Password fields, enter the username and password of a sample user to attempt to authenticate against the LDAP server. The installer uses this information to validate the given LDAP information before moving to the next page.
- Click Test. If it is successful, this enables the Next button.
- Click Next. The optional Enable Email notification page appears.
Notification
The optional Enable Email Notification page allows you to specify whether you want users to send search results and reports by email through Team Server using SMTP.

- Check Allow users to send search results and reports by email from Team Server using SMTP. You can enable notifications anytime later.
- In the Email Address field, enter the email address that you want to use as the sender of the emails sent from Team Server. You may want to prepare a special email address on your email server for this purpose.
- In the Server and Port fields, enter the host name of the email server (for example, "mail"), the fully qualified network name (for example: "mail.example.com"), or the IP address (for example: "10.10.23.250") and the port number where the email server is listening. The default port is 25.
- Optional. Check Requires Authentication if your email server requires authentication. When you check this option, the User Name and Password fields are highlighted. Fill them with the required values to authenticate Team Server against your STMP server.
- Optional. Click Test to check your email server connection.
- Click Next. The Configuration Execution page appears.
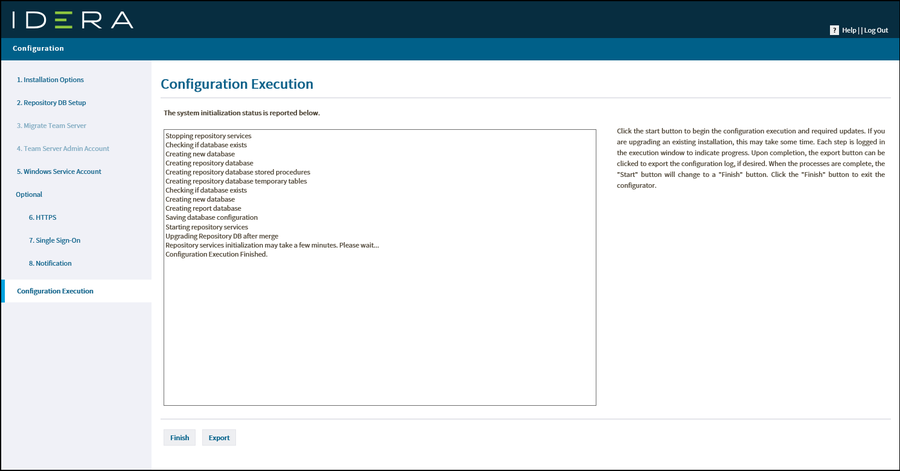
Configuration Execution
The Configuration Execution page basically shows the progress of your system initialization.
- Click Start to execute initialization/migration. The following image is an example of a new installation configuration execution.
- The following image is an example of an upgrade configuration execution.
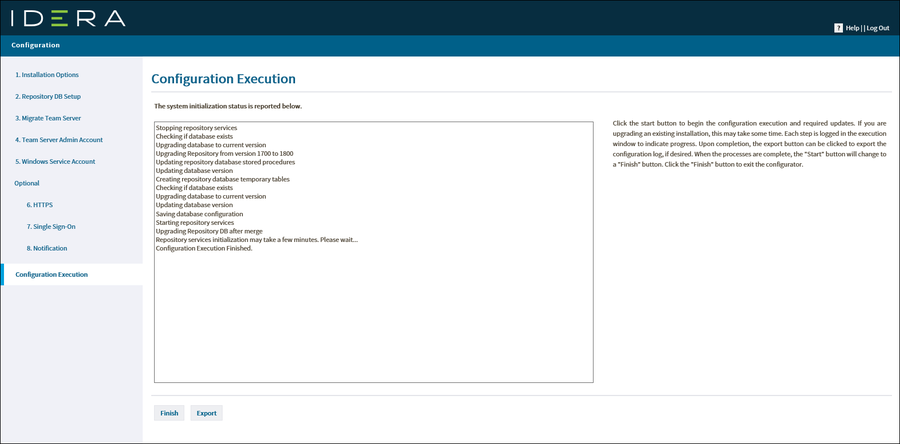
- Click Finish. Team Server and Repository now are installed/configured on your system.


![]() Note: If you are upgrading from an ER/Studio Team Server/Repository version prior to 19.0, as soon as your installation/configuration is complete, you must run the Diagram Data Version Upgrade in ER/Studio Data Architect to upgrade your diagrams to the latest release.
Note: If you are upgrading from an ER/Studio Team Server/Repository version prior to 19.0, as soon as your installation/configuration is complete, you must run the Diagram Data Version Upgrade in ER/Studio Data Architect to upgrade your diagrams to the latest release.
Modify Configuration
You can modify the configuration at any moment by going to My Settings > Configurator from the Team Server Home page.