Quick Start Guide:Create an App with One Click
Go Up to Creating Apps
This type of mastering is recommended for use by an Enterprise Desktop Administrator. Only basic programming skills are necessary. This process is streamlined with many of the necessary decisions made for the user.
All the mastering support has been done so you only have to supply an application’s executable. This process uses a template that has been created with all the information needed to complete the app. This information includes descriptions, display name, product name, icon, etc. It is important to note that this creation process starts in the Apps portion of the AppWave Browser. You then complete the creation process in the Studio portion.
Mastering Process
You can use the AppWave Browser to create an app. To demonstrate this process we will use an application, available in the AppWave Browser, that has an AppWave Template. This template tells AppWave how to master an application, and contains branding information and information on which filter to run on the installer for the application.
Unlike other app mastering processes, you start this process from the Apps tab in the AppWave Browser and then broadcast it in the Studio tab.
For this demonstration we are going to master Photoshop using the template available in AppWave Browser. We need to have the executable of the application we want to master.
Note: If you are using Window 7 or later versions you need to run the AppWave Browser a an administrator. Right-click the AppWave Browser to select Run as administrator.
- Save the executable of the app you want to master in the root directory.
- Locate the template of the application you want to master.
- In the Apps Tab introduce this filter criteria in the search field: Template.
- All the applications with that designation are listed. This template is indicated by the icon MASTER located to the right of the application icon.
- Click MASTER to start the mastering process.
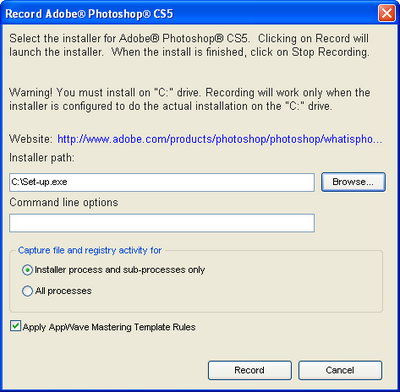
- The Record Installation dialog briefly appears and then is replaced by the Record <Application> dialog.
- In the Installer path browse to the application’s executable. ★ The executable must reside on the root drive.
- Note: The Command Line value indicates how to launch the file and the value is the trigger to run a specific command. We will not use a command line option for this app.
- Leave the default setting of Installer process and sub-processes only. This option captures only the install processes instead of all the processes associated with the application.
- Leave the default setting of Apply AppWave Mastering Template Rules. As the mastering goes through the steps to create an app, tasks may be created indicating missing data. This option automatically completes any missing data.
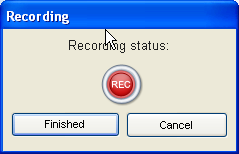
- Click Record and the install process starts. A Recording dialog appears in the upper right corner of your screen and the AppWave Browser is minimized. The blinking recording status button indicates that each action you take is recorded.
- Follow the install steps for your selected application.
- Note: If the application requires a license see Set Up 3rd Party Licenses
- Once the installation is complete, click Finish to close the install dialog.
- At the completion of an install you may have the option to run the application. ★ It is recommend that you do not run the application at this time.
- Click Finished in the Recording dialog and the Record Installation dialog reappears. This dialog identifies each file as it is installed and a progress bar shows each step of the process. The completion time for the operation is also displayed.
- You can see the details of the installation during the record process by clicking Details. Uncheck Close on Successful Completion and this dialog remains opens.
- If the Record Installation dialog did not close automatically, click Finished and the Broadcast your application to the AppWave page appears.
- Note: Notice that at this point in the Quick Start, you are now working in the Studio portion of AppWave.
- During the mastering, the AppWave template populates the various fields in the Steps (Launch & Brand, App, Test, and Broadcast). If one of the steps is missing required information, the mastering process opens to that step.
- If all the information is completed, the Studio opens to the Broadcast step.
- At this point you will see that there is a Task at the bottom of the page that requires fixing. This task is about using the Prefetch Option that can make launching the application faster. Follow the steps described in the Next Step section to complete the prefetch and mastering process.


