Adding a Server
From InterBase
Go Up to Connecting to Servers and Databases
You can access the Add Server Wizard in IBConsole by one of the following methods:
- Choose Server|Add or click the Add a New InterBase Server toolbar button.
- Double-click InterBase Servers in the Tree pane.
- Right-click InterBase Servers and choose Add from the context menu.
When you add a server, and there is no local server yet added, the Local Server dialogue opens.
If a local server already exists, the Remote Server Setup dialog opens.
To add a local server:
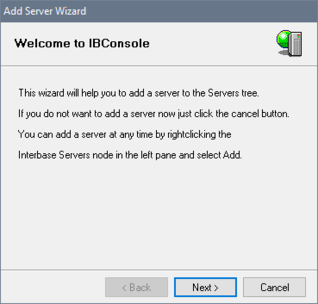
- Once you have clicked Server|Add, click Next in the Welcome dialog to advance to the Local Server Setup panel.
- Select a server instance from the drop-down list.
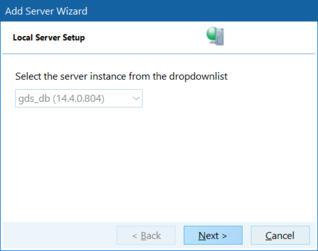
- Click Next and Specify Credentials opens.
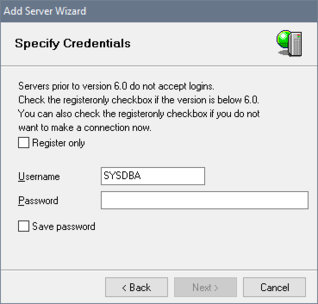
- You can choose to just add the server (without logging in) or you can choose to add and connect to the server simultaneously.
If you want to just add the server you can ignore the Login Information and click Next.
If you want to add and connect to the server simultaneously, enter a username and password in the corresponding text fields and click Next.Note:
The usernames and passwords must be the InterBase usernames and passwords stored in the InterBase security database (admin.ib by default) on the server. - Click Next to advance to the Finish Wizard. Here you have the option to enter a description name for the server.
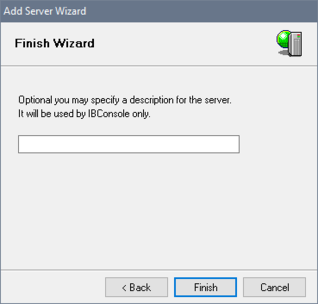
- Click Finish and once a server is added, IBConsole displays it in the Tree pane.


To add a remote server:
- Choose Server > Add or click the Add a New InterBase Server toolbar button and the Remote Server Setup dialog appears.
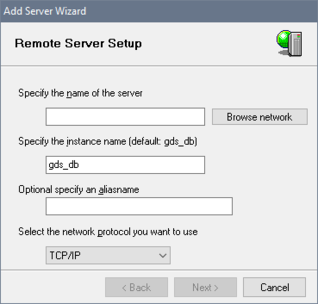
- Browse the name of the server.
- Specify the instance name (the default is gds_db)
The InterBase server name is the name of the database server machine. There is not a specific name for the InterBase server process itself. For example, if the server is running on the NT server “venus”, you enter this name in the Server Name text field. - Enter an alias name in the Optional: Specify an Aliasname text field.
- The network protocol you select can be TCP/IP on any platform. On Windows, it can also be NetBEUI or local. Protocols are valid only when they are supported by both the client and the server.
- Click Next and Specify Credentials opens.
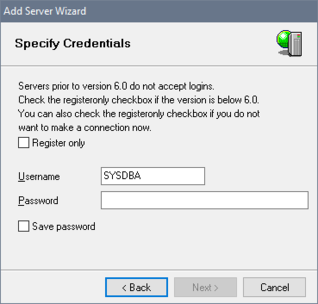
- You can choose to just add the server (without logging in) or you can choose to add and connect to the server simultaneously.
If you want to just add the server you can ignore the Login Information and click Next.
If you want to add and connect to the server simultaneously, enter a username and password in the corresponding text fields and click Next.
Note:
The usernames and passwords must be the InterBase usernames and passwords stored in the InterBase security database (admin.ib by default) on the server. - Click Next to the Finish Wizard dialog. Here you have the option to enter a description name for the server.

- Click Finish and once a server is added, IBConsole displays it in the Tree pane.


