Building an example master/detail form
From InterBase
Go Up to Creating master/detail forms
The following steps create a simple form in which a user can scroll through customer records and display all orders for the current customer. The master table is the CustomersTable table, and the detail table is SalesTable.
- To create a VCL project, select File > New > VCL Forms Application - Delphi.
- Add a data module to the project:
- In the Project Manager, right-click the project and select Add New... > Other... > Data Module.
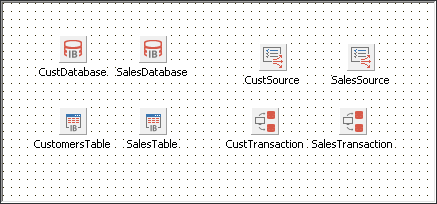
- Drop two of each of these components in the data module: TIBTable, TIBDatabase, TIBTransaction, and TDataSource.
- Set the Name of the first TIBDatabase component to CustDatabase.
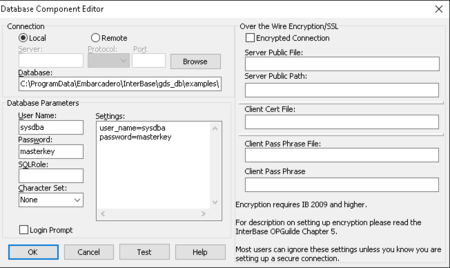
- Double-click the CustDatabase component to open the Database Component Editor:
- Set the Database parameter to:
C:\Users\Public\Documents\Embarcadero\Studio\17.0\Samples\Data\employee.gdb(location of the database)
- Set the User Name to sysdba.
- Set the Password to masterkey.
- Uncheck the Login Prompt box.
- Click Test to check is the connection is successful.
- Click OK to close the DataBase Component Editor.
- Set the Database parameter to:
- Set the Name of the first TIBTransaction component to CustTransaction and the DefaultDatabase to CustDatabase.
- Set the DefaultTransaction of the CustDatabase component to CustTransaction.
- Set the properties of the first TIBTable component as follows:
- Database as CustDatabase.
- Transaction as CustTransaction.
- TableName as CUSTOMER.
- Name as CustomersTable.
- Set the Name of the second TIBDatabase component to SalesDatabase.
- For SalesDatabase, open the Database Component Editor, and fill it as in Step 5.
- Set the Name of the second TIBTransaction component to SalesTransaction and the DefaultDatabase to SalesDatabase.
- Set the DefaultTransaction of the SalesDatabase component to SalesTransaction.
- Set the properties of the second TIBTable component as follows:
- Database as SalesDatabase.
- Transaction as SalesTransaction.
- TableName as SALES.
- Name as SalesTable.
- Set the properties of the first TDataSource component as follows:
- Set the properties of the second TDataSource component as follows:
- Now, on the form, place two TDBGrid components.
- Choose File>Use Unit to specify that the form should use the data module.
- Set the DataSource property of the first grid component to DataModule2.CustSource, and set the DataSource property of the second grid to DataModule2.SalesSource.
- On the data module, set the MasterSource property of SalesTable to CustSource. This links the
CUSTOMERtable (the master table) to theORDERStable (the detail table). - Double-click the MasterFields property value box in the Object Inspector to invoke the Field Link Designer to set the following properties:
- Select CustNo in both the Detail Fields and Master Fields field lists.
- Click the Add button to add this join condition. In the Joined Fields list, CustNo -> CustNo appears.
- Choose OK to commit your selections and exit the Field Link Designer.
- Set the Active properties of CustomersTable and SalesTable to True to display data in the grids on the form. At this point, you can see data on the TDBGrid components.
- Compile and run the application.
If you run the application now, you will see that the tables are linked together, and that when you move to a new record in the CUSTOMER table, you see only those records in the SALES table that belong to the current customer.


