Installing InterBase for Mac OS X
Go Up to InterBase Quick Start: Part I - Getting Started
Before you get started you need to do the following:
- A Developer’s Network account is required. Click http://edn.embarcadero.com to either log on to an existing account or create a new one.
- Go to https://downloads.embarcadero.com/free/interbase and download InterBase XE (10.0.4.590) 32-bit Developer Edition for Mac 0S X. The file is InterBase_XE_Mac-2.zip.
Installation
- Double-click the InterBase_XE_Mac-2.zip file and the InterBase_XE_Mac-2 dialog opens.
- Double-click ib_install.app and a warning dialog appears asking you to confirm the installation. Click Open and a dialog opens requesting your password.
- Note: The installation requires an Administrator password to install the software.
- Click the Lock icon and enter your password. Once the password is authenticated, the install wizard appears.
- Follow the wizard and in the Welcome pane, after you read the instructions, click Next.
- Accept the License Agreement and click Next.
- In the Choose Install Set pane, select the Server and Client option. This is the default setting.
- Leave the No default setting in the Multi-Instance InterBase pane and click Next.
- On the Choose Install Folder pane, select Restore Default Folder which is Macintosh HD > Applications > InterBase.
- Click Next and review the Pre-Installation Summary and then click Install.
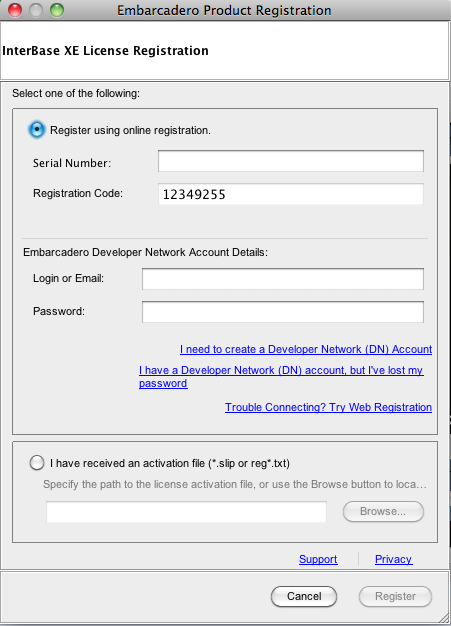
- During the install, the Embarcadero Product Registration dialog appears.
- Enter the Serial Number that was sent to your EDN account. You also need to enter your Login and Password.
- Click Register. Once the registration is complete, you are notified that you now have the InterBase XE Server Edition 15 Day Trial.
- When the install is complete, click Done.
- InterBase for Mac is a command-line application. To start the server, go to Macintosh HD > Applications > InterBase > bin > ibmgr.
