InterBase Quick Start: Part II - Creating Indexes
Go Up to InterBase Quick Start: Part II - Data Definition
An index is based on one or more columns in a table. It orders the contents of the specified columns and stores that information on disk in order to speed up access to those columns. Although they improve the performance of data retrievals, indexes also take up disk space and can slow inserts and updates, so they are typically used on frequently queried columns. Indexes can also enforce uniqueness and referential integrity constraints.
InterBase automatically generates indexes on UNIQUE and PRIMARY KEY columns. See the Data Definition Guide for more information about constraints.
You use the CREATE INDEX statement to create an index. The simplified syntax is as follows:
CREATE INDEX name ON table (columns)
Optionally, you can add one or more of the ASCENDING, DESCENDING, or UNIQUE keywords following the CREATE INDEX keywords.
Contents
 Creating the Name Index
Define an index for the Employee table, by entering the following code:
CREATE INDEX namex ON Employee (last_name, first_name)
This statement defines an index called namex for the last_name and first_name columns in the Employee table.
Preventing Duplicate Index Entries
To define an index that eliminates duplicate entries, include the UNIQUE keyword in CREATE INDEX. After a UNIQUE index is defined, users cannot insert or update values in indexed columns if the same values already exist there.
For unique indexes defined on multiple columns, such as prodtypex in the example below, the same value can be entered within individual columns, but the combination of values entered in all columns of the index must be unique for each row.
You cannot create a UNIQUE index on columns that already contain non-unique values.
 Creating a UNIQUE Index
Create a unique index named prodtypex, on the Project table by entering the following:
CREATE UNIQUE INDEX prodtypex ON Project (product, proj_name)
Specifying Index Sort Order
By default, SQL stores an index in ascending order. To make a descending sort on a column or group of columns more efficient, use the DESCENDING keyword to define the index.
 Creating the budget DESCENDING Index
Enter and execute the following code to create an index called budgetx that is in descending order:
CREATE DESCENDING INDEX budgetx ON Department (budget)
Modifying Indexes
To change an index definition – which columns are indexed, sort order, or UNIQUE requirement – you must first drop the index and then create a new index.
 Altering the Name Index
Begin by viewing the current definition of the namex index.
1. Since namex was created on the Employee table, click Tables in the left pane of IBConsole.
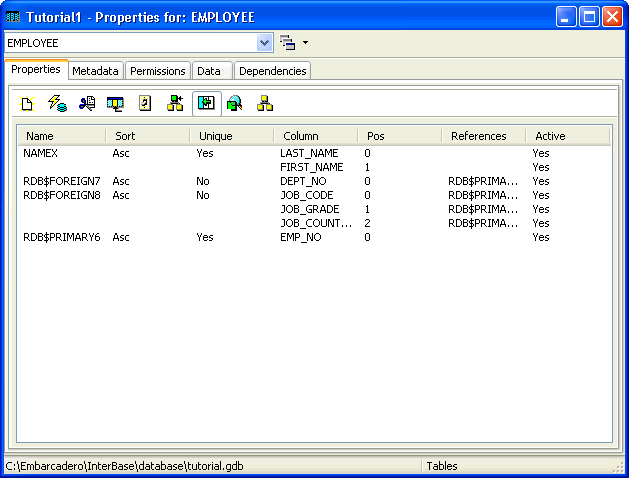
2. Double-click Employee, and in the Tutorial - Properties for: EMPLOYEE dialog, click Indexes (![]() ).
).
3. Select the Metadata tab to view the definition and then you can exit this Properties dialog.
- In the following steps, you redefine the namex index that you created earlier to include the UNIQUE keyword.
4. In the ISQL enter and execute the following DROP INDEX statement:
DROP INDEX namex
5. Enter and execute the following line to redefine namex so that it includes the UNIQUE keyword:
CREATE UNIQUE INDEX namex ON Employee (last_name, first_name)
6. Once again, double-click Employee, and in the Tutorial - Properties for: EMPLOYEE dialog, click Indexes (![]() ).
).
Time to back up: If you have successfully altered the Department table definition, created the phone_list view, created the three indexes, and altered the namex index, this is a good time to back up your database to Tutorial3.ibk.
