InterBase Quick Start: Part II - Creating Tables with a Script
Go Up to InterBase Quick Start: Part II - Data Definition
You have created several tables manually now and begin to understand what is involved. To avoid having to type in all of the table definitions, you should now run the Tables.sql script.
Contents
 Running the Tables.sql Script
Before you leave the topic of tables, look over the remaining table definitions in Tables.sql to be sure that you understand them. Pay particular attention to the Employee table, which is complex and is central to this database. Notice, in particular, the complex CHECK constraint on the salary column in that table. It states that the salary entered for an employee has to be greater than the minimum salary for the employee’s job (specified by job_code, job_grade, and job_country) and less than the corresponding maximum.
- In the Interactive SQL dialog, load the Tables.sql script to enter the remaining table definitions into the TUTORIAL database by choosing Query > Load Script.
- As before, check first that the database path, user name, and password are correct in the CONNECT statement at the beginning of the file. Then choose Query > Execute.
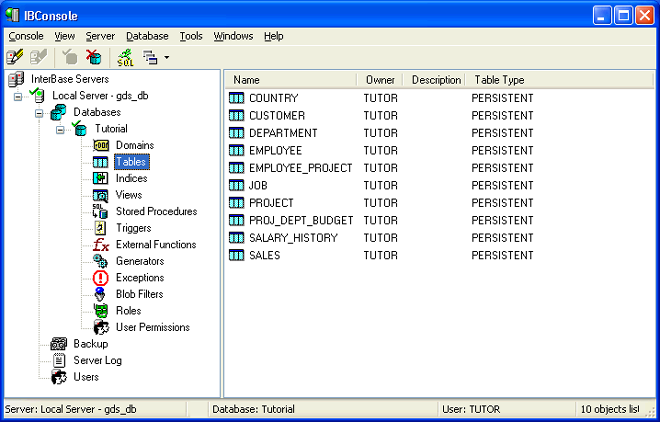
- Click on Tables in the left pane of IBConsole to check that you now have ten new tables in the TUTORIAL database.
- Note: Time to back up again. If you have successfully run Tables.sql, this is a good time to back up your database to Tutorial2.ibk.
Troubleshooting
If you made any typing mistakes when you were entering the domain definitions, you will get an error message when you run the Tables.sql script or when you are defining the tables manually. InterBase posts a message.
When executing a script, check the log file of the script for error information. The log file is created in the same directory as the script file. When you are defining tables manually, look in the SQL Output area for more information. The SQL Output area echoes the contents of the script.
In either case, if there were problems with a particular table, the SQL code for that table is followed by an error message such as the following:
Statement failed, SQLCODE = -607
 Dynamic SQL Error
 -SQL error code = -607
 -Invalid command
 -Specified domain or source column does not exist
To understand the problem, follow these steps:
- Read the error text. In this case, it says that the specified domain does not exist. You probably made an error in typing the domain name.
- Click on Domains in the left pane of IBConsole. InterBase displays the names of all domains in the right pane.
- You defined four domains by hand: FIRSTNAME, LASTNAME, EMPNO, and DEPTNO. Look for each of these in the list of domains and make sure that their names are spelled correctly. It is likely that you will find one that is misspelled.
- Drop the incorrect domain by entering and executing the following command:
- DROP DOMAIN domainname
- Recreate the domain using the CREATE DOMAIN statement.
- Run the Tables.sql script again.
- If this is not the problem, continue with these steps:
- Look right above the message text to see which table has the problem. Note which domains are used in that table. Do they include any of the four domains that you entered by hand?
- Click on Domains in the left pane of IBConsole. InterBase displays the names of all domains in the right pane. Right-click on the domain in the right pane and select Properties. Click on the Metadata tab and InterBase displays the definition of the domain in the SQL Output Area.
- Compare the displayed definition with the definition given in this document (the one that you typed). Continue checking each of the four hand-entered domains until you find one that has a problem.
- Drop the domain as described in step 4 above, and then re-enter it correctly. Run the Tables.sql script again.
Viewing an Object Definition
You can see the definition of any object in a database using the Metadata tab. Now you use it in a different way to get information about a specific object.
 Viewing the Definition of the Department Table
To refresh your memory of the current Department table definition, follow these steps:
- In IBConsole click Tables in the left pane.
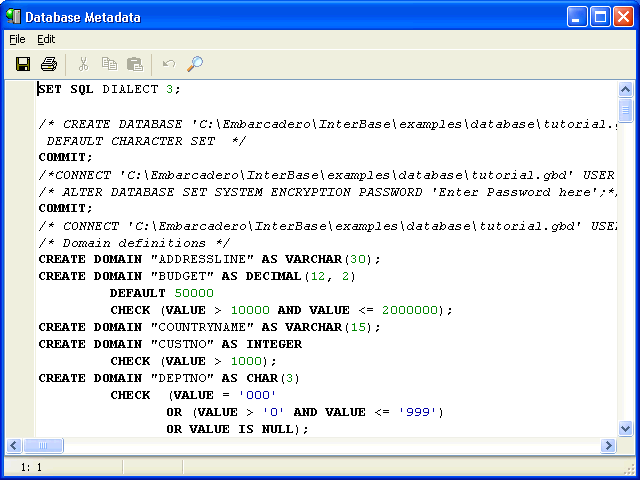
- Click Department and choose Database > View Metadata and the metadata for the Department table is displayed.
Altering Tables
You can change the structure of existing tables with the ALTER TABLE statement. In the previous section of the tutorial, you created a simple Department table. Now you can use the ALTER TABLE statement to alter to this table. The syntax for altering a table, in simplified form, is:
ALTER TABLE table_name operation [, operation]
- where each operation is one of the following:
ADD column
 ADD tableconstraint
 ALTER [column] col_name <alt_col_clause>
 DROP column
 DROP CONSTRAINT constraintname
Notice that you can drop a constraint only if you gave it a name at the time you created it.
 Altering the Department Table
You now add five new columns (head_dept, mngr_no, budget, location, and phone_no) and two foreign key constraints to the Department table that you created earlier.
1. In Interactive SQL, type the following code and then execute it:
 ALTER TABLE Department
     ADD head_dept DEPTNO,
      ADD mngr_no EMPNO,
      ADD budget BUDGET,
      ADD location VARCHAR(15),
      ADD phone_no PHONENUMBER DEFAULT '555-1234',
 ADD FOREIGN KEY (mngr_no)
      REFERENCES Employee (emp_no) ON DELETE CASCADE ON UPDATE CASCADE,
      ADD CONSTRAINT fkdept FOREIGN KEY (head_dept)
      REFERENCES Department (dept_no) ON DELETE CASCADE ON UPDATE CASCADE
2. In IBConsole, click on the Department table once again and then Database > View Metadata to see the new table definition.
More Troubleshooting
If you receive error messages when you are altering tables or inserting data, use the Metadata command as your resource.
- Show the definition for each table that you entered by hand and compare the output to the SQL code that this document instructs you to enter.
- When you find a problem, you can either drop the table and recreate it, or use ALTER TABLE to drop a column and then add the column again with the correct definition. If you misspelled the name of the table itself, you must drop the table and recreate it.
- The DROP TABLE statement has the following syntax:
DROP TABLE tablename
- To change a column definition, first drop it using the ALTER TABLE statement:
ALTER TABLE tablename DROP columnname
- Then add the column back in using the ALTER TABLE statement again:
ALTER TABLE tablename ADD columnname columndef
If you made any typing errors when creating the domains and tables, you will get errors when you try to insert data by hand or to run the Inserts.sql and Update.sql scripts. If you follow the steps above, you will be able to fix your errors and run the scripts successfully.
The remainder of the tutorial is less demanding, in that it focuses on the SELECT command. Once you detect and fix any errors in the domain and table definitions, you will get the correct results from your SELECT statements.

