InterBase Quick Start: Part I - Create a New User
Go Up to InterBase Quick Start: Part I - Getting Started
Once you create the new user named TUTOR, the rest of this tutorial assumes that you are the user TUTOR and that your password is tutor4ib.
 Creating a New User in IBConsole
- Note: InterBase ships with one user, SYSDBA, as the default.
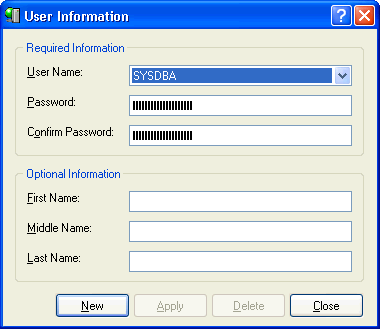
- To display the User Information dialog in IBConsole, click Server > User Security.
- Click New to clear the Required Information and Optional Information fields.
- Type TUTOR in the User Name field. This appears in all caps even if the Caps Lock is off. Type tutor4ib in the Password and Confirm Password field. The password is case-sensitive. You do not need to complete the Optional Information.
- Click Apply to create the user, and then click Close.
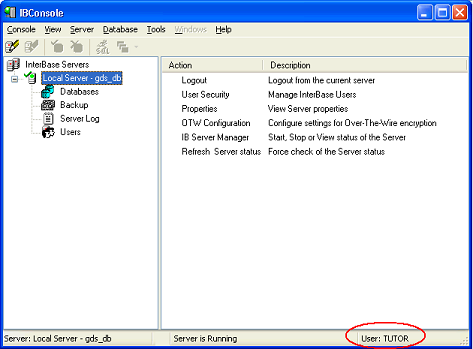
- Click Server > Logout and log out of the server. You will be asked to confirm this action.
- Now click Server > Login and enter your new user name TUTOR and password. Once the login is complete the TUTOR user appears in the Summary pane.
You have now created a user on the server you are logged into. Users are defined server-wide and can connect to any database that resides on that server. Tables within these databases have additional security, however. Being able to connect to a database will not do you much good if you do not have privileges on any of its tables. This will be covered later.

