Using FireMonkey Animation Effects
Go Up to FireMonkey Quick Start Guide - Using Image and Animation Effects
FireMonkey provides many different types of built-in animation effects that modify the value of the selected property over time.
Examples of animation effects:
| Type of property | Animation Effects class |
|---|---|
| Any property that is an integer. | TIntAnimation |
| Any property that is a real number. | TFloatAnimation |
| Location of component defined by a TBounds property. | TRectAnimation |
| Any string or integer property that contains a color. | TColorAnimation |
| A gradient (type TGradient) | TGradientAnimation |
| A bitmap picture | TBitmapAnimation |
In this tutorial, you will use several basic animation effects in a FireMonkey application.
Step 1: Using TFloatAnimation to Change a Floating Property Value
In FireMonkey, any property that uses floating numbers can be modified using animation effects through TFloatingAnimation. So, let’s change some values using animation effects.
-
Create a new application using:
- File > New > Multi-Device Application > Blank Application
-
Place a TRectangle component on the Form Designer. To do so, type rec in the search box on the Tool Palette, and then double-click the TRectangle component:
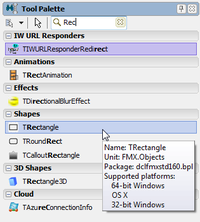
Selecting a TRectangle component on the Tool Palette

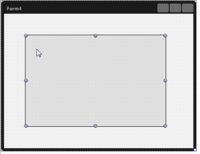
TRectangle component on the Form Designer
-
After you place a TRectangle component on the Form Designer, you see several properties that have a film icon (
 ) in the Object Inspector. The film icon indicates that these component properties can be animated.
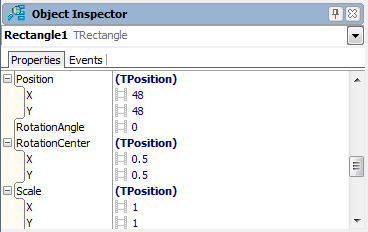
The following are typical properties (depending on the component) that you can change through TFloatingAnimation:- Height
- Position.X
- Position.Y
- RotationAngle
- RotationCenter.X
- RotationCenter.Y
- Scale.X
- Scale.Y
- StrokeThickness
- XRadious
- YRadious
- Width
-
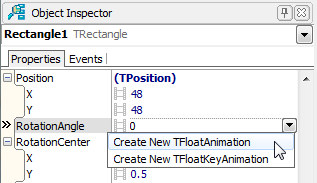
To modify the value of a property, click the drop-down menu for the RotationAngle property, and then select Create New TFloatAnimation.
-
Now the new TFloatAnimation component is created. You will see that, in the Structure pane, FloatAnimation1 is defined as a child of Rectangle1.
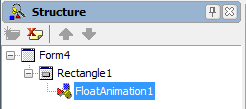
- Note: Please keep in mind that the effect of the animation-effect components applies to the parent component.
- Note: Please keep in mind that the effect of the animation-effect components applies to the parent component.
-
The Object Inspector shows the properties for the FloatAnimation1 component. Change the following properties as described in the table:
Property Value Description Duration 5 The amount of time (in seconds) to animate from the start value to the stop value. Enabled True The animation starts when the application starts. Loop True Repeats the animation indefinitely. StopValue 360 Terminates the animation of this property when it reaches this value.
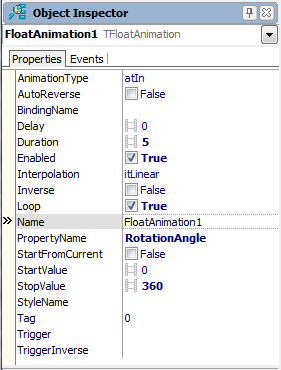
Properties for FloatAnimation1
- Another important property, which is defined automatically, is PropertyName. In this case, this property is set to RotationAngle; therefore this animation affects the value of the RotationAngle property of its parent component.
- Another important property, which is defined automatically, is PropertyName. In this case, this property is set to RotationAngle; therefore this animation affects the value of the RotationAngle property of its parent component.
-
Execute the application. Now the rectangle component rotates on the form:
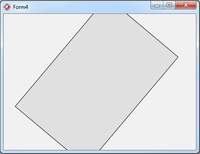
- You can animate any numeric properties using the same steps.


![]()
Step 2: Changing the Color by Adding TColorAnimation
As mentioned at the beginning of this tutorial, FireMonkey has many built-in animation effects. Next, you will apply a color animation to change the color of the rectangle, in addition to the rotation described in Step 1.
-
Select the TColorAnimation component from the Tool Palette. To do so, type anim in the search box on the Tool Palette, and then double-click TColorAnimation:
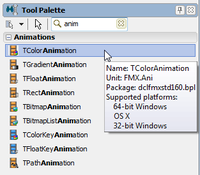
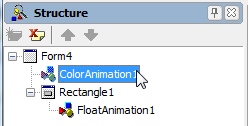
TColorAnimation component is now on Structure pane.
-
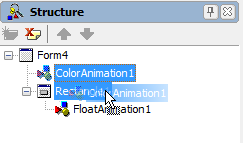
TColorAnimation1 is defined as a child of Form4 while FloatAnimation1 is defined as a child of Rectangle1 (as discussed at Step 1). Drag-and-drop ColorAnimation1 onto Rectangle1. Now ColorAnimation1 is defined as a child of Rectangle1, and therefore ColorAnimation1 affects Rectangle1:
-
The Object Inspector shows the properties for the TColorAnimation1 component. Change the following properties as described in the table.
Property Value Description PropertyName Fill.Color Name of the property to animate. Enabled True The animation starts when the application starts. Duration 3 The amount of time (in seconds) to animate from the start value to the stop value. Loop True Repeats the animation indefinitely. AutoReverse True Animates backward after animating forward. StopValue Red Terminates the animation of this property when it reaches this value.
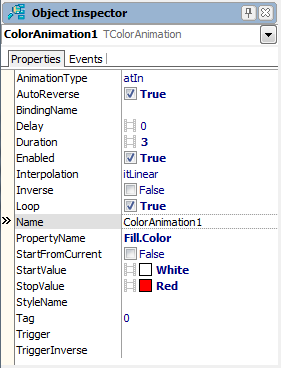
Properties for ColorAnimation1
-
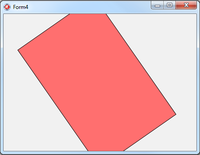
Execute the application. Now the rectangle component rotates on the form and has its color changed to red:


![]()
Step 3: Changing the Image by Using TBitmapAnimation
The last step in this tutorial is using a bitmap animation with an image component.
-
Create a new FireMonkey application, as in Step 1 of this tutorial.
-
Place a TImage component (Image1) on the Form Designer.
-
Place a TBitmapAnimation component on the Form Designer. Using the Structure View, set this component (BitmapAnimation1) as a child of Image1:

-
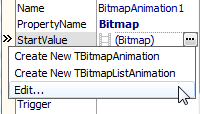
Set the properties of BitmapAnimation1 on the Object Inspector as follows:
Property Value Description PropertyName Bitmap Name of the property to animate. Enabled True The animation starts when the application starts. Duration 10 The amount of time (in seconds) to animate from the start value to the stop value. Loop True Repeats the animation indefinitely. AutoReverse True Animates backward after animating forward. StartValue 
Starts the animation of this property from this bitmap image. StopValue 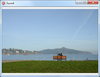
Terminates the animation of this property when it reaches this bitmap image.
-
Set the StartValue and EndValue properties. These properties hold the picture as initial image and final image. Click the Edit menu, and then select your favorite pictures using the Bitmap Editor.
-
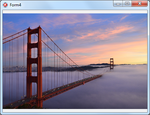
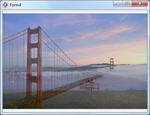
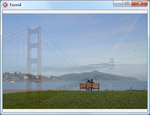
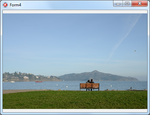
Execute the application. Now these two pictures are animated over time:


See Also
Samples
- FireMonkey HD Animation sample
- FireMonkey 3D Animation sample