Populating your AppWave with Apps
Go Up to Admin Quick Start
Your AppWave can be populated with Apps via an Internet connection or can be manually imported, as is the case of third party Apps that you have mastered.
This section describes the procedures involved to populate your AppWave.
Obtain Apps Via Internet Connection
If your AppWave has an Internet connection, then by default, when an AppWave Browser user attempts to run an App, it will be automatically downloaded from the Embarcadero AppWave Store to your AppWave and then broadcast to the Browser. When cached on your AppWave, Apps start faster.
You can also choose to cache all your licensed and free Apps on your AppWave:
- Go to MANAGE APPS > App Inventory option of the Admin console.
- Select the Apps you want to download.
- If the Status of the application appears as Available the App is already cached.
- If the Status is Internet Available the App is available to download.
- Click Cache Apps or the down arrow.
- The Status changes to In progress.

Note: You can pause or stop the download by clicking Pause Download or Cancel Download ![]()
The applications (.app) are saved in :
- Windows 7: C:\ProgramData\Embarcadero AppWave\Products
- Windows XP: C:\Documents and Settings\All Users\Application Data\Embarcadero AppWave\Products
The descompressed applications (STC file, Icon, .aib...) are saved in:
- Windows 7: C:\ProgramData\Embarcadero AppWave\Products\Cache
- Windows XP: C:\Documents and Settings\All Users\Application Data\Embarcadero AppWave\Products
Obtaining Third Party Apps
You can master Third Party Apps to make them available to the users in the company.
Go to Studio Quick Start if you want to know how to master an App and broadcast it to the AppWave.
Upload mastered apps
You can manually upload mastered Apps (files with the specific extension ".app").
- Copy the App to the machine on which AppWave is installed.
- On the AppWave Admin console go to the MANAGE FOLDERS menu and click App Folders to create a new folder.
- If you want to limit access to third party Apps, it will be easier if they are in specially assigned folders.
- At the bottom of the App Folders pane, click Create Folder. The Create Folder pane appears.
- In the Folder name field, enter a folder name of up to 20 characters and click Create Folder. We can add users to the folder later.
- From the MANAGE APPS menu, select Version Updates.
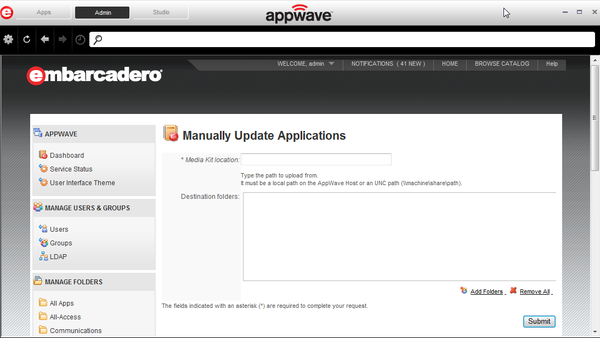
- At the bottom of the Version Updates page, click Manually update your applications.
- On the Manually Update Applications page, enter the path to the mastered App.
- In the Destination folders area, click Add Folders, choose the folder we just created and then click Submit.
