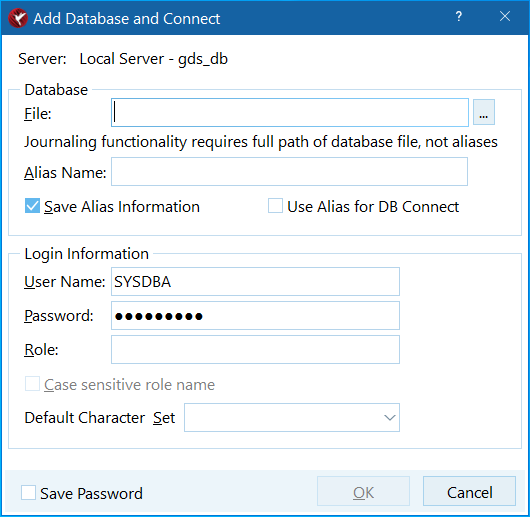
Add Database and Connect Dialog
From InterBase
Go Up to IBConsole Dialogs
The Database and Connect dialog
You can access the Add Database and Connect dialog in IBConsole by one of the following methods:
- Expand a connected server branch. Right-click Databases in the Tree pane and choose Add from the context menu.
- Select a disconnected database in the Tree pane and double-click Add in the work pane, or right-click the database and choose Add from the context menu.
To Add a Database
- Make sure the server displayed in the Server field is correct.
- Enter the database filename, including the path where the file is located, in the File text field. For databases that reside on the local server, you also have the option of clicking the Browse button to locate the file you want. The Browse button is disabled for all remote servers.
- Type an alias name for the database in the Alias Name text field. This is the name that will appear in the IBConsole window. If you omit this step, the alias defaults to the filename that you select in step 2.
- Check the Save Alias Information check box if you wish to permanently register the database. This saves the database alias name in the Windows registry.
- Check the Use alias DB Connect check if you have specified an Alias Name and you want to connect using it instead of using the File entry.
- You also have the option to save your password so it is automatically supplied each time you log in.
- At this point you can choose to just add the database without connecting, or you can choose to add and connect to the database simultaneously.
- If you only want to add the database, ignore the Login Information and click OK.
- If you want to add and connect a database simultaneously, type the username, password and optional role and default character set for the database in the corresponding text fields and click OK.
- If you want to connect using a role, specify the role in the Role text field. This is optional. Connecting using a role gives you all privileges that have been assigned to that role, assuming that you have previously been granted that role with the GRANT statement. For more information on roles, refer to SQL Roles.
Once you add a database, it appears in the Tree pane.
