Create an App with One Click
Go Up to Mastering Apps
Contents

You can use the AppWave Browser to create an app with one click. This process uses an app, available on the Apps tab, that has an AppWave template. AppWave templates have been created by Embarcadero for Embarcadero and third-party apps and are available with AppWave. This template tells AppWave how to master an app and contains branding information and information on which filter to run on the installer for the App, so unnecessary files can be filtered.

The apps with an AppWave template are considered Premium Apps and contain licensing information. This information allows for license automation which activates third-party licenses. AppWave then manages those licenses in the same way that Embarcadero application licenses are managed.
On the Apps tab, the Apps that can be mastered are indicated by a designation of “Master”.

Note: When you create an app with one click you start from the Apps tab in the AppWave Browser and then complete it in AppWave Studio.
Four Major Steps to Create an App with One Click
Licensing
The Administrator sets up the licensing for third-party apps through AppWave. Once the licenses are set up and activated, when the app is mastered, the license automation completes the licensing process.
For complete step-by-step instructions for this Administrative function, see: License Management.
Preparation
Before mastering an app in AppWave Browser, you must ensure that no other apps are currently running. If there are any apps running you will get a warning dialog when you click Master: ![]() You currently have one or more AppWave Apps running on your system. Please close these apps before performing a record. Please, close each app from its application interface.
You currently have one or more AppWave Apps running on your system. Please close these apps before performing a record. Please, close each app from its application interface.
Close each app from its application interface, usually File> Exit.
Setup
To see how the "One Click" works, we will use the FileZilla Client application.
- Download and save the Filezilla Client from the official website.
- In Apps, search (
 ) for AppWave Template and all apps with templates are listed. This template is indicated by a Master icon located to the right of the app icon.
- Tip: If you are searching for a specific app or a type of app, you can use the Search field and all apps matching the search parameters appear in the browser, for example Template Filezilla.
- Click View All and scroll to the app that you want to master.
- Note: if there are multiple pages of apps scroll to the bottom of the screen and click Next to advance through the pages.
- Click Master located to the right of the icon.
- Note: When you hover your mouse over the app icon, additional information appears.
- The Record installation dialog opens briefly followed by the Record <application name> dialog.

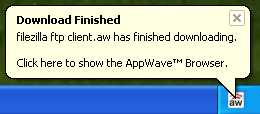
- Note: An indicator window opens in the lower right-hand corner of your screen showing that the selected file has finished downloading. The file extension .aw indicates it is the AppWave Template file. See Glossary.
- Browse to the location of the executable. Notice that the web site information is then automatically populated.
- Note: Click the web site URL if you have not downloaded the executable for the selected app you are going to master.


This dialog has the following fields:
| Field | Description |
|---|---|
| Installer path | Click Browse to find the executable for the app you want to master. |
| Command line options | The information entered here indicates how to launch the file and is the trigger to run a specific command. |
| Installer process and sub-processes only | This setting is selected by default. This option captures only the install processes. |
| All Processes | Captures all the processes associated with the App. |
| Apply AppWave Mastering Template Rules | This option is selected by default. As the process goes through the steps to create an App, tasks may be created indicating missing data.
This option automatically competes any missing data that is available in the template. |
Recording
- Once you have completed the information, click Record and the install process starts.
- A Recording installation dialog briefly appears and then a Recording dialog appears in the upper right corner of your screen. The blinking recording status button indicates that recording is in progress and the AppWave Browser is minimized.
- An indicator window opens in the lower right-hand corner of your screen showing that your installation has started.
- Follow the install wizard for your selected app. To ensure compatibility between operating systems, choose a destination folder at the root drive, such as
C:\FileZilla FTP Client. - The licensing of your app depends on what type of AppWave licensing you have purchased as well as the type of app you are creating. For a full explanation of how to license your App, please refer to: License Management
- Note: In the example we are using here, a License Agreement dialog appears. Click I Agree to accept the agreement.
- On the final panel of the Setup wizard, you may have the option to launch the app. Make your selection and click Finish to close the wizard.
- Tip: You may not want to select the Launch option so you can investigate the registry keys that are created. If the roots of these keys are not in the app it is a good idea to include them so they will be managed.
- Once the installation is complete, click Finished in the Recording dialog and the Record installation dialog appears. This dialog identifies everything that needs to be installed. A progress bar shows each step of the process.
- Note: Click Details to see the details of the installation while it is recording or after it completes. If you want to see it after the installation is complete deselect the Close on successful completion option and then click Details.
- If this dialog box does not close automatically, click Finished in the Record Installation dialog.
- Tip: At this point in the mastering process you are now working in the Studio portion of the AppWave Browser. The AppWave Browser changes to the Studio tab automatically.
- During the mastering, the AppWave template populates the various fields in the Steps (Launch & Brand, App, Test, or Broadcast).
If one of the steps is missing required information, the mastering process opens to that page. If all the information is completed, the Studio opens to the Broadcast step.- Note: If a Tasks pane is open at the bottom of the page, this means there are fields that are missing required information. Click Fix next to the task and your cursor is placed in the appropriate task.
- Once the tasks are corrected the Tasks dialog closes. The fields with an exclamation mark
 are the fields missing required information.
 - For the FileZilla example we are using, the Broadcast step opens. For more information on each step, see AppWave Studio Overview

Using the Broadcast Task
The last step in mastering an app is to broadcast your application to the AppWave. The following fields appear on this page.
| Field | Description |
|---|---|
| AppWave URL | The default URL appears in this box. You can edit this URL. |
| Always remaster projects before broadcasting to the AppWave | This is selected by default. This guarantees that the app has the latest updates. |
| Broadcast | Click Broadcast and a dialog appears telling you need to save your file before continuing. Click OK and the Broadcasting dialog appears. |
On the Broadcast page, notice that a Task appears at the bottom of the screen. This task indicates that the Prefetch function is recommended in the mastering process. The task states: In order to Record the launch of the application for faster start-up time, you need to master the app from the Test tab before broadcasting. Once the launch data was recorded, remastering before broadcast will not remove this information.
Prefetch is the process of streaming application blocks in anticipation that those blocks are needed by an application, as well as to perform typical actions for the first few minutes of using the program, such as opening files, saving files, etc. The process of streaming these blocks from the server to AppWave Browser is also called buffering. Only some key blocks of application data from AppWave are necessary for the application to launch and perform basic functions.
Unlike conventionally installed applications, application streaming does not require all application files to be always available.
The prefetch file is created by logging pages that are being streamed when the application is executed. This includes all the functions required by the application when the user opens it for the first time.
- Tip: If you do not want to use the Prefetch option, you can ignore the Task to be fixed and just click Broadcast.
- Note: There is an indicator next to the Broadcast step showing that there is a task that needs to be fixed.


- In the Tasks pane, click Fix and a dialog appears instructing you on how to record prefetch information.
- Click OK to close the information dialog.
- Click the Test page and then click
 . The Master dialog appears. If you have not saved your file a message opens. Click Yes and save the file named FileZilla_FTP_Client.tca.
 - The Master dialog opens and masters the App.
- Once it is complete, check to make sure the Record the launch of the application for faster start-up time option is selected. This option is selected by default.
- Click Launch. The End User License Agreement as well as the Recording dialog opens. When you click Accept the application opens.
- Once the application opens, click Finished in the Recording dialog (this dialog reopens when you click Master) and the application closes.
- In the Master dialog, click Details to view the results of the recording.
- Click Finished in the Master dialog to close it.
- You must also close the application that you launched during the prefetch operation.
- Click Next to advance to the Broadcast page.
- Make sure the option to Always remaster projects before broadcasting to the AppWave is selected.
- Click Broadcast and save the changes to your file. A dialog opens asking you to save the changes to your current working file. Click Yes.
- Once the file is saved the Broadcast dialog appears.This dialog tracks the process of the broadcasting. Once you get the indication that the broadcast was successful, click Finished and the Broadcast dialog closes.
- Note: A pop up also appears in the lower right corner of your screen indicating that new and updated apps are available.
- Click Finished and your app is now mastered with the prefetch information included.


Running the App
Once your app is broadcast, the newly mastered app build is made available in the AppWave Browser.
- Click Apps to return to the AppWave Browser.
- The new app appears in the user designated folder and also an indicator appears in the menu indicating that there is a new app

- Tip: If your folder or the new app does not appear you may need to reconnect to the AppWave Browser by clicking
 >Connect.
 - Note: You can access details and reviews for this app, as well as write reviews.
- Tip: If your folder or the new app does not appear you may need to reconnect to the AppWave Browser by clicking
- Select the app from your folder and click Add. In the Sign In dialog enter your user name and password from your EDN account and click Sign in.
- If the licenses is available for this app the Licensing Information dialog appears which provides the key necessary to complete the final step in the Licensing Automation process.
If it is a free third-party App, an End User License Agreement dialog appears.
A Progress dialog opens in the lower right corner of your screen. This tracks the downloading, mounting, and streaming progress of your new app. - Click Accept and the app opens.


- ★ Caution :During mastering, extra services related to the app you are mastering may be launched. At the end of the mastering process, Studio will attempt to shut down any services it detects.
In some cases Studio cannot detect those services and you must shut them down manually before broadcasting the App.