Managing Catalog Banners
Go Up to Application Management
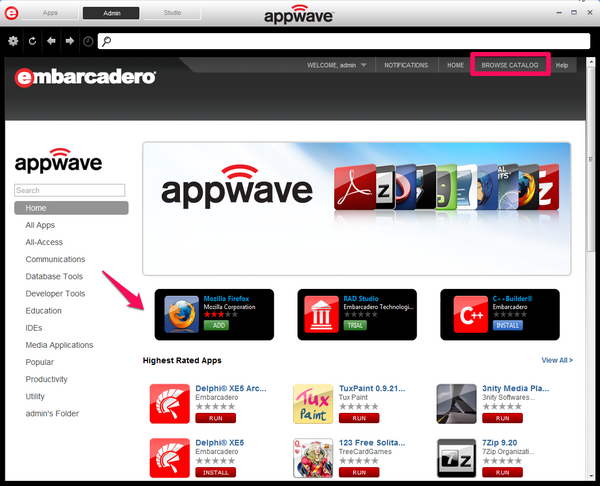
You can customize your AppWave catalog to display any number of banners. These banners can be used to perhaps draw attention to new Apps recently added or Apps suggested for your users. If you have more banners than can be shown on the catalog at any one time, the banners that appear will be chosen randomly. Users can click on the banner to see more details and run the associated App or open a URL associated with the App.
Create Banners
Follow these steps to incorporate banners to your AppWave:
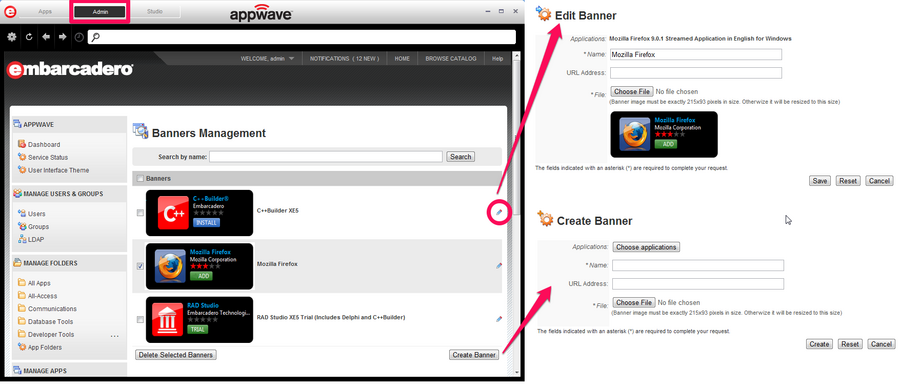
- From MANAGE APPS, click Banners Management.
- Click Create Banner.
- On the Create Banner page, next to Applications, click Choose applications.
- Select an application. The Application and Name fields are automatically completed.
- The banner icon in the catalog can either point the product page for the App in the AppWave catalog page or to another internet address of your specification.
- To point to the app product page, do not enter a URL address.
- To point to a different address, enter the URL preceded by
http://
- Click Browse and locate the image you want to use for the banner.
- Click Create. Your banner will now display on the AppWave Catalog page.
- Your banner will also appear in the list of banners available.
Note: You can further customize the appearance of the catalog by choosing a different css file and logo picture. For more information, see AppWave UI Customization.
Edit Banners
You can edit the banner by clicking the banner check box and then clicking the pencil icon ![]() .
.
- The Edit Banner page appears where you can change all the properties of the banner, except the application it is associated with.
Delete Banners
You can delete the banner by clicking the banners check box and then clicking Delete Selected Banners.
- The Remove Banners dialog appears where you can confirm your action.

